2016 Turnings

It's June, 2018, and I am just now working on 2016 (I guess 2017 is next). Sorry for the delay, but life gets in the way, and keeping up a web page that is all self coded HTML takes a bit of time. I know there are easier ways in these modern times, but I do not want to change the whole website that has now been running for 20 years. I can hardly believe myself that there is now 20 years of work on the site.
I did a couple of different things in 2016, but mostly it is similar to stuff I have done before. Enjoy whatever you wish, and I hope you learn something and appreciate the beauty of the wood.

I was "chuffed" (as they say in New Zealand), to have a very nice article written about me in the Creative Wood magazine in New Zealand. If you would like to see it, you can click here.

As usual, I love hearing from you, so feel free to let me know you were here.


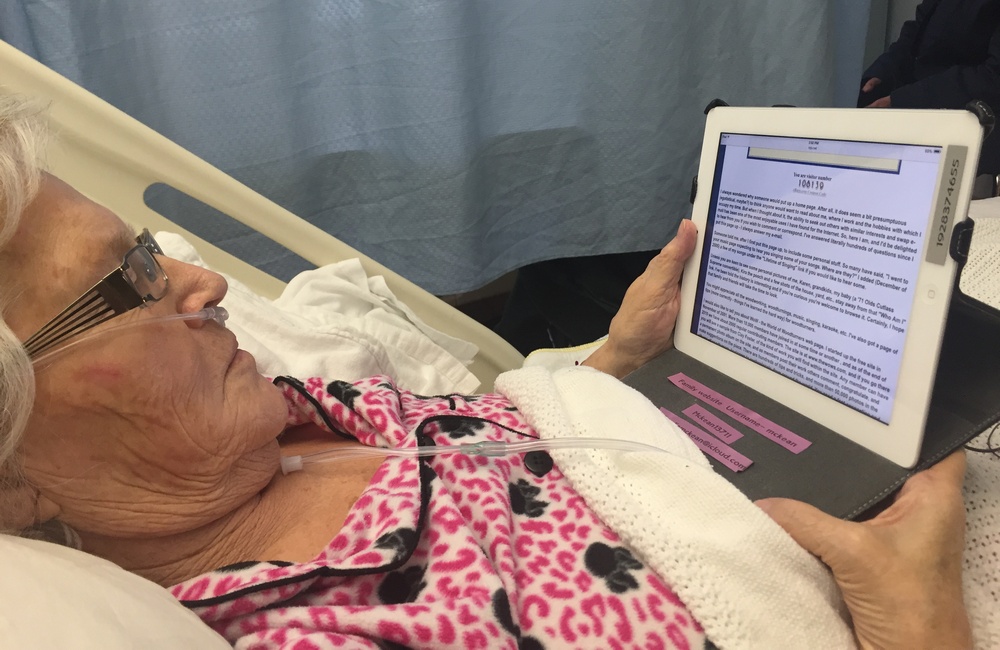
Mary looking at my webpage

My sister, Mary, passed away while we were in Texas. She had cancer, and she had asked for an urn prior to her passing.

Mary was a beautiful lady, and she and I always had a special connection. She followed my career in music with great interest, and as a college student it was not unusual to get a letter with a $20 bill tucked into it for "fun". Always supportive of my vocal art, and later on, my woodturning. Mary had the soul of an artist, and had a broad range on interests. Her stylist business was an artistic venture for her, more than just cutting hair. She wanted to create, and as a boy in high school, I let her experiment with curling my hair, even though I got teased about it at school. Later on, she was active in helping Charlie with some beautiful refinishing work on antiques that they would scout out at estate auctions. She liked to draw, color, paint, and her yard was always a bright splash of colorful flowers.

I loved her fiercely, and it was with great surprise and gratitude that I received this photo of her, taken just a few days before she died. There she is, still supportive, still following the exploits of her "little" brother on his webpage.

A special memory of her is that she never called me by my name. No one else called me "Butch" anymore. That had been by nickname as a little boy, but all my life that was what she called me.

Thanks, Beverly, for getting this photo to me. It is very dear to me.

As you likely know by now, my major career was with the credit union system. When I retired, I helped Brian Peto and Don Pavelick organize the first and several other annual golf tournaments for retirees which happens every September.

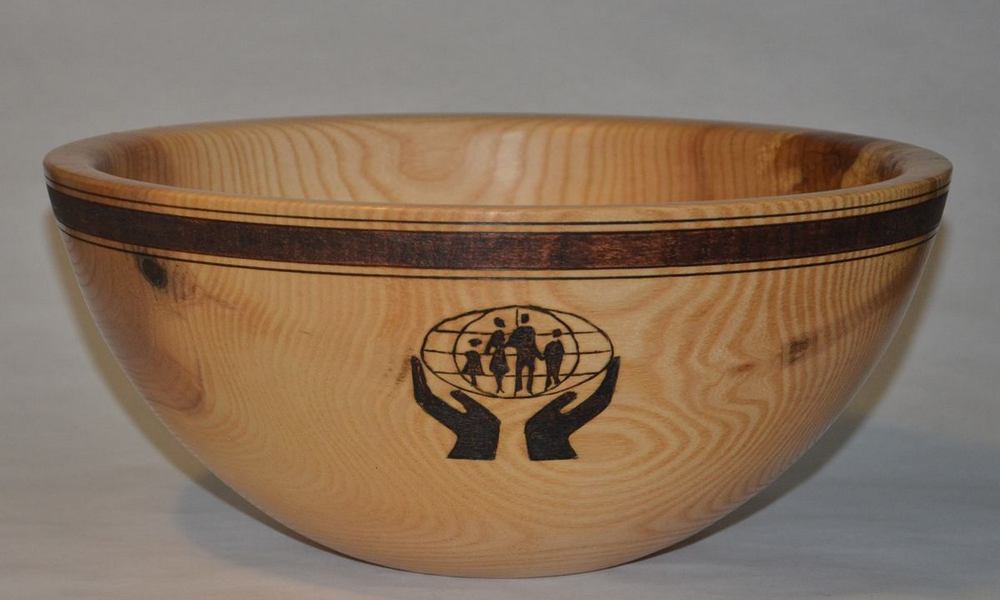
This year, I decided to surprise everyone with a bowl made for the occasion as a door prize, not knowing how it would be received. After all, woodturning means nothing to many people and is sort of a "ho-hum" topic of discussion, and the labor and skill that goes into a woodturned production is not understood. So, I was very pleasantly surprised at the nice reception this bowl got, and gratitude I felt from the person who won it. And, a big thanks to my friend, Hank Hildebrand, who talked up the bowl and talks up my work every year.

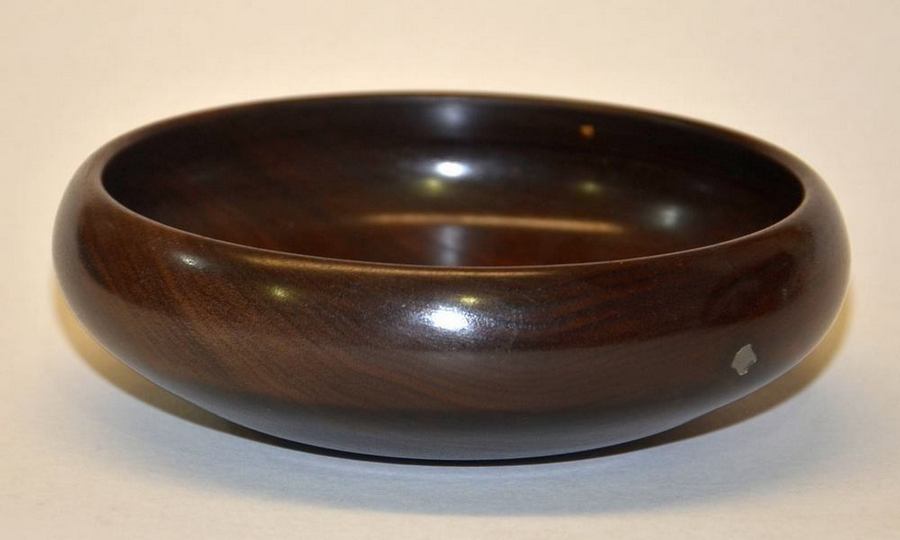
This ash bowl is 14" in diameter and about 7" deep, decorated with a textured rim and a "Hands and Globe" logo of the credit union system. Finished with Tried and True oil on the inside and Danish oil on the outside

Maple & Cottonwood Box

Bud Vase / Weed Pot
Bud Vase / Weed Pot

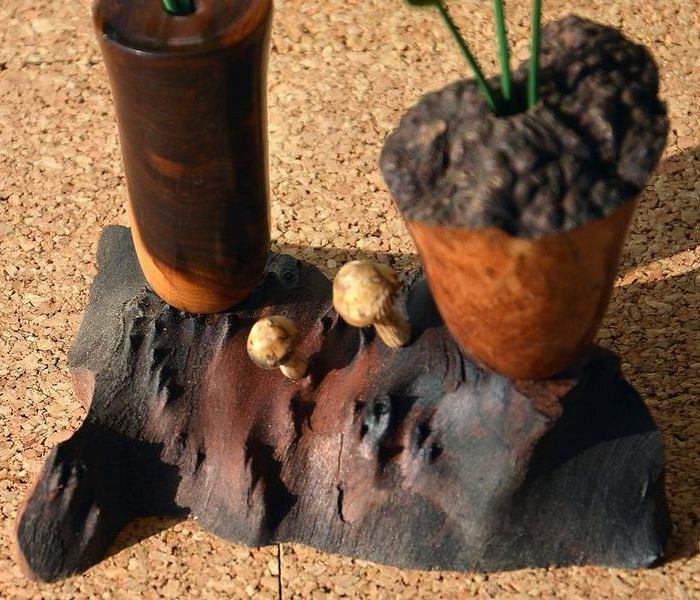
So I had this little chunk of Redwood with a lot of burn on it, which is why it looks black, and I thought it would make an interesting base for something. But what?

So weedpots are cute and fun to make and a good use of small pieces. A couple of weedpots later, the left one of Texas Ebony and the right one of brown mallee, and a small dowel on the bottom of each and I simply had to make holes in the base for the dowels.

But, somehow it did not look complete, and, walking along the fence in the Palm Shadows park in Texas, I came across some little pieces of dried wood something caught in the fence. Broke them off, took them to the shop and turned a couple of tiny mushrooms. Somehow, that seemed to finish off the piece, and it went into the Park auction to support the wood shop. Martha and Dean from Kansas bought it.

They're around 4 to 5 inches tall. Finished with Danish Oil and the base with Krylon matte spray finish.

Thuya Clamshell Vase

The whole story is quite long, and quite sad, but every bit true and meaningful. This is the short version, and the long, detailed, version is here, with all the associated pictures.

When we first moved to Winnipeg in 1987, I saw the 80 pound burl at Windsor Plywood, and it was very expensive. At the time, I was making flat work (furniture pieces), and thought maybe I could use it. I made an offer which was refused.

Years later, when I began teaching turning at Lee Valley, I met Mike Walter and we became good friends. Mike was fond of showing me up any time he could, and if I bought something, he would buy the same thing, only a bit bigger and better and then make sure everyone knew about it, joshing me mercilessly. He bought the burl, and gave me grief every chance he got.

I really was fond of the man, and before he died a couple of years ago, he offered the burl to me. He had it on a pedestal in his living room, and was afraid to cut it up because he did not know what to do with it.

So, I ended up with it after all, and after it sat around for awhile, I planned carefully and cut it into pieces with a plan for each piece.

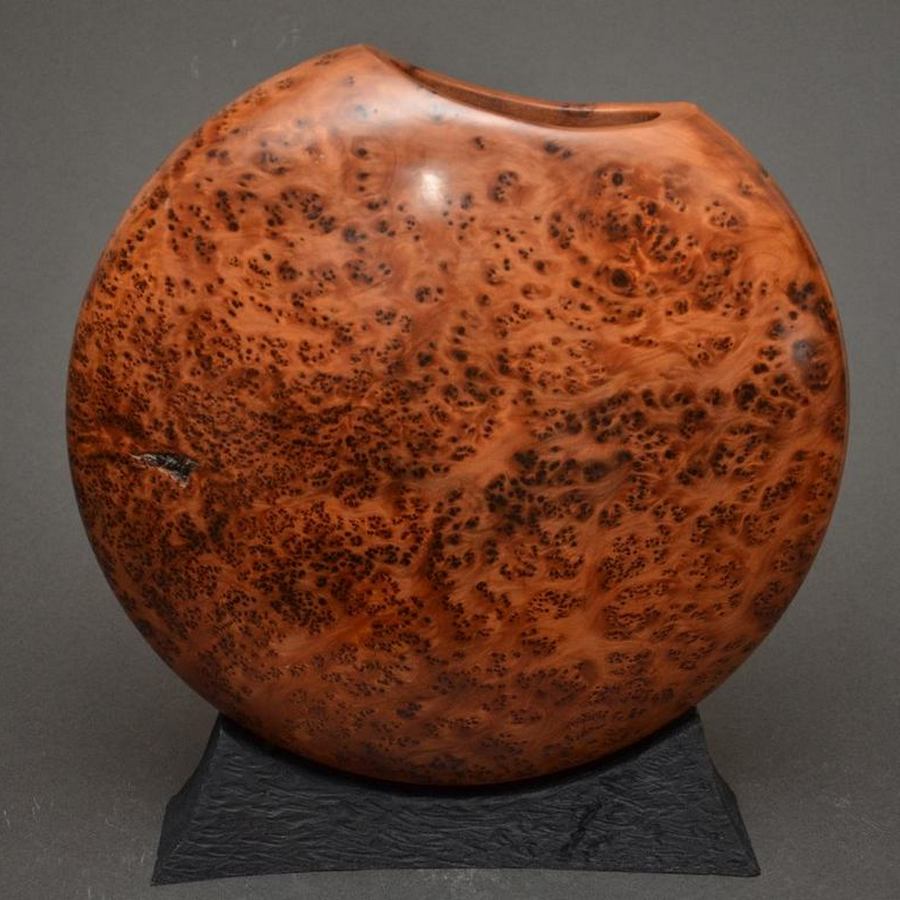
This 17" split vase was the major piece, and in a couple of the photos that follow, you can see how I planned around it.

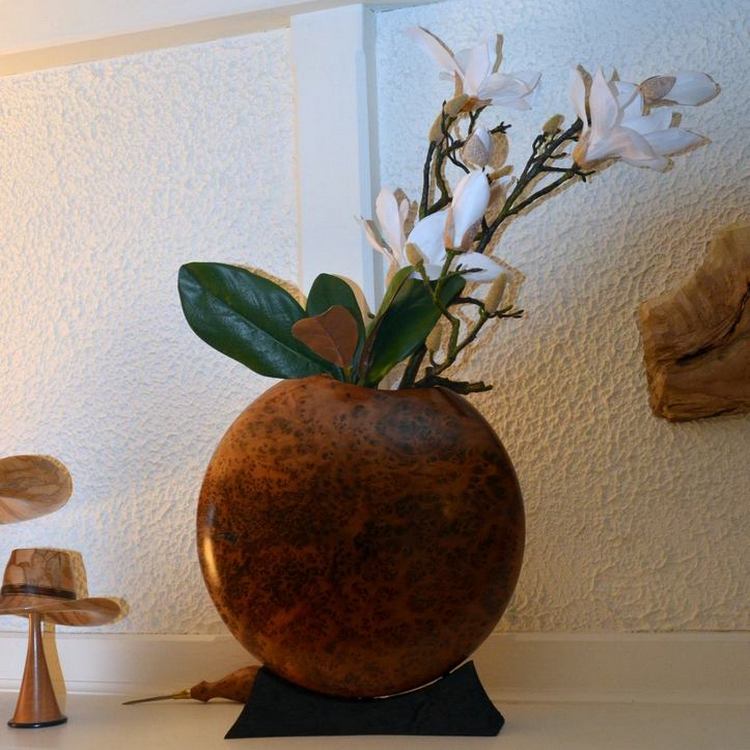
This is incredible wood, from Morocco, and is quite rare. It is a cedar with such a strong smell it almost overpowers. A nice smell, but a little of it goes a long way, and I have to make sure I get the shavings into a bag quite quickly. But the birdseye and the burl figure, and the colors, are just incredible. The photo does not do it justice.

The base is made of textured and dyed hard maple, and it is mounted on steel pins into the base.

Thuya Clamshell Vase in use

This is the same vase displayed in our house with silk flowers. Obviously, real flowers are not an option since the vase is wood and not suited for water. But it gives you an idea of the finished product in use.

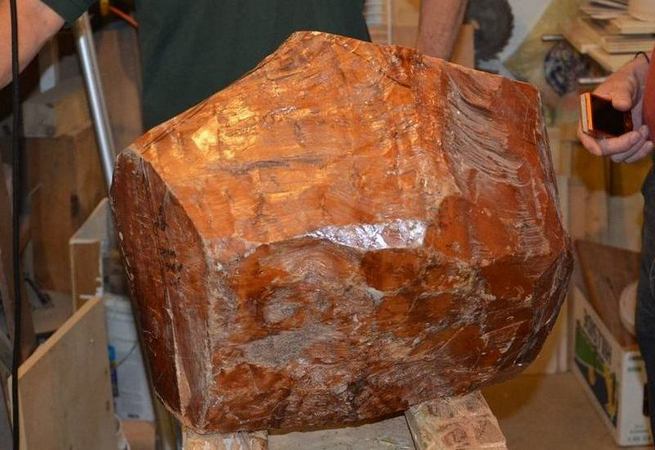
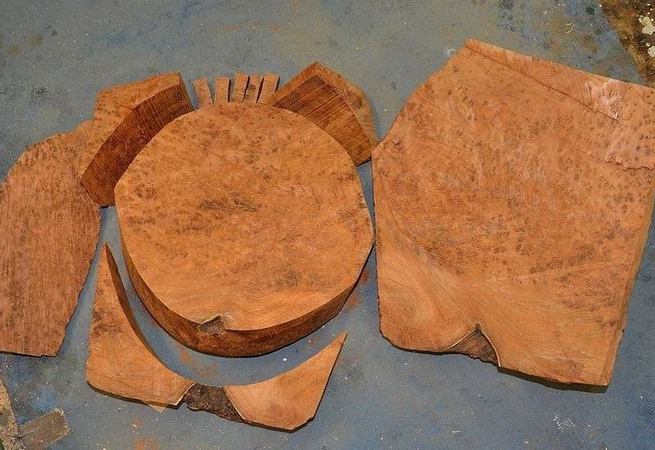
So - the top left photo is the burl in its entirety.

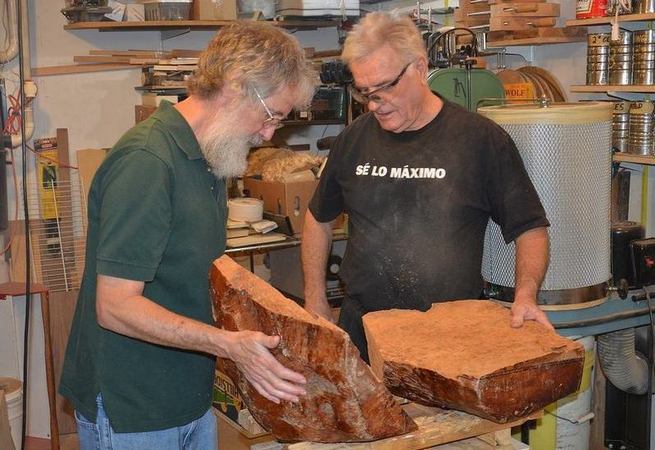
The top right photo is after the burl was split in my shop, using an electric chain saw. Rob Stewart and I are marveling at the beautiful figure inside the burl.

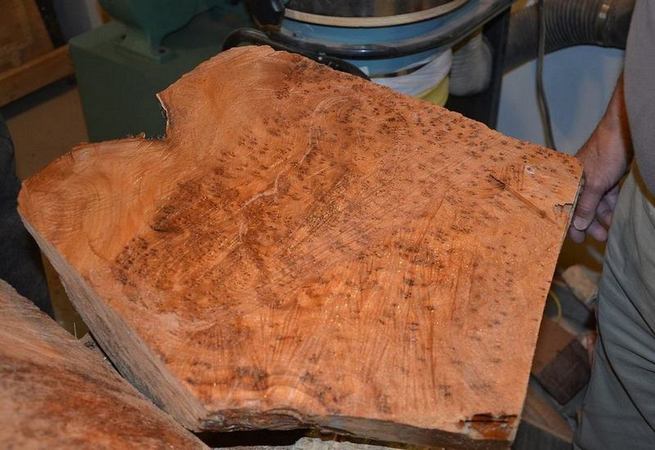
The bottom left is a closer shot of the figure. I had given it a spray of water to darken and expose the grain, but it had already started to dry by this time.

The bottom right photo shows the plan for just a part of the burl. The round piece is actually about 8" thick, and the split vase in the frame previous comes from there. The other pieces, much smaller, are being planned for boxes, small forms, etc. Some pen blanks on top. The piece on the right still looks that way in 2018. I have not planned it out yet

With burl like this running at $50 a pound when it is wet, this is valuable wood, and one must either have a plan before cutting it up or have unlimited funds. I do not have unlimited funds.


Thuya Burl

The Burl Cutting

The Burl Cutting

The Burl Cutting
Maple Wall Sculpture

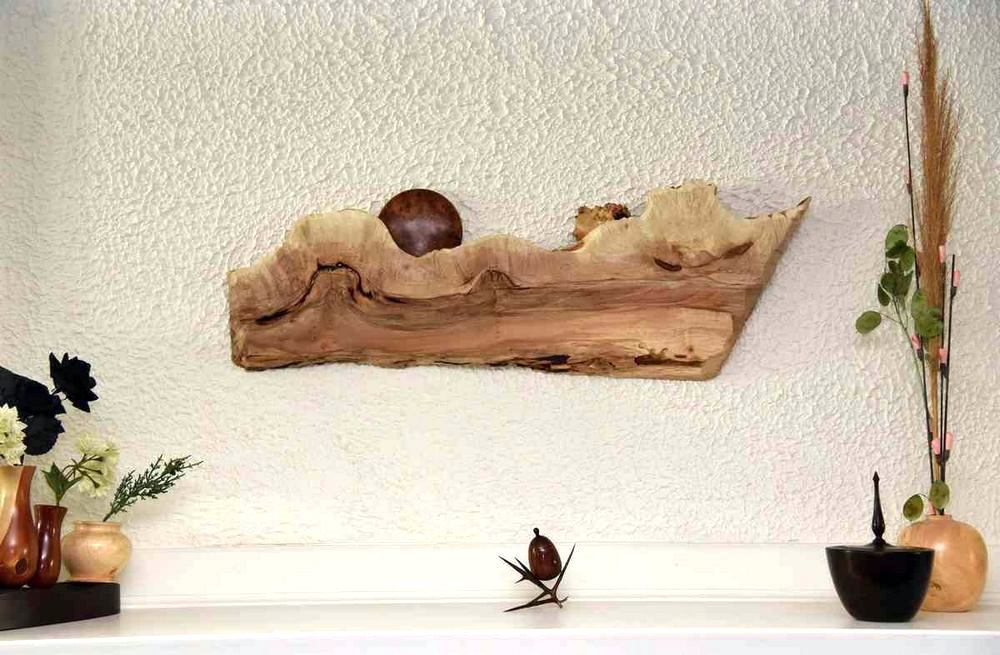
I put this here because it contains a tiny piece of the thuya burl in the previous frames. From the inside of the round halves of the vase, I was able to core two small disks from each half. Then I used the two smallest ones to create a disk that was hollow, and that is the "moon" in the sculpture above. The two middle size disks were used in the sculpture in the next frame just below.

I am basically a wood turner, and do not have a very creative gene when it comes to sculpting something. But, when a retired Canadian senator asks you to make a sculpture for the wall of her summer home, you give it a go. I had a maple burl piece from a load that I bought from Tim Shipp in Oregon, probably about 20 years ago. From that, I had chain sawed off the crooked flat pieces that had no use in a turning, and like most woodturners, I seldom throw anything away just in"in case" I could use it. So, after tripping over some chunks for 20 years I sort of kicked them into a pile on the floor and got a brain wave.

This piece is about 28 inches long and 2 inches thick. The foreground is created by a side grinder with a chainsaw toothed blade on it, and then the "snow caps" are bleached to whiten them. The little polished thuya "moon" is about 4" in diameter.

After all that, the lady didn't want it, but took some other pieces instead. Go figure.

Large Wall Sculpture

Here are a couple more pieces from the thuya burl.

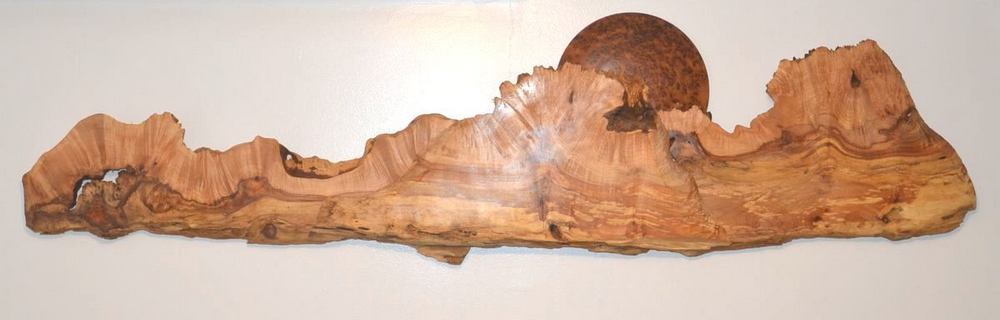
I showed you a completed wall sculpture above, but this one is incomplete. It is just tacked together at this point and is much larger - about 4 feet long. It is made of three pieces of maple that have not yet been carved or bleached. The thuya is the "moon", about 7" diameter. Like the smaller moon in the other wall sculpture, it is hollow, about 3/16" thick walls. The moon has several possible positions and can be moved. Someday, I will finish the piece and post a photo of it and put a link here.

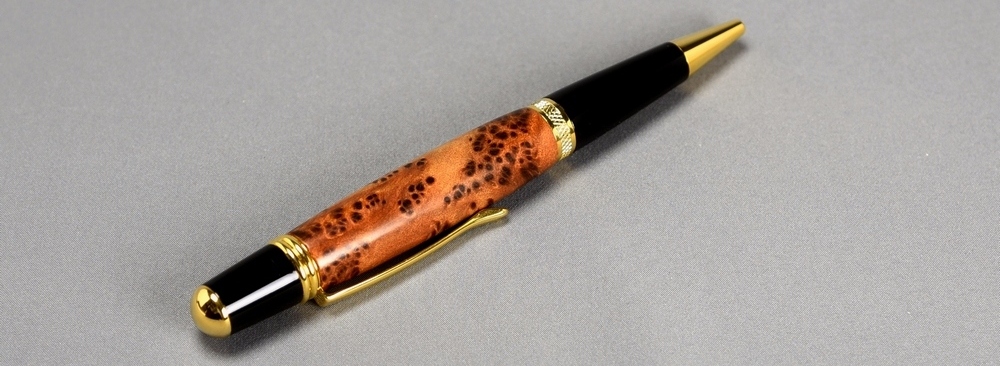
The bottom photo is a pen that I made using a bit of the thuya. This is difficult to work with when the wood gets thin, like the pen. Bird's eye wants to chip out, and an extremely sharp skew and deft toolwork is needed to keep that from happening. The wood is soft, and is best harded with CA glue on a pen.

Thuya Pen

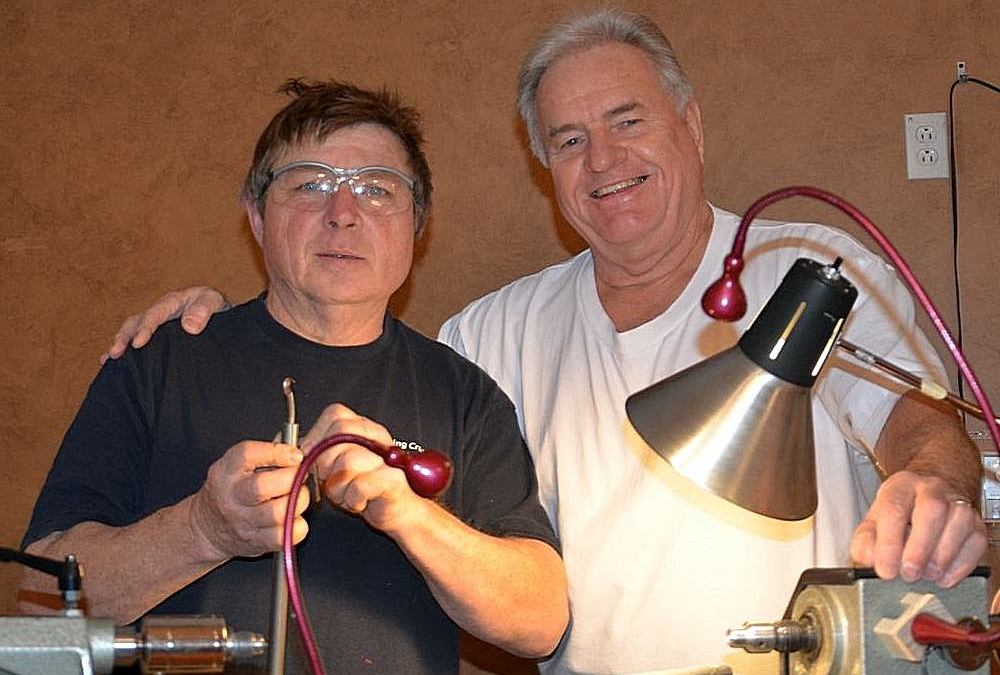
Mike Hosaluk and Herm

Our club, the Woodturners Association of Manitoba, invited Mike Hosaluk to spend a couple of days with us and do a demonstration for our club.

Mike is one of the finest woodturners in existence, a charter member of the American Association of Woodturners, and singly has done as much to advance the art of woodturning as almost anyone else in the world. To have him come here was an honor.

Even better, he cheerfully accepted our offer to stay with Karen and me. Mike (just look at that impish face) is probably one of the most cheerful people I have ever known, and after our two days together we confirmed that we would indeed be friends. He was a delightful house guest, and the ease and skill with which he showed our club some of his methods and thought behind his incredible art - well, that was pleasure to watch.

For some of Mikes work, please click on the this link to the Slate Gallery.

Mike demonstrating

There is also a You Tube video of Mike in action.

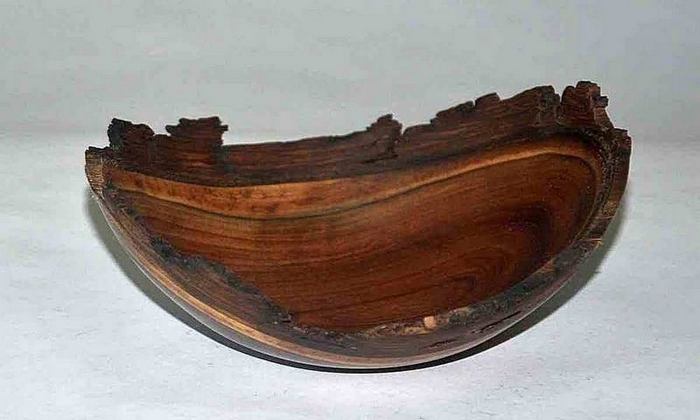
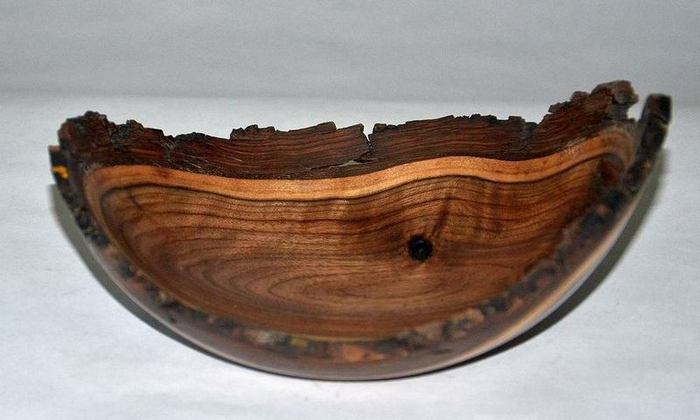
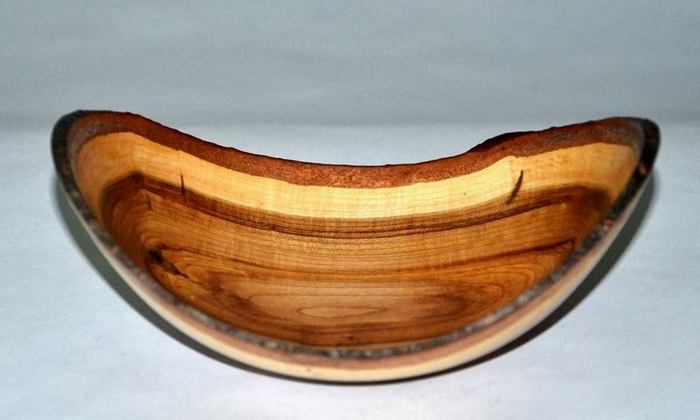
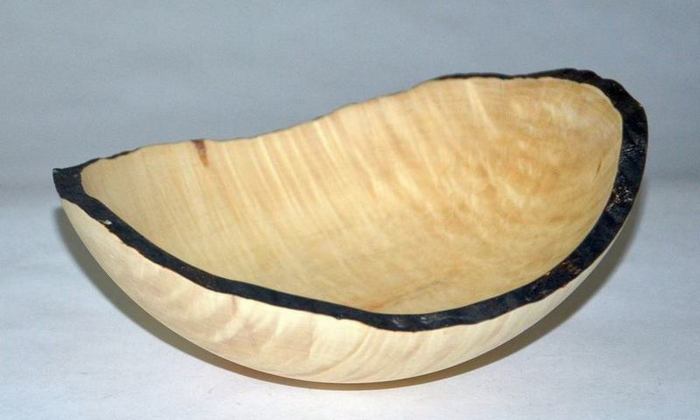
Four Natural Edge bowls. I guess, these days, the modern term is "live edge".

The top two are from opposite sides of the same walnut log. I love walnut natural edge because the bark is usually quite thick and pretty robust (stays on), and the sapwood (whiter wood under the bark) is often very wide. Not so much in this case, but it still makes a pretty bowl. These are about 8 inches in diameter.

Bottom left is a Schubert chokecherry bowl, also about 8 inches. I have mentioned if often before on this site, but the Schubert chokecherry is losing ground in Winnipeg due to its inability to fight off black knot, a disease that produces ugly carbuncles on the branches. It is a real shame, as the trees are so pretty in summer with the brown green leafage and abundant and purple fruit. Makes good jelly and jam.

Bottom right is a bowl of Manitoba Maple, bark removed and the edge burned with a torch. Abou 7 inches.


Walnut NE

Walnut NE

Chokecherry NE

Manitoba Maple NE
Elm Burl Split Vase

Back in 2010, I got a call from someone about a big elm burl, (click here to see it) and the tree was being removed by the city. To make a long story short, I went to several neighbors of the tree, to ask them to make sure to advise me when the city came to take the tree down. I promised I would make piece for them if they did so. And, I did that, delivering several pieces to the neighborhood.

So it was with surprise when a man and lady approached me at an Art Gallery sale and told me that they were the ones who had called me. I had not met them before, but assumed they were one of the neighbors that called me, and that I had given them a piece. But they said, "no, we are not even from that neighborhood, but we were driving by this tree as we often did, and saw that it was marked for removal. We had seen your work and thought you might be able to create something from the burl. We do not have a piece from the tree."

Well, I felt terrible. I told them I did not think I had anything left from that burl, but I would look. When I got home I spotted this, the only remaining piece, and much more than I had given the others. But, these were the folks who called me in the first place, and when they came and got the piece they seemed grateful that I finally paid my obligation to them.

As woodturners, we often rely on people to let us know of trees being taken down, or of available wood, and I am grateful to these folks. This is an elm burl split (clamshell vase), about 12 inches in diameter.

Mini Pin

One day, a few from our club visited a senior citizens center to show them what woodturning was all about.

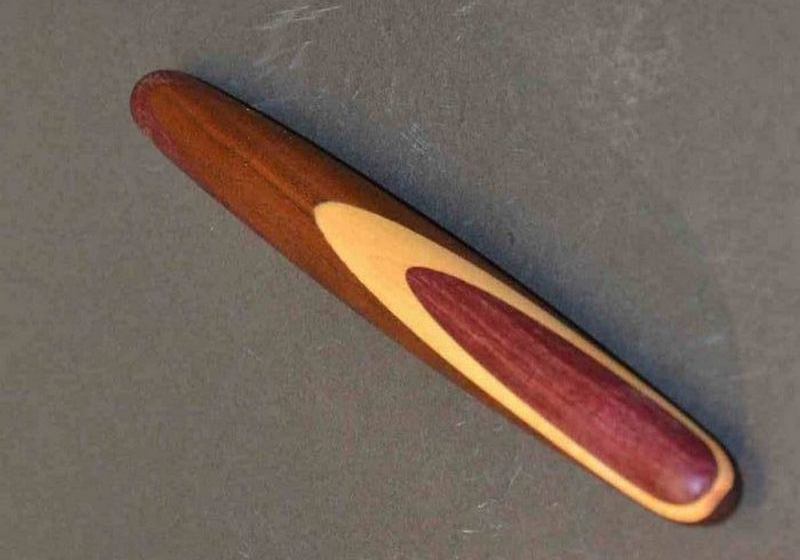
I did the demonstration for the roomfull of people and showed them some of the basic elements of woodturning, a bowl, etc. Just for fun, I showed them what a French rolling pin was like and how to turn one, except this was a just a sample mini one. The lathe was not big enough to turn a full size one.

When I got home, Karen was in the kitchen, baking as she often does, and I laid the little model on the counter and went to put my stuff away. When I came back she was grinning, and happily using the mini pin to roll out small pieces of dough for the tarts she was making. With some hand issues, she found that the small size was perfect, and that the light weight felt good in her hands. So, I had to sand it down and put some salad bowl finish on it so she could keep on using it.

Since then, a few cooks and bakers have gotten these from me, including the dental assistant when she found out I made rolling pins.

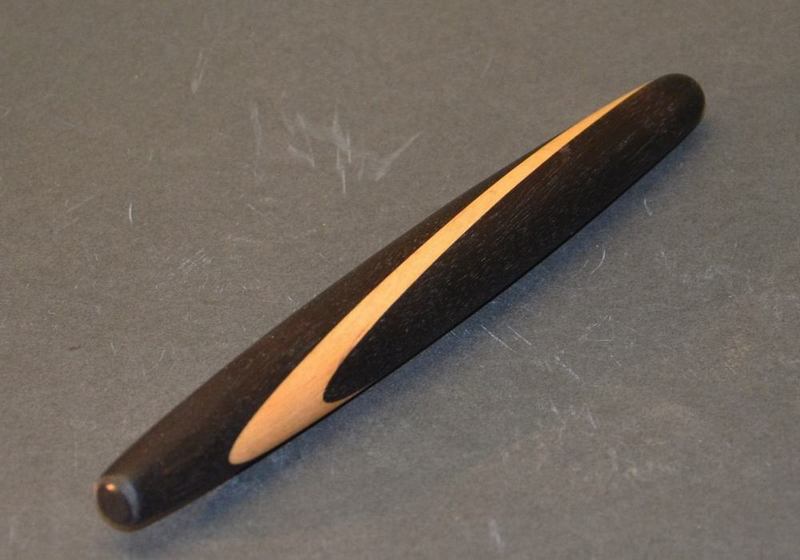
These are about 10" long and maybe 1 1/4" in diameter. The top pin is made of maple and purpleheart and the bottom one of maple and walnut.

Mini Pin

Chokecherry Vase

I have often praised the beautiful characteristics of the Schubert Chokecherry, with its brown/green foliage and lovely berries. And - the trees are dying in droves.

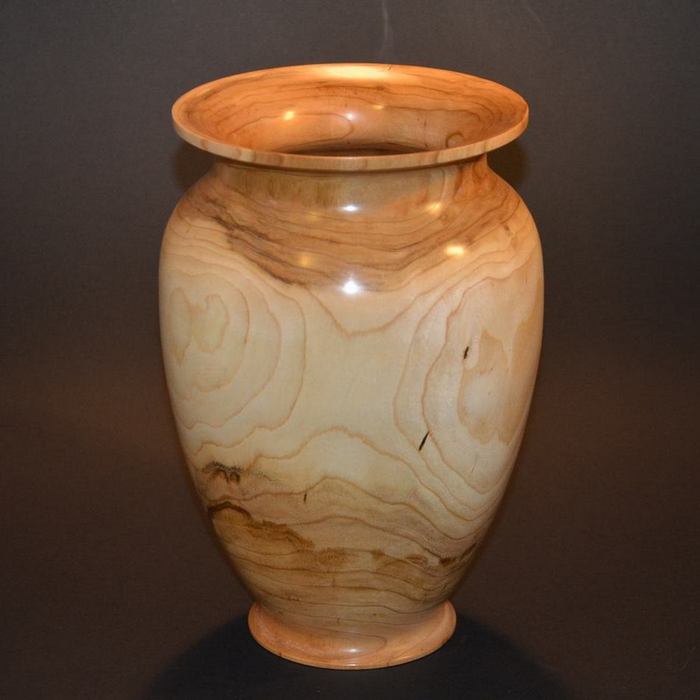
Good for woodturners, though. The wood is beautiful to turn and smells good. This vase is about 11 inches tall. Finished with Danish oil and buffed.

Mesquite Pepper Mill

Lots of mesquite in Texas, and that is where we have spent the last few years during the winter.

As I write this, in 2018, though, we have sold our place in Texas and will no longer be travelling down there for the winter. As Canadians, we no longer feel comfortable in the US. Their government seems to have put a target on Canadians, our economy, our Prime Minister, etc. and that has taken the wind out of our sails. We no longer go over the border to shop, and willingly pay a bit more to shop Canadian products.

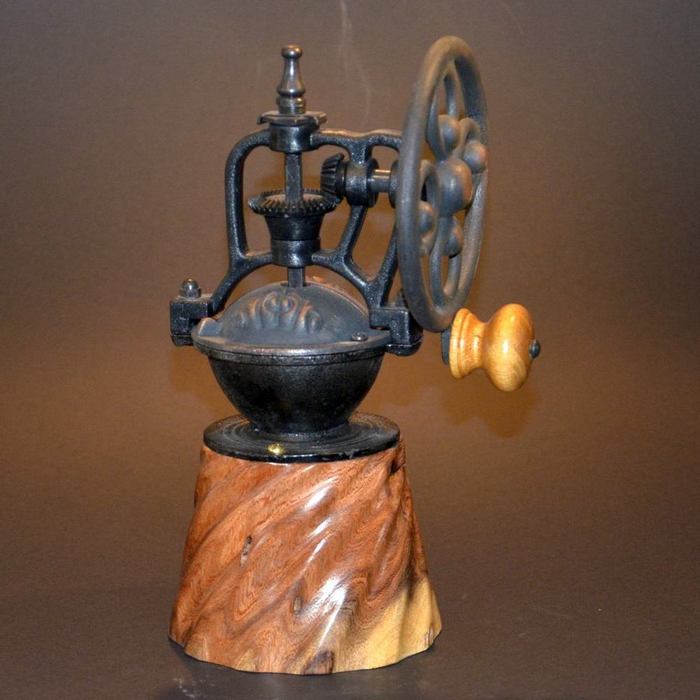
But, I will miss my friends down there, and the mesquite. Got this piece from my good friend Roger, and had a antique style pepper mill hanging around for several years. I decided to make the base with spirals, and hollow it so it can be set over a shotglass to collect the ground pepper.

Not really a handy way to grind pepper, but an interesting coversation piece.

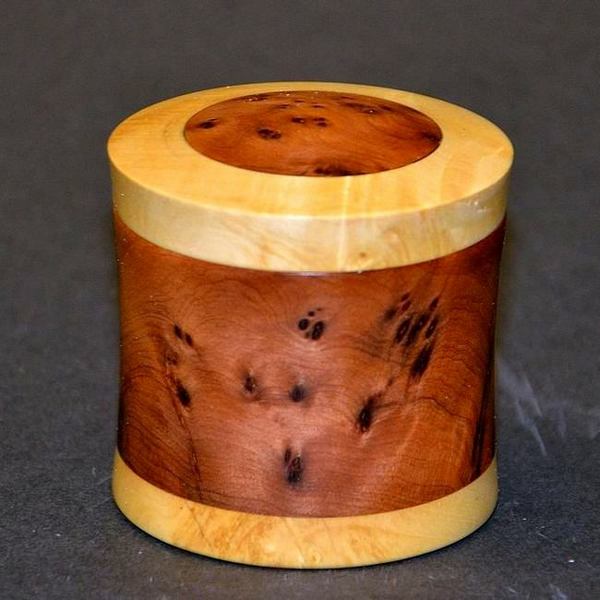
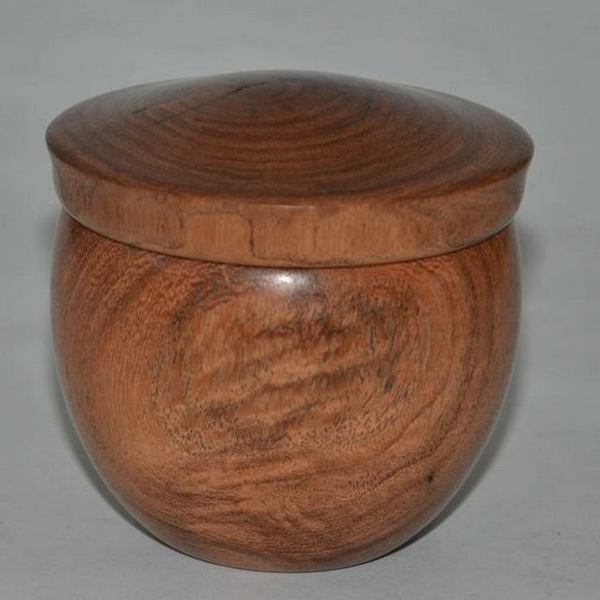
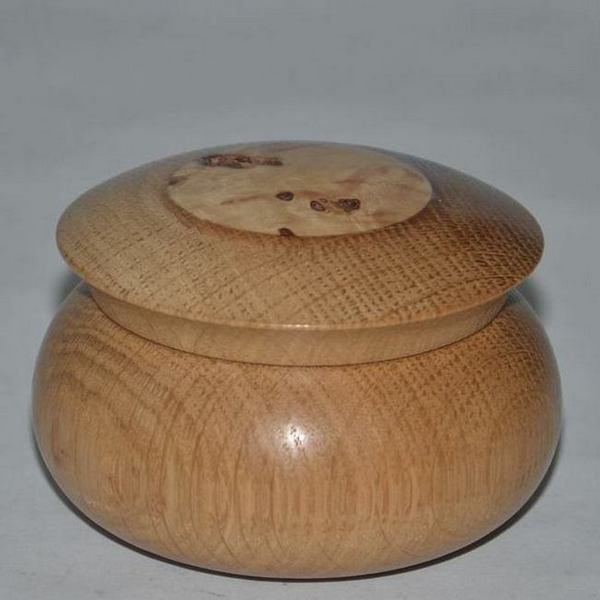
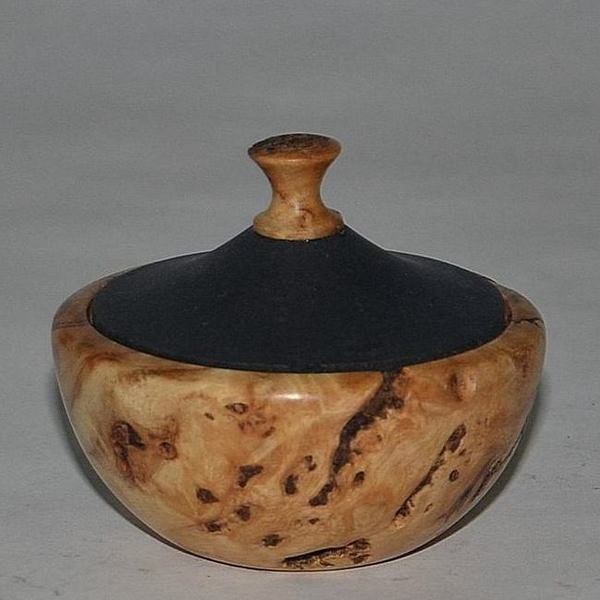
Four small boxes, all in the range of 4" in height. Small boxes are a good way to use smaller pieces of wood, and present a challenge to fit the lid properly, design shape, etc. And they are fun to make. These are all different in design and wood. Some have suction fit lids, and others have loose lids.

The top left is a piece of the thuya burl discussed earlier on this page. It came from one of the odd shaped pieces lying on the floor, in the photo a few frames up. The light wood is Manitoba maple.

Rop right is a box of mesquite

Bottom left is an Manitoba oak box with a lid insert of cottonwood burl.

Bottom right is more of the cottonwood burl, with a walnut lid on the box.


Thuya and Maple

Mesquite Box

Oak/Cottonwood Box

Cottonwood/Walnut Box
Manitoba Maple

Man, some of that Manitoba Maple is beautiful

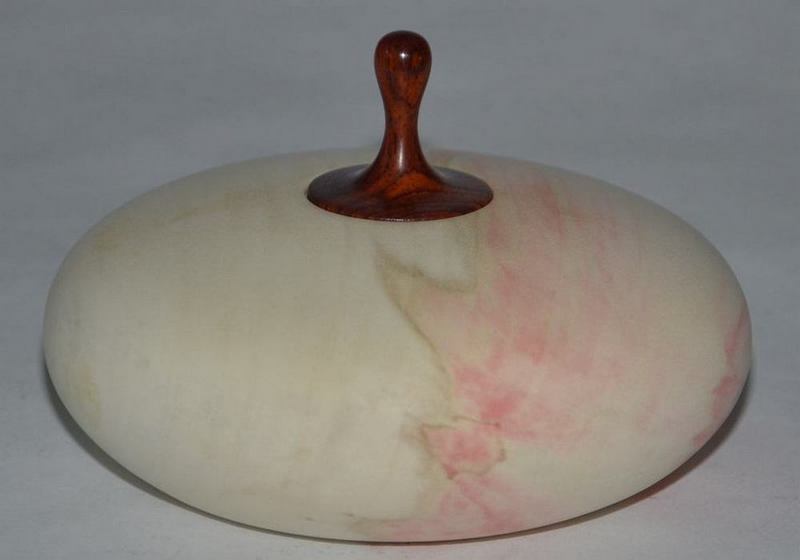
This little 6 inch diameter hollow form, urn, whatever you want to call it, is bleached and finished with matte Krylon spray. It is very light and only about 3/16" thick. The lid is made of cocobolo, as I thought the color matched the reds in the maple.

Walnut Flame Hollow Form

Two pieces of walnut, both brought from Iowa by my good friend, Lauren Cory. He and Tish are residents of the Palm Shadows RV park where we were for several years. Loren is an accomplished woodturner specializing in segmented bowls.

For this 11" diameter hollow form, I needed to make a special bent shank tool to reach to the inner surfaces at the far edges of the top and side. The opening on this is less than 2" and it was a substantial feat to turn this to about 1/4". The lid is turned from a bit of the same wood, but the carved flame finial is actually walnut from right here in Manitoba. The piece is finished with Danish oil and buffed.

The bottom bowl (10") is made from another piece of Loren's walnut, and while I was turning it, I heard "tic, tic, tic". When I stopped the lathe to look, I found the remnants of a lead bullet. Obviously, somewhere in Iowa, this tree had once had a target pinned to it, or was just in the way when someone took a shot. The bullet bit can be seen lower right of the piece.

Walnut Bullet Bowl
Bud Vase

Earlier on this page, I posted a couple of photos of another one of these.

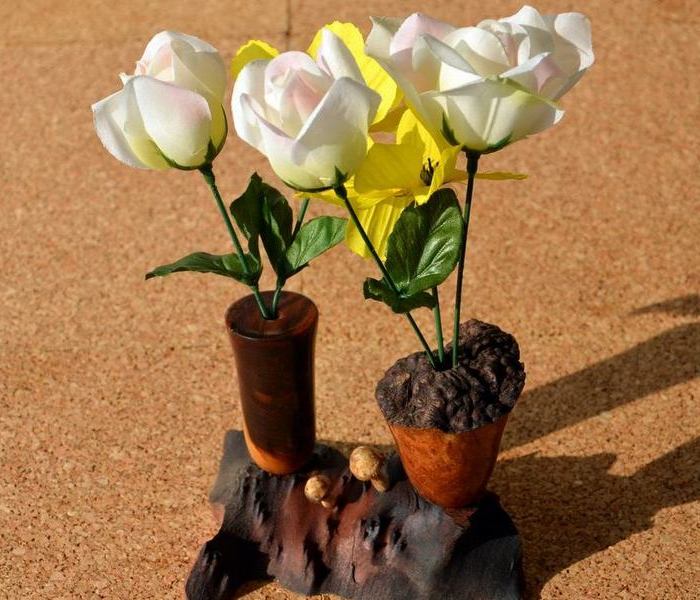
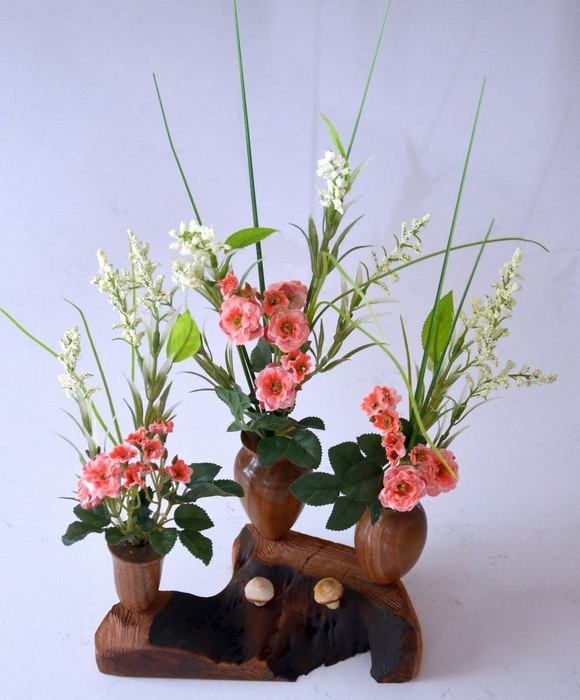
When Karen's aunt celebrated her 90th birthday, and there was a big party at the church, I took this along as a little gift for her. The flowers are silk, but the little unit has glass tubes if someone wanted to use it for a bud vase.

The woods are walnut, mesquite and cherry, and each one is about 4" tall. The base is made of redwood, and the little mushrooms are mounted on wires with several holes in the base so they can be moved around. The mushrooms are of some unknown branch wood.

Tina seemed to like this whimsy piece.

Texas Ebony Vase after Accident

So, you need to know that woodturning can be dangerous.

In the past few years, several people have died at the lathe, most notably a lady who was found dead on the floor by her husband when he got home from work. The lathe was still running, and the piece that hit her was on the floor beside her.

This piece could have been that way. I have had pieces break off and hit me, usually small pieces of bark or knots. But once, a large elm piece created a split I ignored, and a box sized chunk hit me directly in the face. I was wearing, as usual, a full visor and it protected me. But I still ended up on the floor. I am "out of the line of fire" for 90% of the time, but sometimes a turner needs to stand directly in line to see the profile of the work as he turns. I have learned, since that experience, to test every crack I see with a large screwdriver and if it moves, it gets taken apart and epoxied, or it goes for firewood.

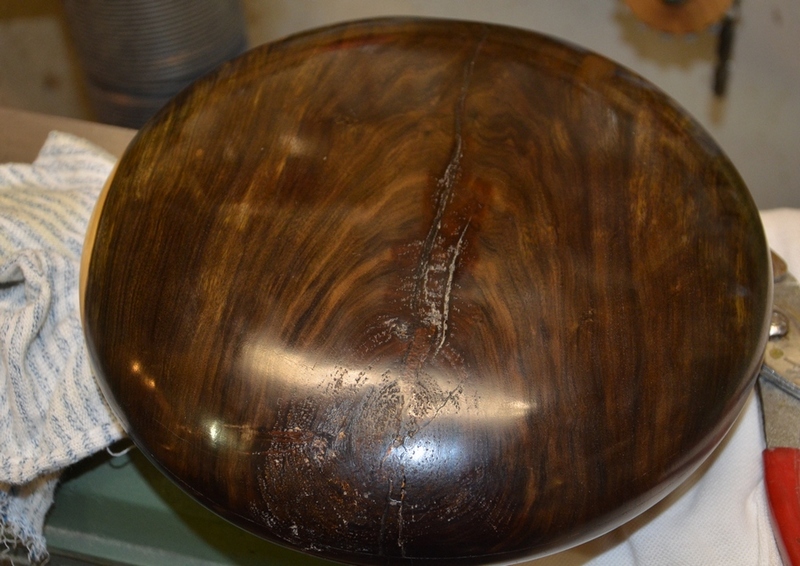
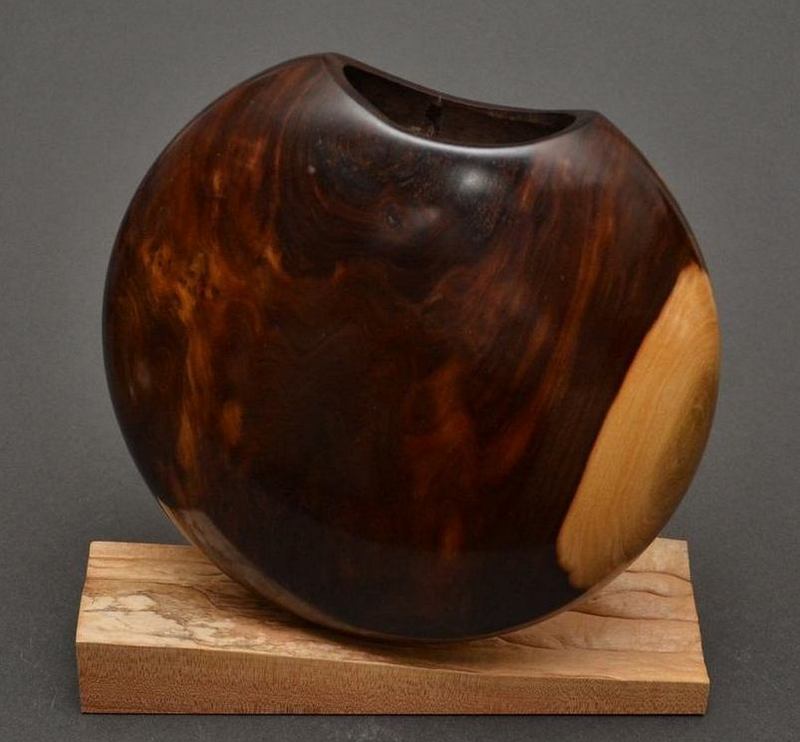
In this case, I was a bit cocky. The Texas ebony piece has an obvious fault, as can be seen in the top photo. But it seemed solid, and I was quite successful in turning the vase, then cutting it in half and hollowing out the two halves. This was all done in the park in Texas.

The problem came when I glued them back together when I came home to Canada.

The solid half was mounted in the lathe in a chuck. The half with the fault was glued in place with epoxy around the rim, and the tailstock used as a clamp to hold it. The half still had a piece of waste wood glued in the center of it, and no doubt that was helping hold it together. The epoxy I used to glue the two halves together was supposed to be fast acting. I still had the opinion that the fault in the wood was solid. What I did not think about was, after several months in a house where the temperature was kept very low, the glue was very cold. Therefore, the set up time for the glue would be extended.

So, after a few hours, I took away the tailstock and turned away the waste block I had glued, months ago, to the cracked side. Then I began the final shaping of that side.

All of a sudden, "WHAM", and the lathe began to shake. I quickly switched it off, and found that one half of the front side of the piece had disappeared. That half of a disk was more than 9" in diameter and weighed several pounds, and I could not find it anywhere. I gave up and left the shop.

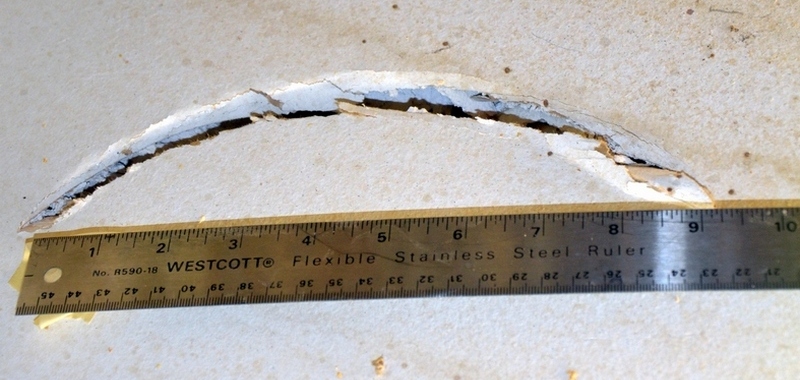
Next morning, I went into the shop and happened to glance upward, and spotted a cresecent shaped hole in the ceiling that was not there before. You can see the size of it in the center photo. A tiny corner of the missing piece was visible and the rest was between the joists in the ceiling. I was able to grab that with a needle nose plier and wiggle it out of the hole.

It was only after this was all over, and I felt how heavy that piece was, and sharp edged, and I knew I had literally dodged a bullet. It was months before I picked it up again and reconstructed it into the final piece in the bottom photo, but I always felt that, on that particular day, I was the one that got away.

Hole in the Ceiling
Texas Ebony Vase Finished
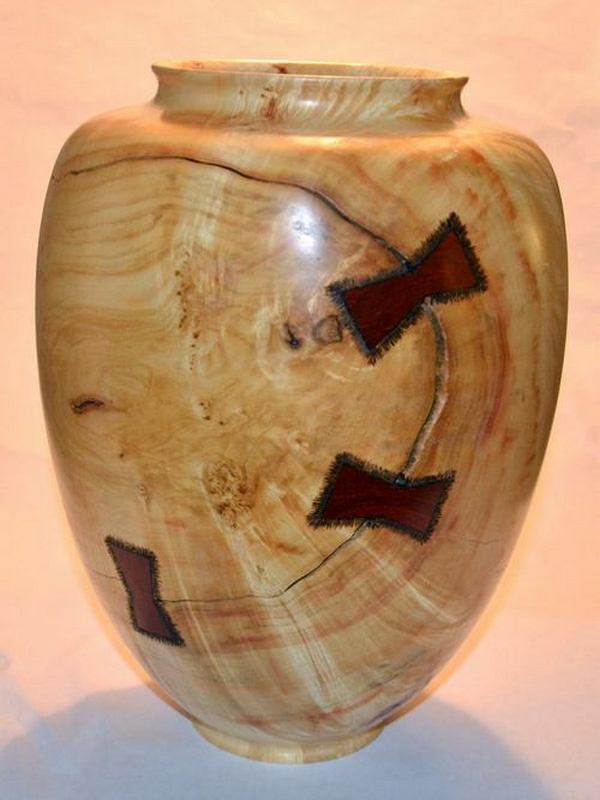
The vase on the left (15" tall, 8" diameter) is Manitoba Maple. I finished this one with an oil finish, which accounts for the more yellow color than many of the Manitoba maple pieces I do. Usually I use a matte water base finish which does not yellow the wood. In this case, I wanted the oil to accent the dovertails.

The piece has obvious cracks and faults. Almost 100% of the time, people ask me, "what are you going to use to fill that crack?" Well, the truth is, most of the time I don't fill, anymore. I prefer to leave the crack unfilled, and accentuate it in some way. You have seen me lace the cracks, wire them, etc., but I like using dovetails above all, although they are a lot of work. The dovetails go all the way through, so they show on the inside of the piece as well. And I used a completely contrasting wood - redheart, in this case. and made them deliberately oversize.

The dovetails are often called "pewas" (from Hawaii, I think), and on this vase they are very functional. That split goes all the way around in a circle, and what holds the center in place is the dovetails. Two more are on the side you can't see. The are all hand carved, after I cut the dovetails on the bandsaw. No templates are used.

After completing it, I still was not happy, so I "stitched" each pewa in place with a woodburner.

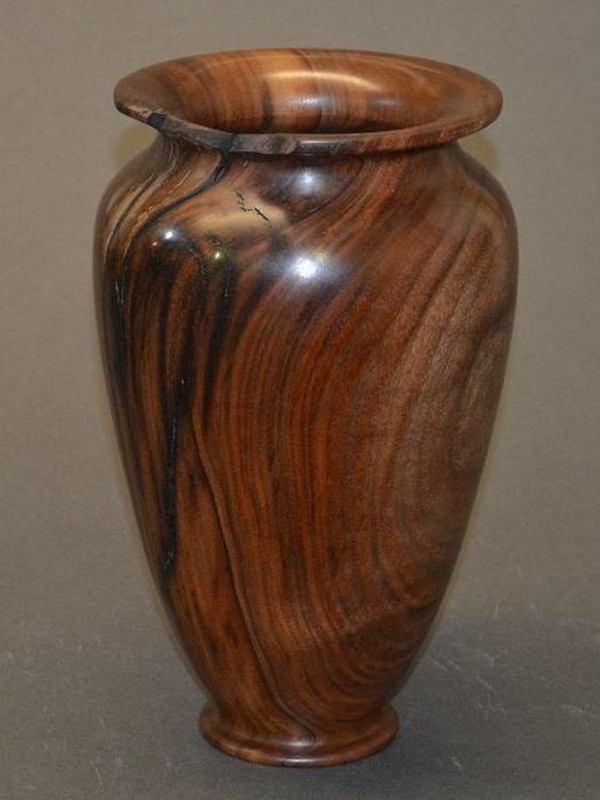
The piece on the right is walnut, about 9" tall. I almost threw this walnut away because of the faults and cracks in it, but I thought the bark missing on the rim created an interesting effect, and the grain is just beautiful.


Manitoba Maple Vase with Pewas

Walnut vase
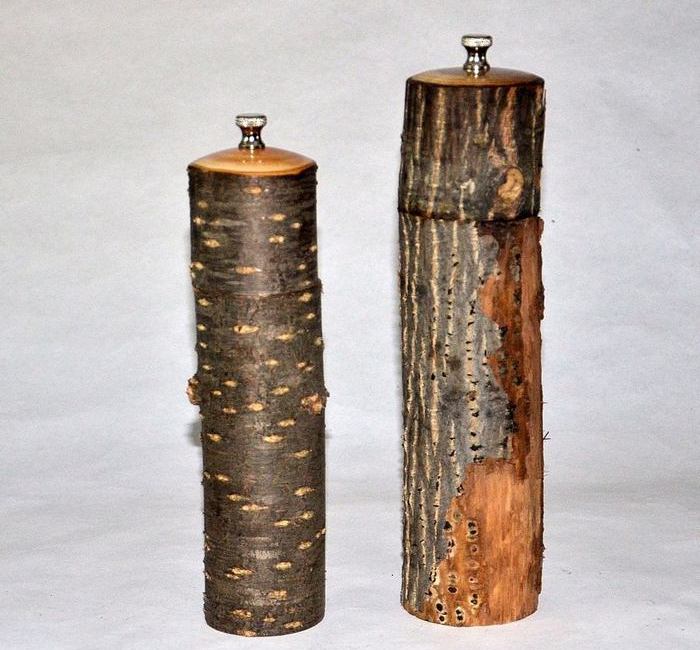
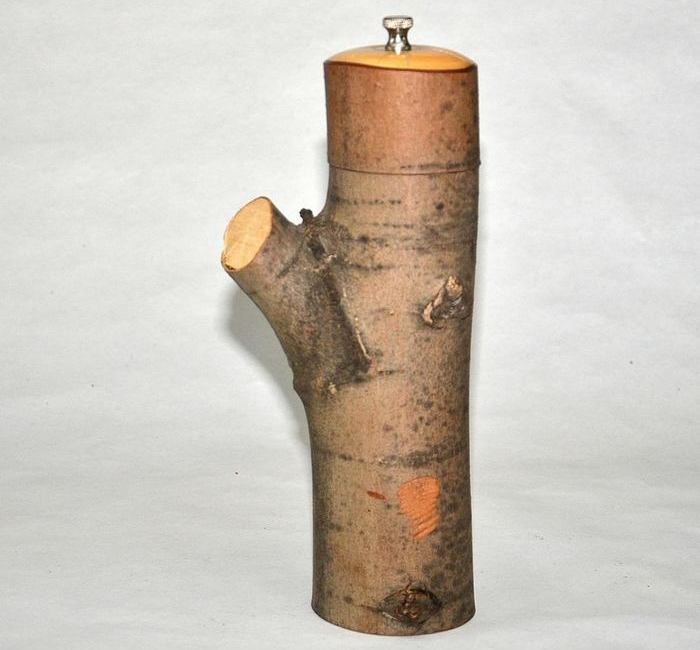
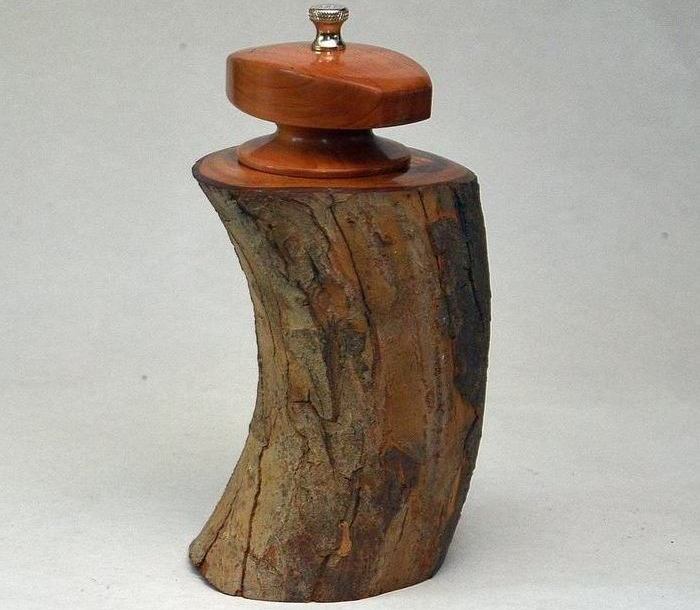
The first three photos below are peppermills that I turned from plain old branch wood. but leaving all the bark and small branches in place. The first one is a chokecherry branch, the second one is a poplar branch with a twig left on, and the third is from a Japanese lilac tree that was growing in our back yard. They are all turned on the inside, as opposed to simply drilled out. This is much more difficult to do, but it enlarges the inside so more peppercorns can be put in. The third one is actually hollowed to follow the curved shape on the outside, and since it was such a short piece of wood, I gave it a special kind of handle. These are very popular with the BBQ crowd, and a conversation piece. I made one (no photo) for my nephew and his wife with their initials carved into a heart on the outside, like lovers do on trees.

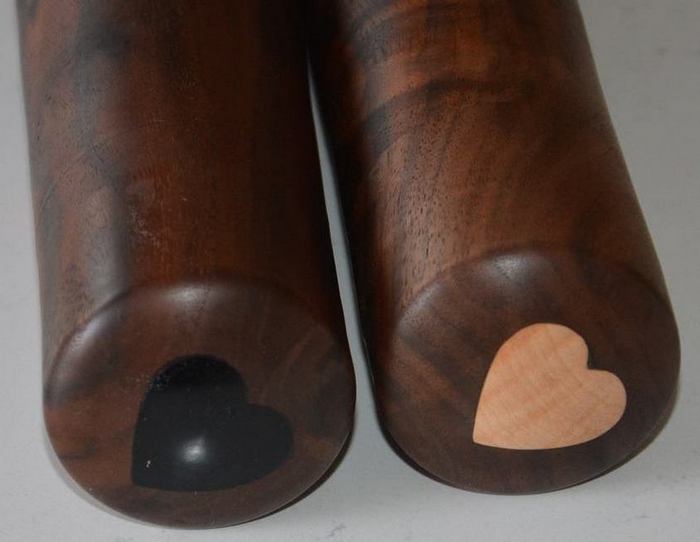
The bottom three photos are of a walnut pair of mills I made for a lady in England. These have special ceramic grinders in them that allow sea salt or salt crystals to be ground. Regular metal grinders would be destroyed by the salt. And, they are shaft-less. The bottom of the grinder is held, and the entire upper portion is rotated to do the grinding. Much more difficult to make.

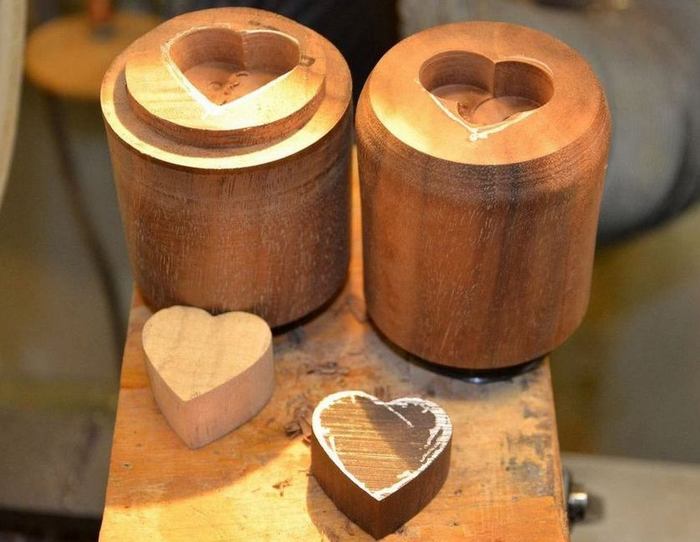
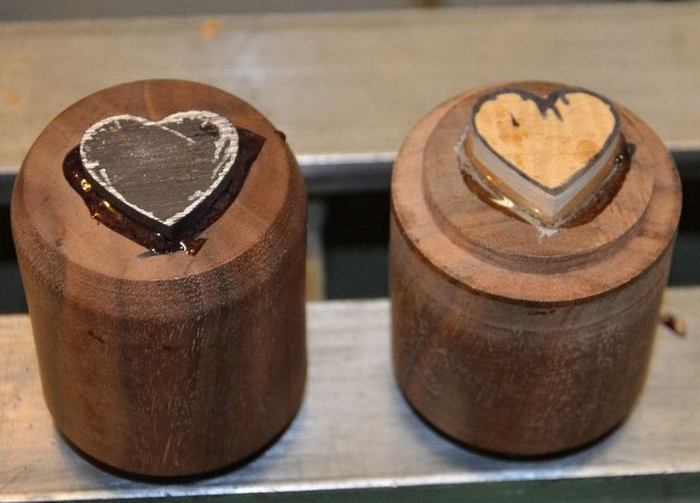
Anyway, she wanted a pair to commemorate their 40th anniversary, and I came up with the idea of a pair of hearts to differentiate between the salt and pepper. She liked the idea, but was determined to have them very tall, which really limits the form one can turn. I could not convince her that a shorter set would look better, and I was not artistically happy with the result. I shipped them off, and am not sure how she felt about them when they arrived in England. The first of three photos shows the completed top view of the mills. The other two are progress photos showing how I carved the mortise after bandsawing the hearts, and glued them into the tops before turning.


Branch Peppermill

Branch Peppermill

Branch Peppermill

Anniversary Mill

Anniversary Mill

Anniversary Mill
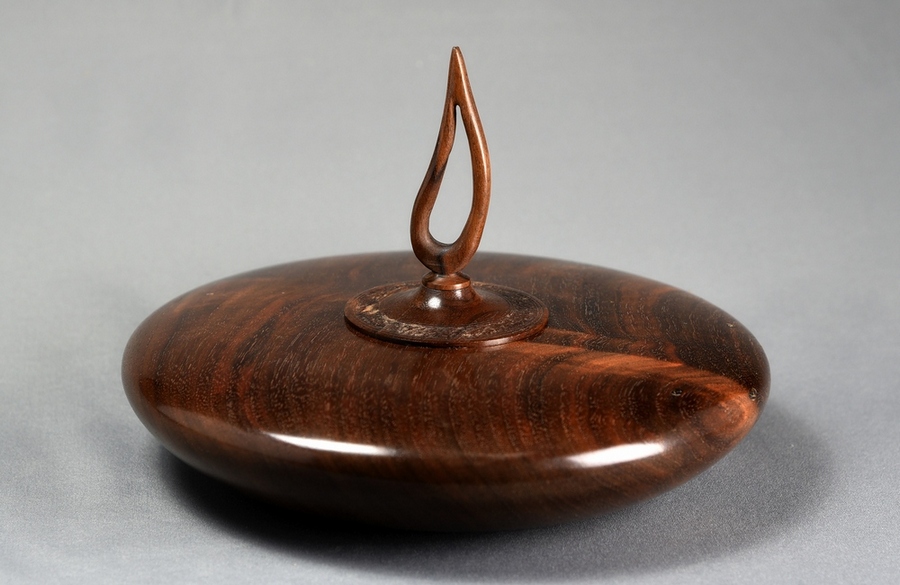
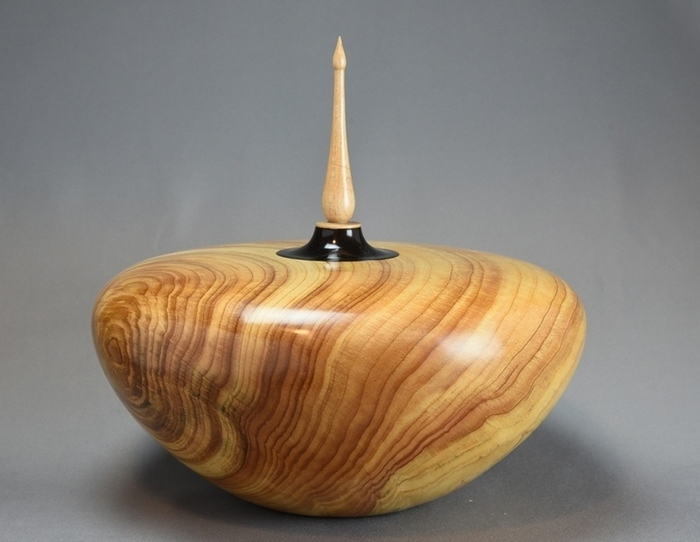
The piece on the left is a spruce burl urn, about 10" in diameter. My good friend, Ken, gave me a piece of spruce burl that he found in British Columbia, and he brought it home for me to turn. I normally do not turn spruce due to its sticky sap, but this was bone dry and the figure on the outside intrigued me. When I cut into it, I discovered all the lovely swirls and color contrasts inside the piece. It is topped off with an ebony cap and a holly finial. And it soaked up Danish oil like it would never stop. It took weeks for the multiple coats of finish to harden until I could buff it. The process was, apply finish, wait 5 minutes, wipe off, wait two days, repeat. Again and again.

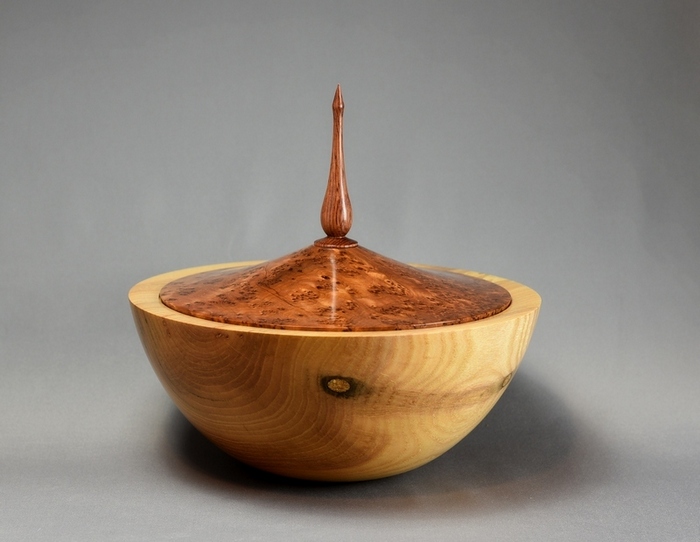
The piece on the right is an example of a failure, in my eyes. I am not proud of everything that comes off my lathe. As a matter of fact, like most artists and performers, I am seldom thrilled with anything I make. It is very difficult, when people praise a piece they are holding, to keep my mouth shut and not point out the flaws I see in it. I think most of us woodturners are like that.

But this was, in my view, a waste of a good piece of thuya. It is a poorly designed piece. I thought contrast was good, and it usually is, but not in this case between the ash and the thuya. The contrast, in my eyes, does not work. This may end up in the fireplace.


Spruce Burl Urn

Thuya Lidded Ash Bowl
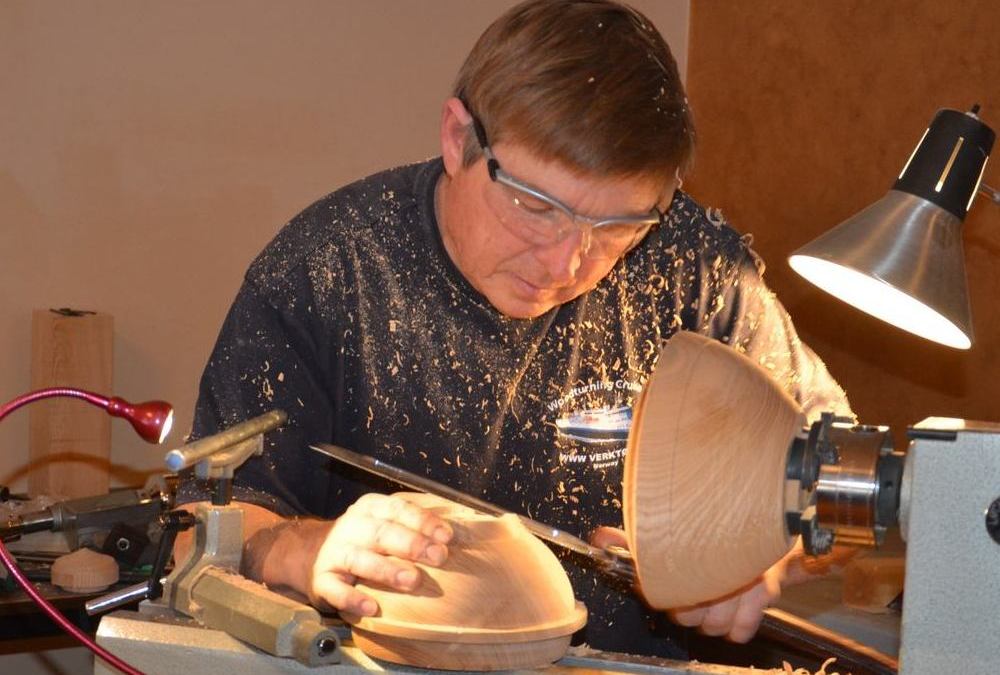
We'll finish off this year with some photos of yours truly actually working. Just in case you folks think that all of this just simply appears with little effort.

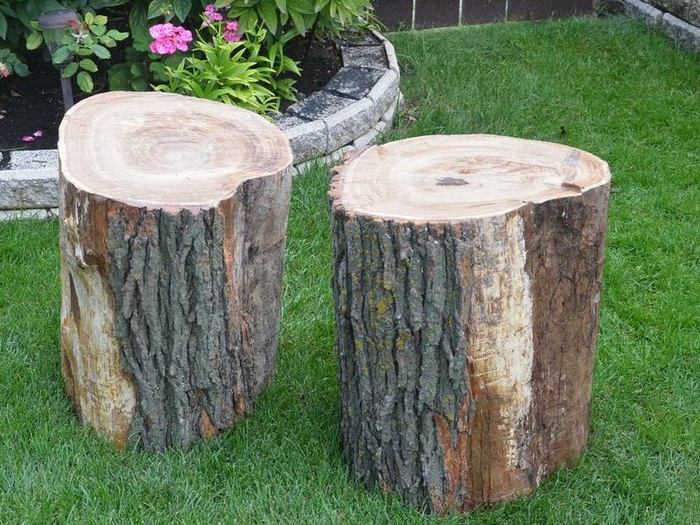
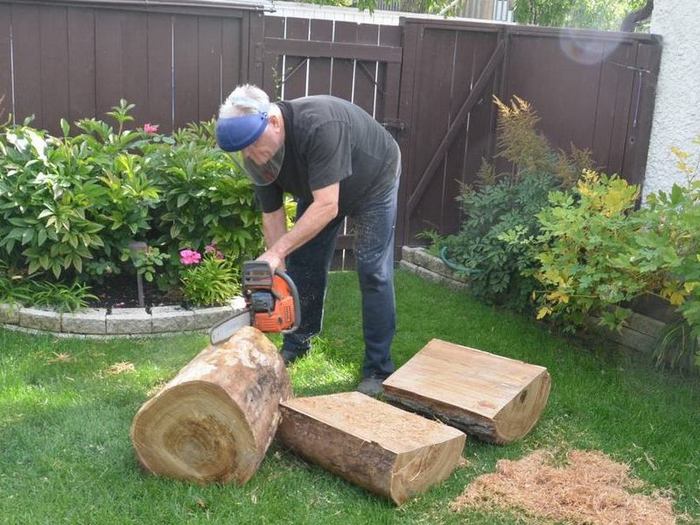
My friend, Wesley, hauled a couple of oak logs over to my house and asked if I would turn him some bowls to commemorate this tree that had grown in his yard for a long time. Manitoba oak grows slowly, is extremely hard once it dries, and is a real "b---h" to keep from splitting and cracking. The first photo is a couple of the logs sitting on the lawn. The second photo shows one of them split and another one being split after I removed the bark.

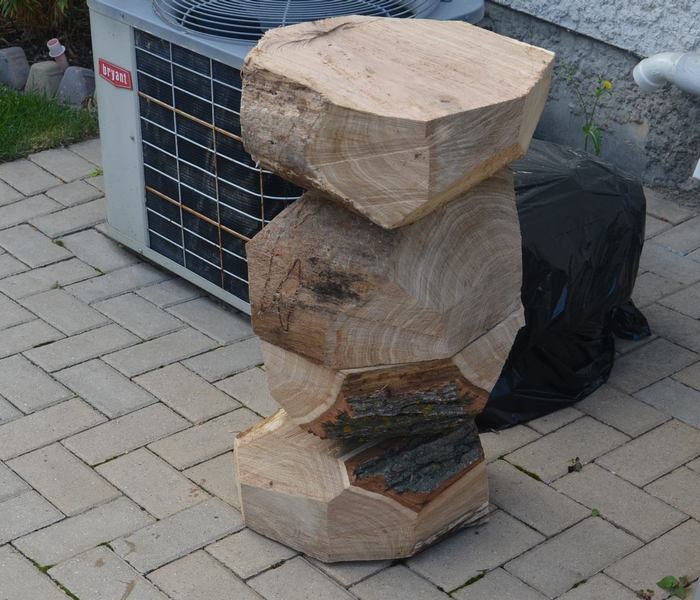
The third photo shows the half logs with the corners knocked off, stacked on the patio outside before hauling them down to the basement shop to turn. At this time, they are soaking wet and verrry heavy. I use a two wheeler to get these down the stairs. (Remember, the shavings have to come back up again, too).

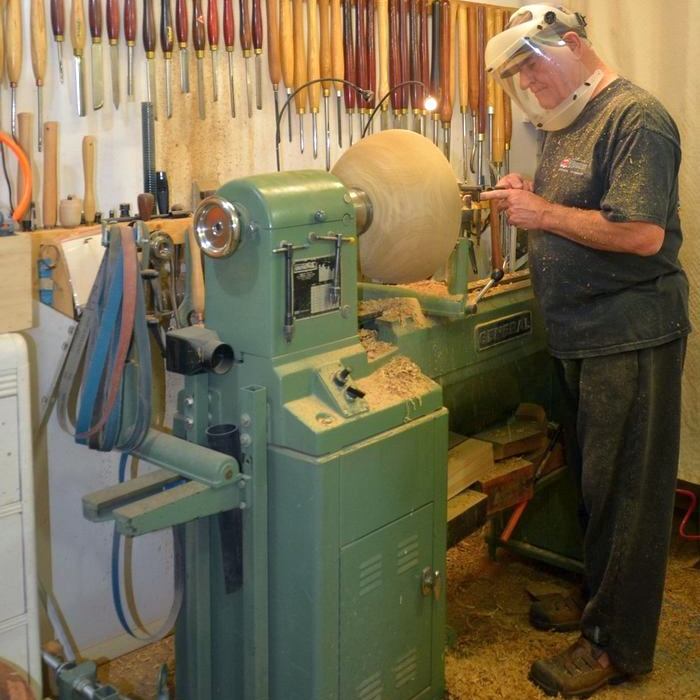
The fourth photo shows one of the pieces on the lathe, and I am in the process of "coring" the blank. That is, after the piece has been turned round, I use a curved tool to cut a bowl shaped core, sometimes two or more, out of the big piece. That creates a series of three or four bowls that stack inside one another. With expensive wood it is necessary to maximize its use. With the oak, I did it so I could make a few more bowls for Wesley.


Wesleys Oak

Wesleys Oak

Wesleys Oak

Wesleys Oak