I got a call from a local music and instrument store for help with fixing a bassoon. A bassoon is a large and very expensive woodwind instrument made of thin hard maple. It is made in sections so it can be taken apart, and the sections have tenons on them that are part of the body of the instrument.
Well, someone had dropped and stepped on this bassoon and it was very damaged. Both tenons of the main body were completely crushed, and I was asked if there was any way to construct new tenons on the piece so it could be refinished and put back into service in the orchestra.
Here is the pictorial of the process I underwent to take on the challenge. I had to go by my wits, since there was no normal process for doing this. I was not even aware if it could be done.
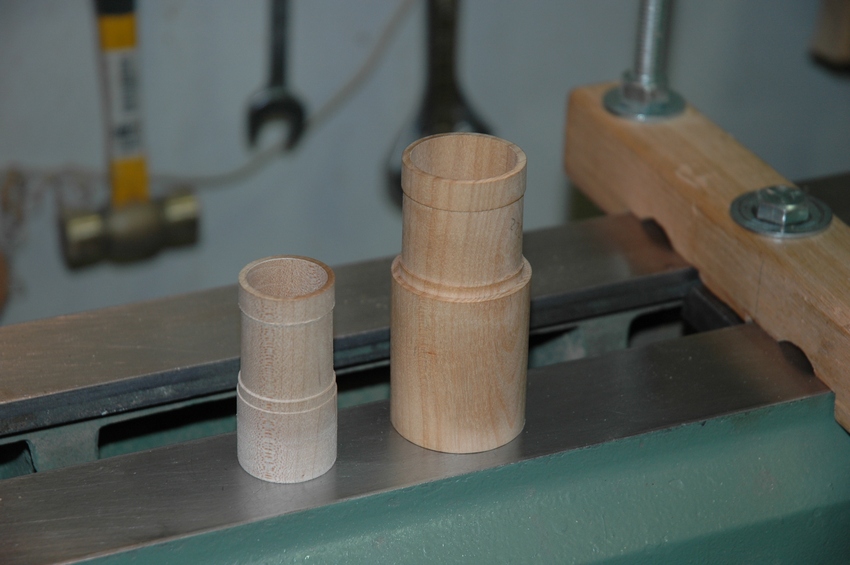 |
The first thing I had to do was construct the tenons for the top and bottom of the main section of the bassoon. These are made of hard maple, and the dimensions had to be just perfect. The interior dimension had to match the interior bore of the bassoon, and it was tapered. So the interior dimension had to be tapered to fit the bore of each section. When the store got the bassoon back, they had to fit cork around the tenon so that it would fit perfectly with the other sections of the instrument. This is something they knew how to do, since cork is regularly replaced on these instruments. | ||
 |
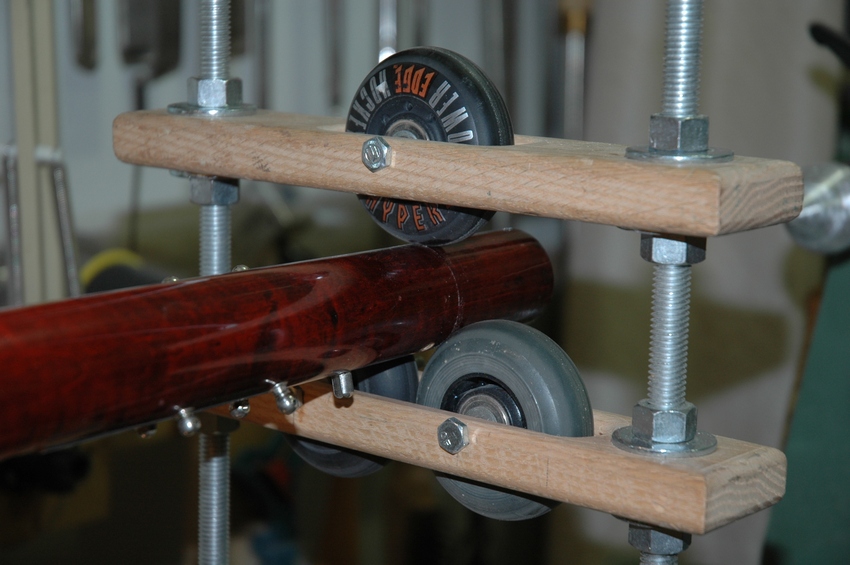
The next thing I had to do was figure out how I was going to spin the bassoon. I had the store take all the keys off it, but leave the key posts in place. However, I could not use a normal chuck to grip the piece or use any metal, so I constructed a cup chuck out of scrap wood, turned a hole to fit the outside of the bassoon and a groove to put a hose clamp for pressure. As you can see, I split the chuck with a saw kerf, crosswise, to allow it to come together and grip the bassoon body. | ||
 |
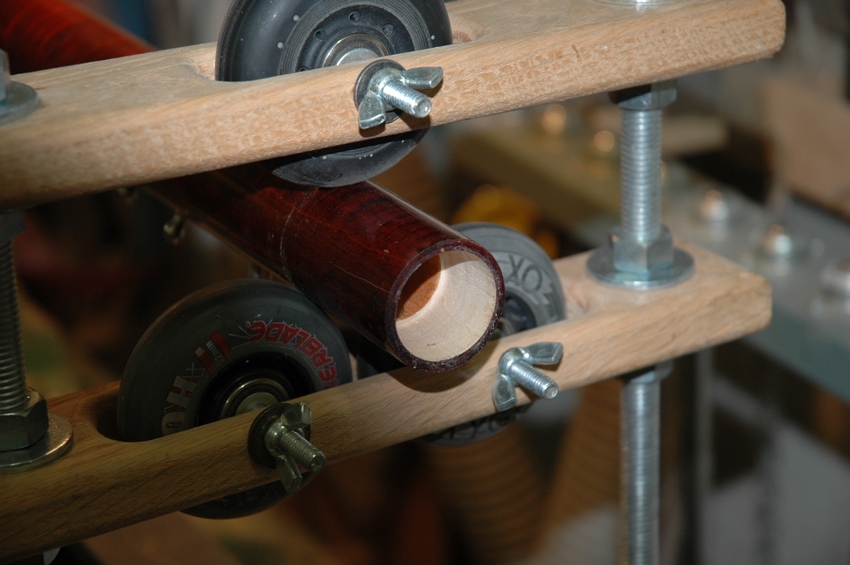
With the end of the bassoon body securely held by the chuck, I put the other end in the cone chuck in the tailstock so it would be perfectly centered and then brought the wheels of the steady rest into contact with the body. I wanted to be sure the piece would run dead true, so after I took the tailstock away I ran the lathe slowly and made minute adjustments, by raising and lowering the lower rail of my steady rest, until the piece ran perfectly true. | ||
 |
You can see how long the bassoon body is in this photo. It felt so fragile and thin that I was really nervous about tightening the wheels too much to avoid cracking the body, but yet have it held firmly enough to avoid excessive vibration and movement of the piece. | ||
 |
Here is the completed mortise on the inside of the body, ready to receive the tenon. This was some nerve racking turning, as I wanted to avoid creating any vibration or movement, as the tenon had to fit dead center in the body. I found that the best tool to use was the skew, laying it flat on its side and using the leading edge to take off tiny amounts of wood. I found that spinning the piece at a high speed worked far better, although it scared me more. | ||
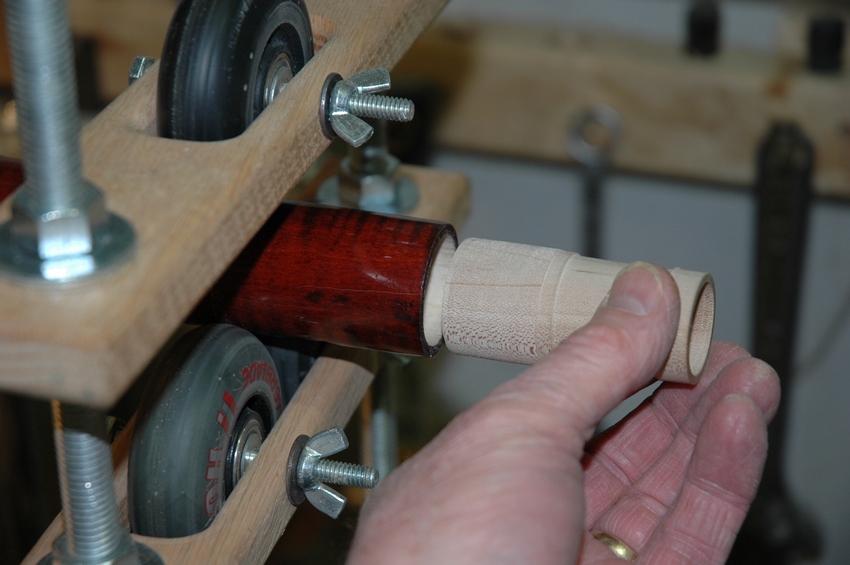 |
Here you can see that the tenon is going to slide perfectly into place. Whew! | ||
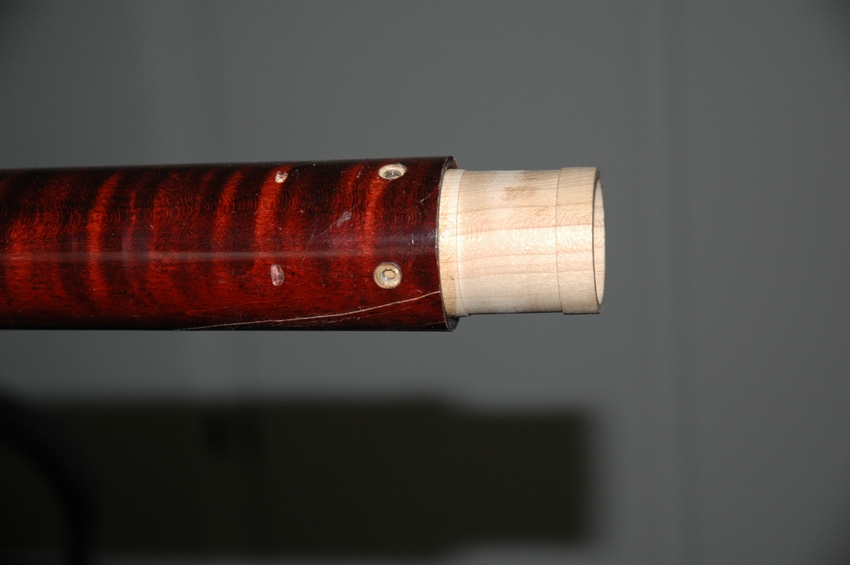 |
This is the lower and larger tenon in place. I used epoxy glue to hold it, and had to put glue on the tenon only to avoid squeeze out entering the inside of the barrel of the bassoon. | ||
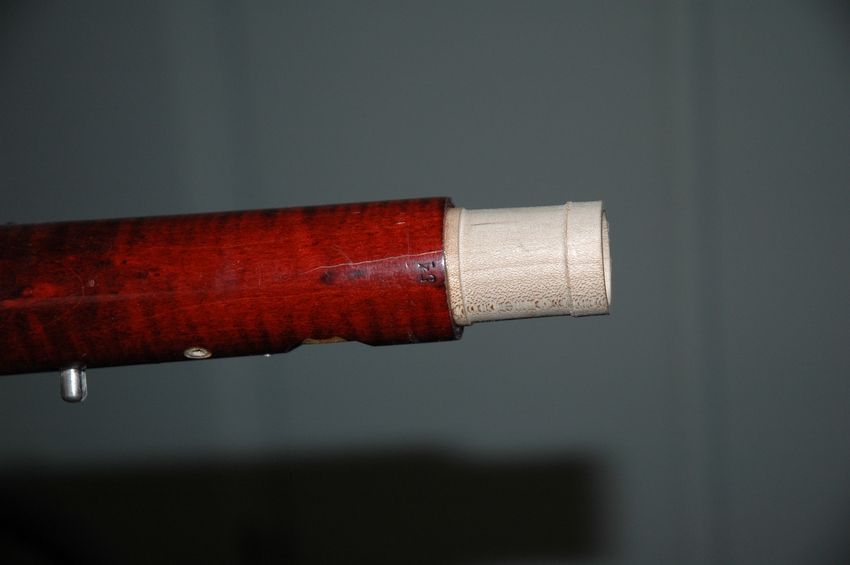 |
The upper tenon is in place. | ||
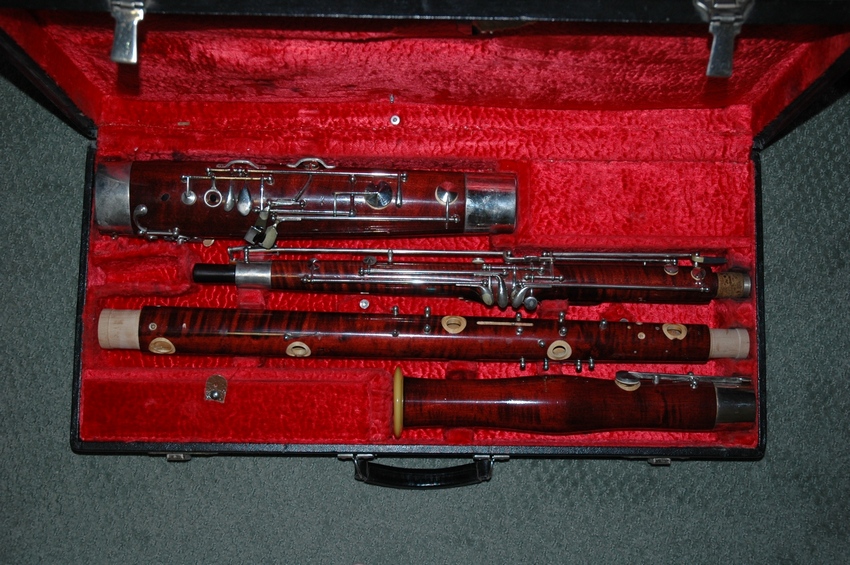 |
All done. The bassoon resting in its case and ready for corking and reassembly. I think the store was going to refinish the bassoon before reassembling it. | ||