

2009 Turnings |
|---|
I will try, once I have the 2009 stuff uploaded, to continue right on with 2010 and just build that throughout the year. At least I have good intentions........
I thank you for visiting, and please let me know you were here. I love hearing from people who visit the site. I might even write you back.
So, here it is, the 20th of April, 2010, and I am just beginning to put up the work that I did in 2009. C'mon, people - have some SYMPATHY, for cryin' out loud. I'm retired, getting older, Karen is retired, I like going out for breakfast, I like to watch TV and play with my other toys, and sometimes the time just plain gets away. Besides, you have to admit, not a lot of people visit this site, so I'm not putting out very many people.
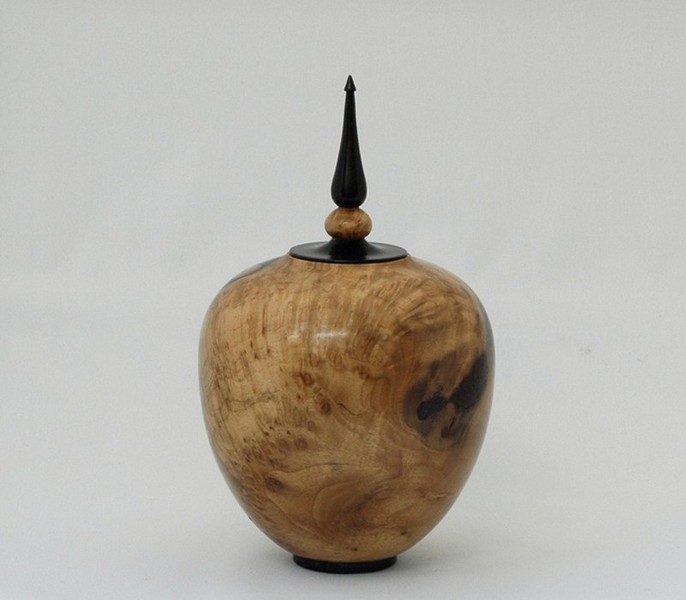 |
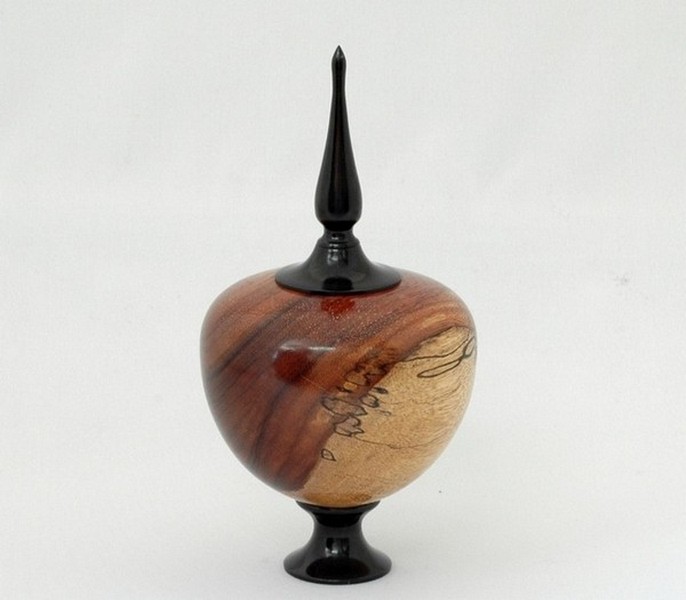
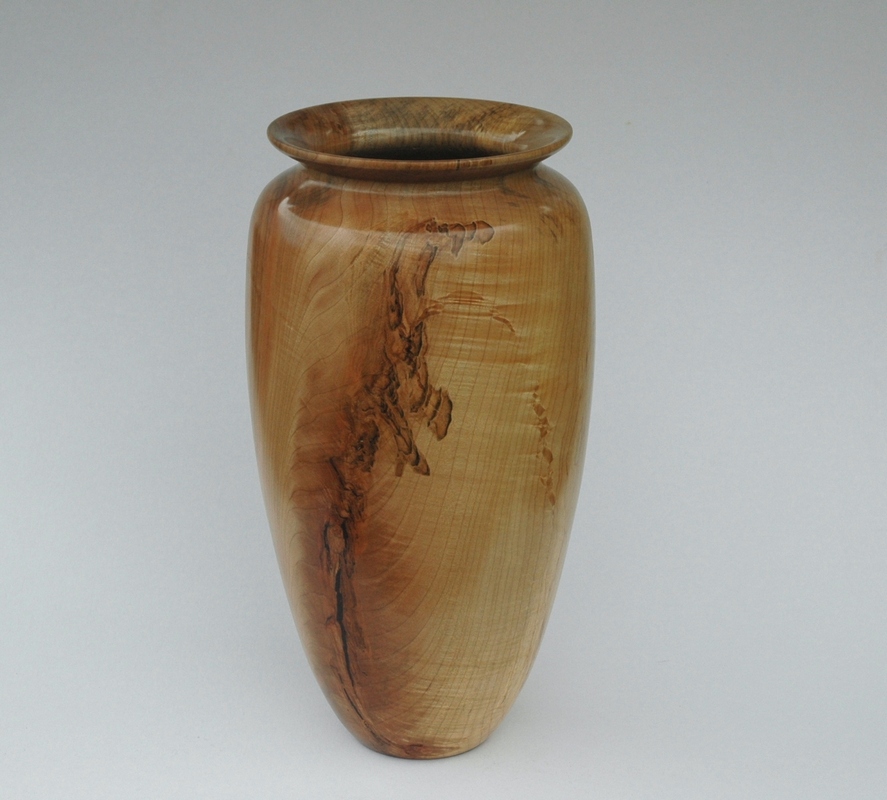
The urn at the top is of maple burl that I got from Tim Shipp in Oregon many years ago. As I work my way through what remains of the original 1000 pounds of wood, I am starting to use up some of the small pieces remaining. This is a relatively small urn, about 9" tall overall and 5½" in diameter, finished with tung oilThe small urn in the lower panel is about 9" tall and 5" in diameter. The wood is called Limoncillo and comes from the rain forests of Peru. I put Jim King and his band of local Peruvians in touch with Windsor Plywood here in Manitoba and they shipped a lot of small turning blanks to Windsor Plywood. Jim would like to introduce the fabulous woods from Peru to the rest of the world and save the forests from destruction and create employment for the native Peruvians in the area. Otherwise, the forests are being simply burned and wasted. I hope others will try these woods. They are hard, colorful and finish beautifully. However, they are difficult to turn as they dull tools rapidly. A carbide cutter (see the tips section for how I made my own) is a valuable tool to cut this stuff. A regular HS steel gouge will only cut for a few seconds before dulling.
| ||
 |
|||
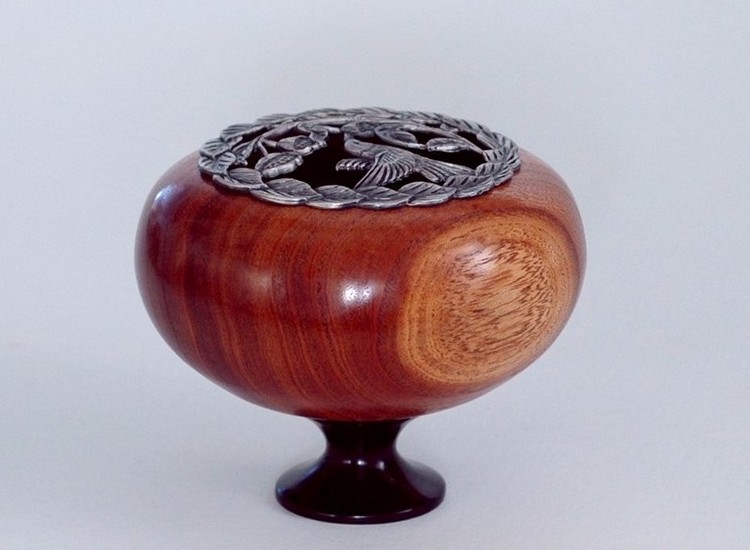 |
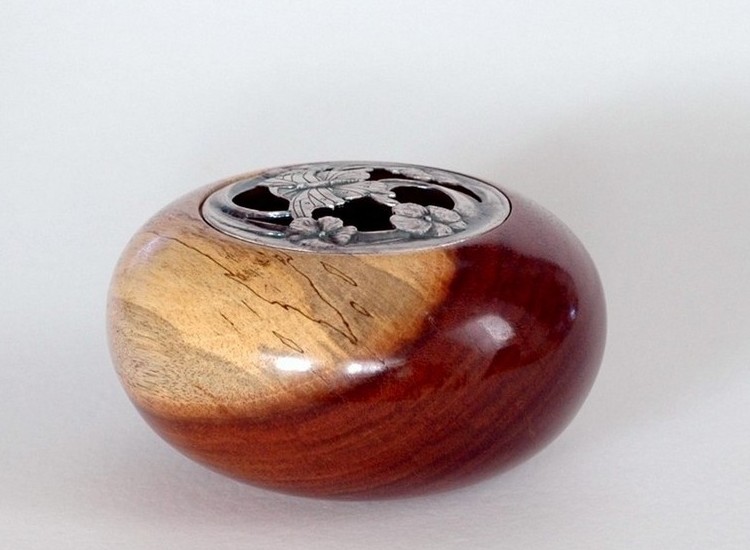
Here are a couple of potpourri boxes made of wood that came from Jim King in Peru.The upper photo is of Orange Agate and sits on an ebony pedestal. Orange agate is pretty, but like the Limoncillo of the next piece, it is very, very hard and turns best with carbide tools. The potpourri box in the lower panel is about 3" tall and 4½" in diameter and is made of Limoncillo
| ||
 |
|||
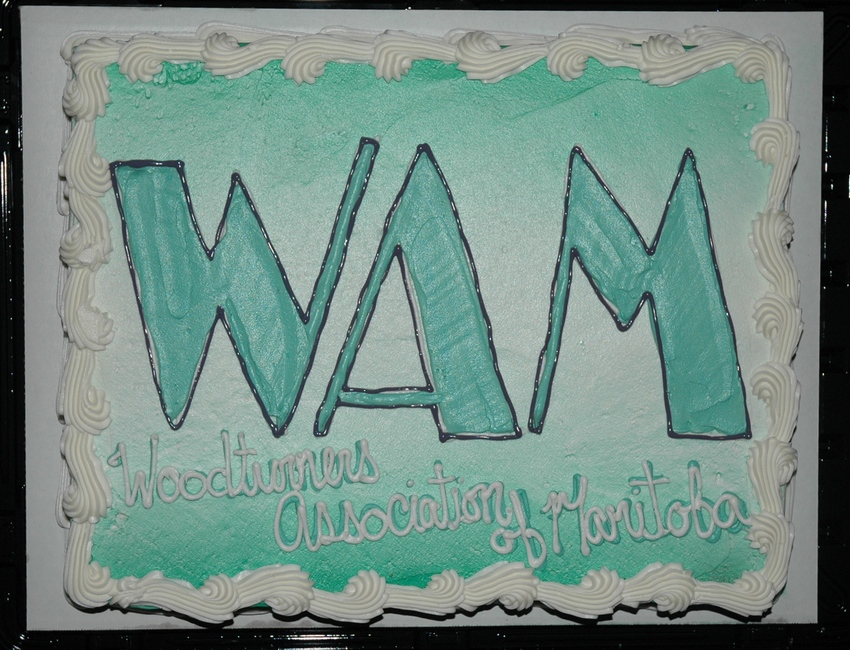 |
For our woodturner's club (WAM - Woodturner's Association of Manitoba) windup in June, I has a cake made. I thought it was kinda nice, so here's a photo of it. It was good, too!
| ||
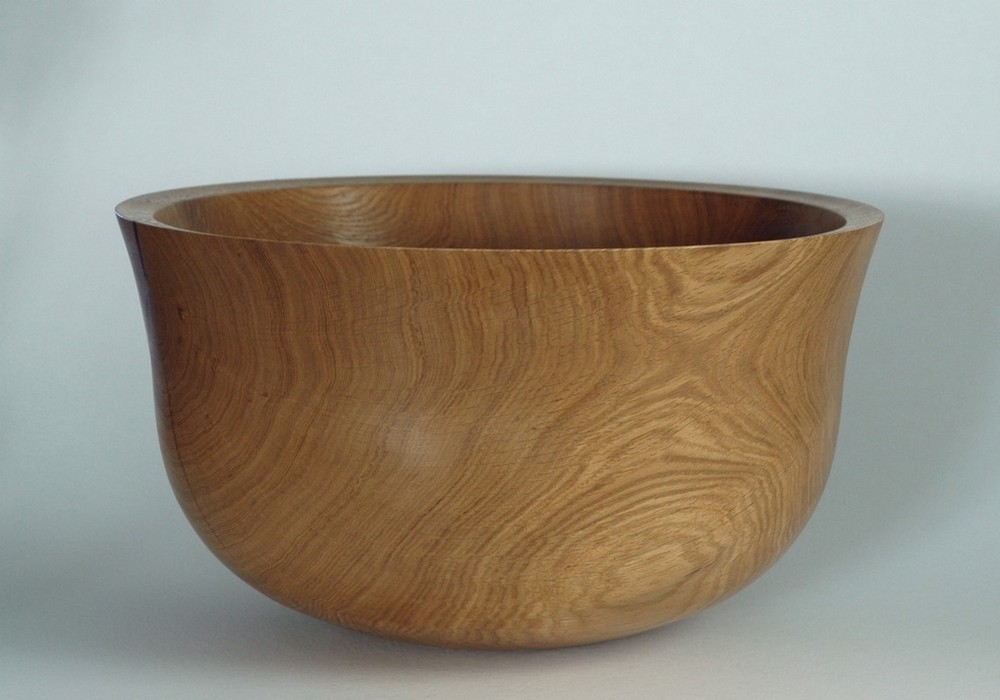 |
I rough turned this oak bowl years ago and finally decided to go ahead and finish it. It is a salad bowl, and it is huge and heavy - designed to stay put while vigorously mixing a salad in it. At 17" in diameter and 10" depth, a lot of people can eat from this bowl. This is part of a tree from the backyard of a friend's brother-in-law. The tree was HUGE and, unfortunately, I should have picked up more of it. It's probably all been burned by now.
| ||
|
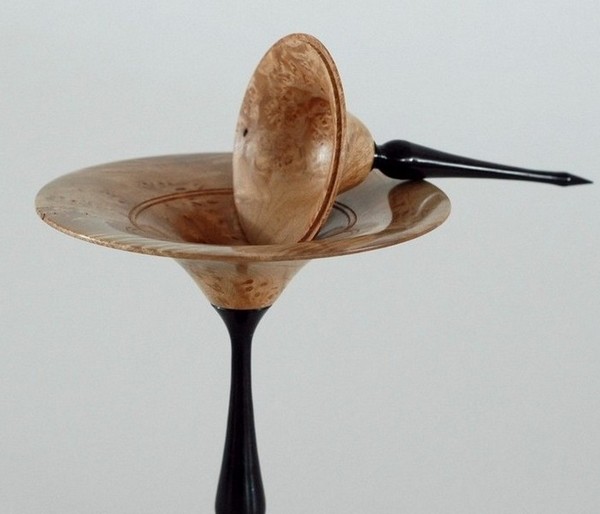
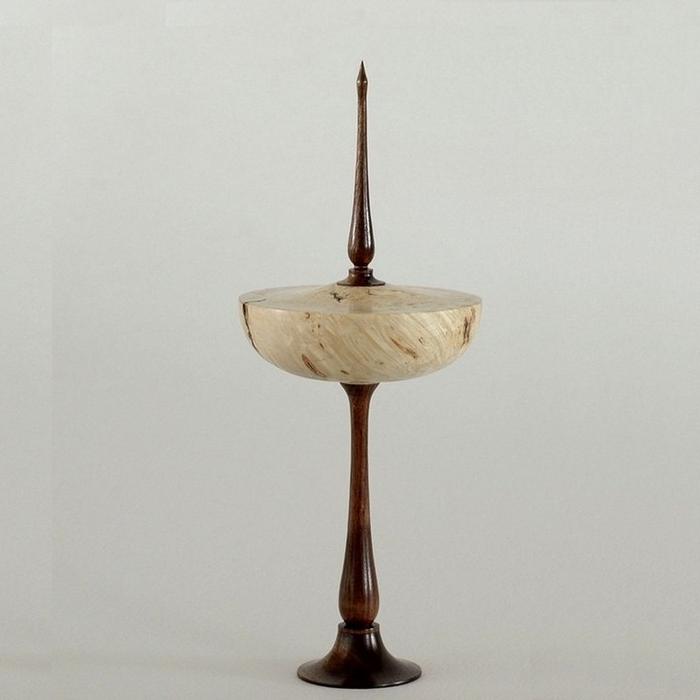
I kind of got a bug to turn tall, lidded goblets after seeing some on the World of Woodturners web pages, and here are two of the smaller ones I turned. The top one is of spalted birch, and it was so badly spalted it was soft and could be carved with my fingernail. I turned it rough to about ½" thickness and it was barely hanging together. Very sharp tools and a slow speed were needed to keep it from disintegrating completely on the lathe. After it dried, I treated it with Polyall 2000 and turned it to finished size. It is small, about 6" tall overall and 3" in diameter. It's finished with Danish Oil and buffed. The bottom piece is about 10" tall overall and about 4½" iu diameter. It is extremely thin and very delicate. My challenge was to make this as light as possible, and it weighs less than 2 ounces. In order to reduce the weight I even drilled out the finials so they are hollow, and the foot is also hollow. Don't ask me why - just for the fun of it, I guess. It is made of big leaf maple burl and ebony, and is finished with tung oil and buffed. | |
|---|---|
 |
 |
 |
 |
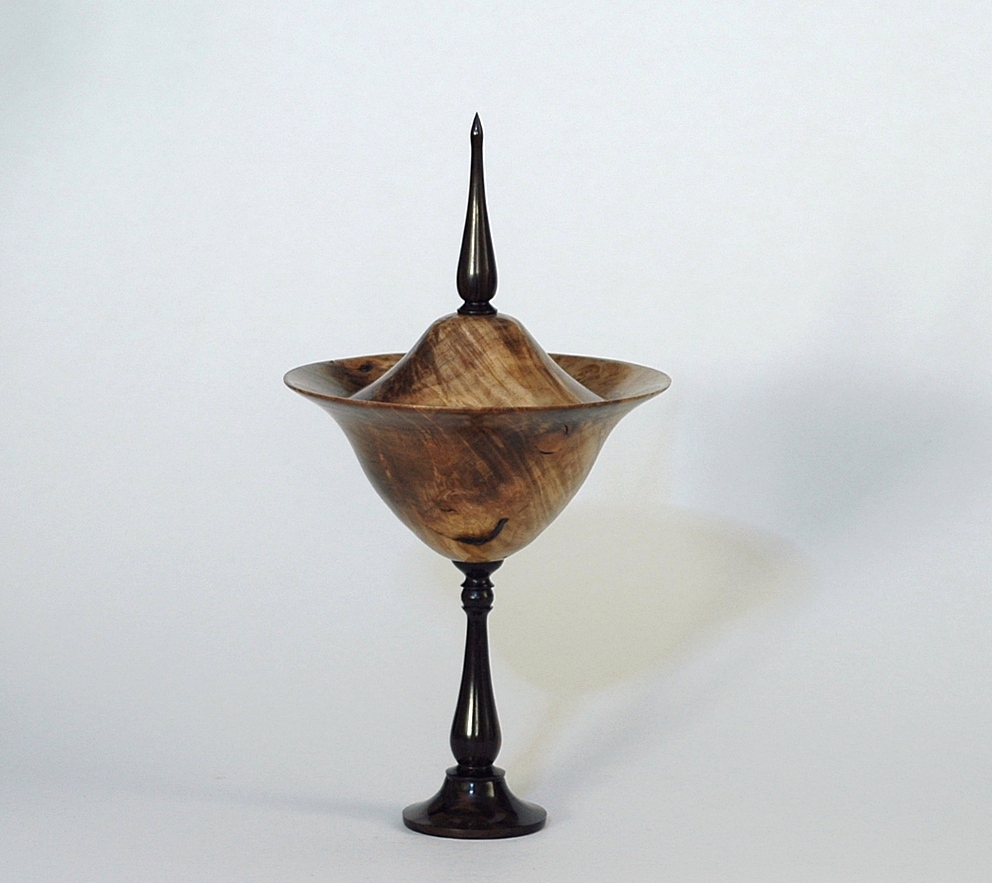 |
This goblet, of myrtle burl, is quite a bit larger than the previous two. It stands about 12" tall and weighs just 5.3 ounces. Diameter is a bit over 5". The wood came from Black Forest Woods in Calgary, and the store owner told me he got a whole barn full of the wood from the estate sale of an old man that collected the wood but never did anything with it. The wood is probably close to 100 years old. The piece is finished with Danish oil and buffed.
| ||
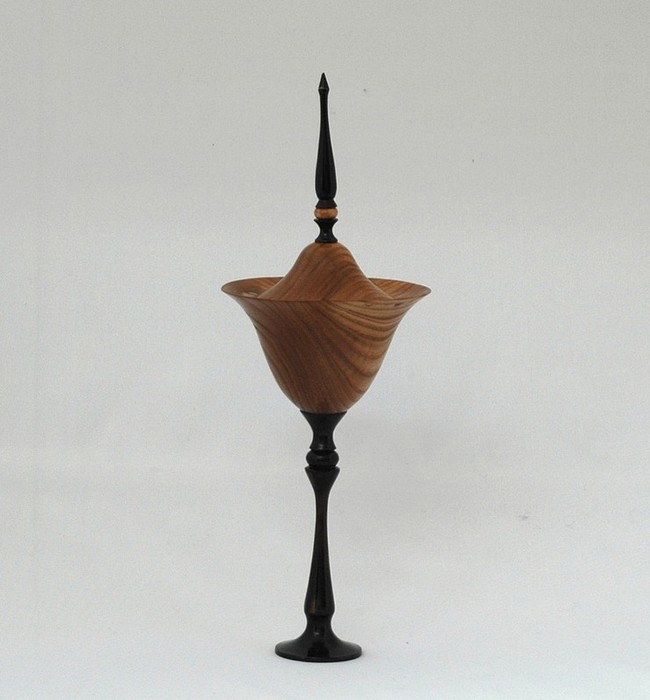 |
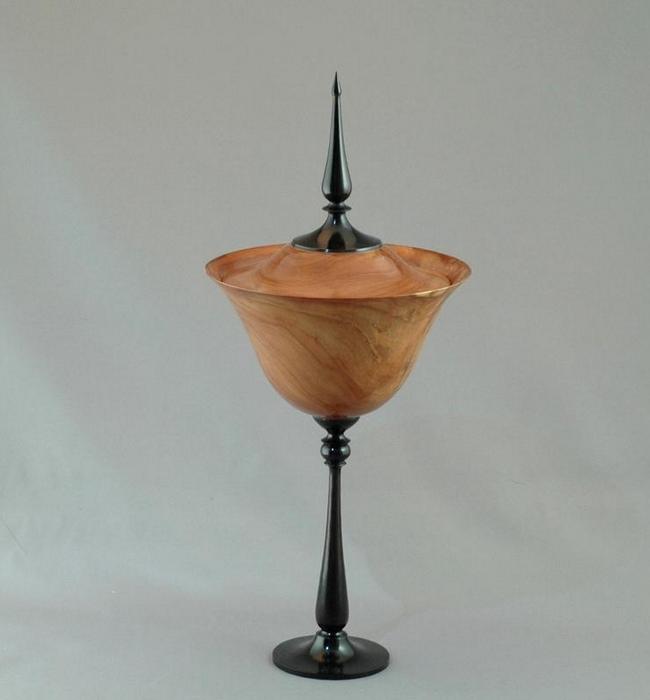
The Russian Olive goblet (top photo) came from Albert's tree. He was a neighbor, and he absolutely hated that tree. I loved it because it added a distinctive shade of green to the summer colors, and because it was twisted and knarly and unusual. It could have used some TLC, but since he disliked it so much, all he wanted to do was cut it down. I told him, if he ever decided to do it, to let me cut it down so I could have the wood.Well, Albert's wife died, and two weeks later, so did he. His daughter moved into the house and the first thing she did was tear down the fence to build a new one. She was in the yard looking morosely at the tree when I happened by, and remarked that she hated the tree, too. When I told her about my conversation with her dad she immediately asked me to cut it down because she was going to call someone to do it. I got a lot of nice pieces out of that tree, and this little bit was one of the last small pieces. It is 10" tall and finished with danish oil. The piece below is a remnant of some cherry I got several years ago, and it originated in Quebec. This is a large piece, about 12" tall, and very, very light for it's size. It is also finished with danish oil and buffed.
| ||
 |
|||
 |
This one is a little different, and much more difficult due to the small opening. The piece is of box elder, or Manitoba Maple, as it is more commonly known. The opening is only 3/4" and the box is more than 5" in diamerter, so I had to undercut the top inner surface with a homemade bent tool to reach all the way. The piece is barely more than 1/8" thick, so the woodturners out there can appreciate how difficult this was to do. By the way, I do this with hand held tools - I do not use a captured boring bar or laser measurement for any of my work.The lower photo shows the piece with the small cap and finial lying on top of it, just so you can see the small opening. Overall, the piece is about 12" tall and 5" in diameter. It is finished with water borne urethane and then hand rubbed with steel wool to a soft sheen. I prefer a soft sheen finish on light wood and the water borne urethane keeps the colors true.
| ||
 |
|||
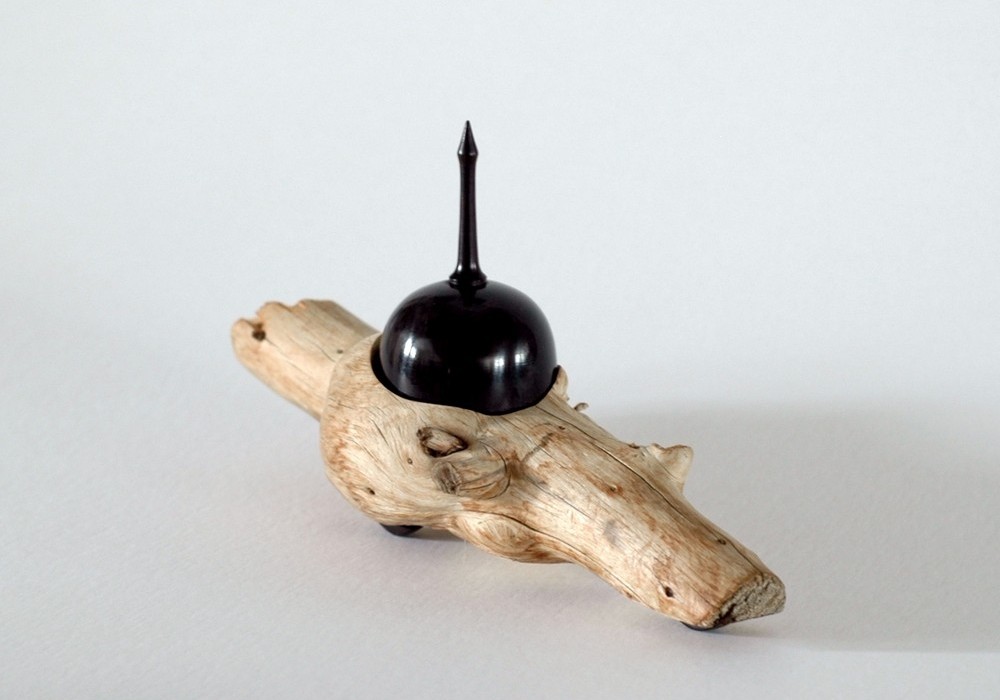 |
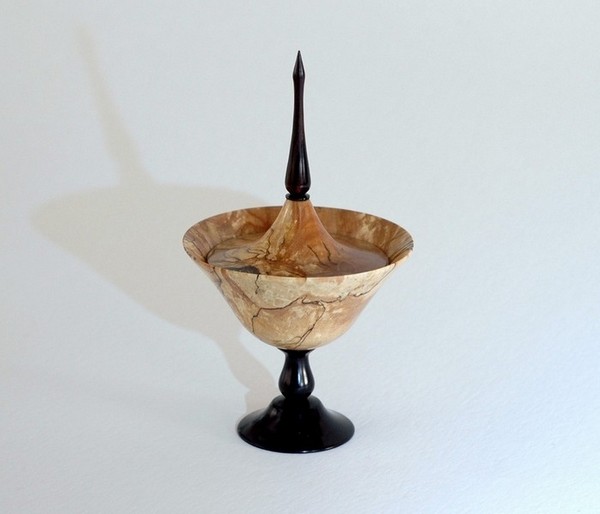
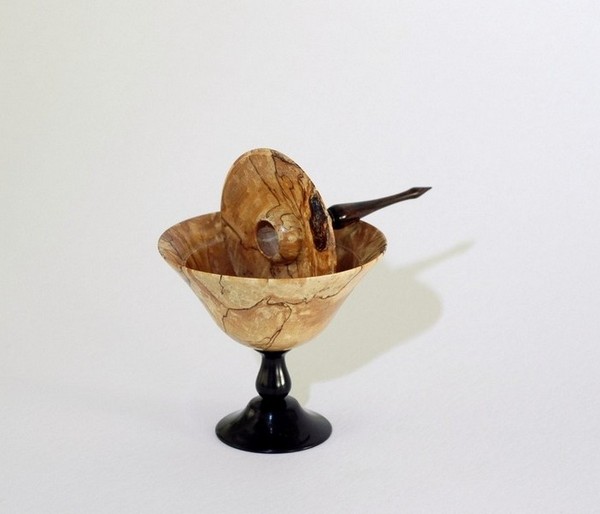
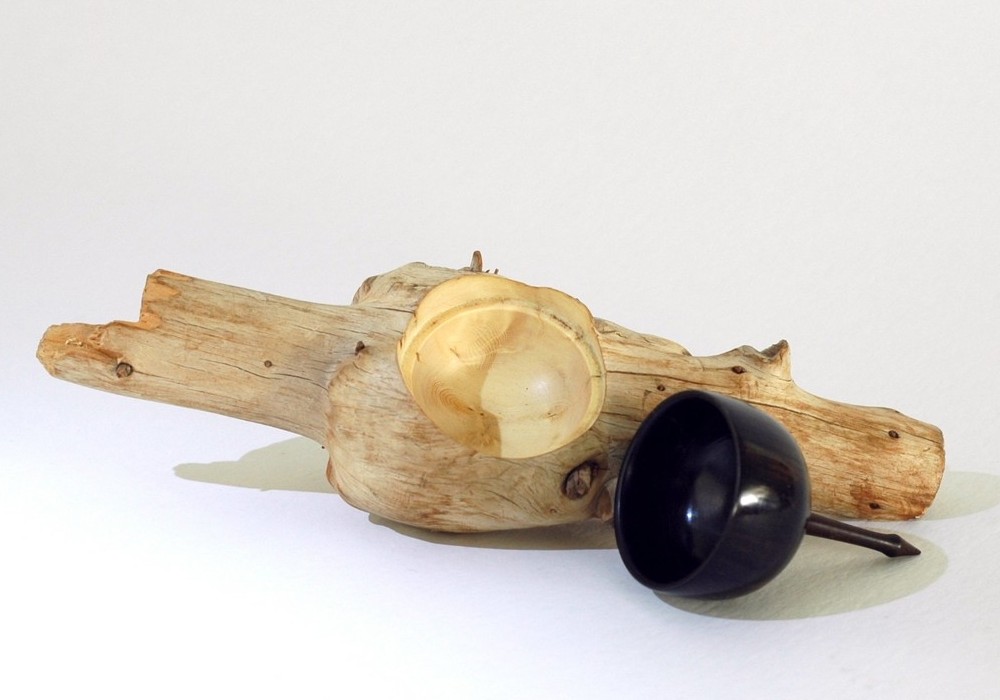
My sister-in-law, Diane, gave me a little stick of wood about 10" long that had been snapped off at both ends and had a little (3" diameter) round growth in the center. She told me she had gotten it from her friend, Laura, who had found it and wondered if I could turn something for her from the stick. She wasn't sure what it was and where it came from, but after I cut into it I determined that it was Manitoba Maple (box elder).Well, it was pretty tiny, and I had to think about it for a long time before I came up with the idea of leaving most of it natural and just turning and polishing a little box opening in the middle of it. I gave it an ebony lid and finial and three little ebony feet and left it unfinished - just buffed the ebony. I haven't spoken to Laura, but I understand she really likes it.
 | |||||
|
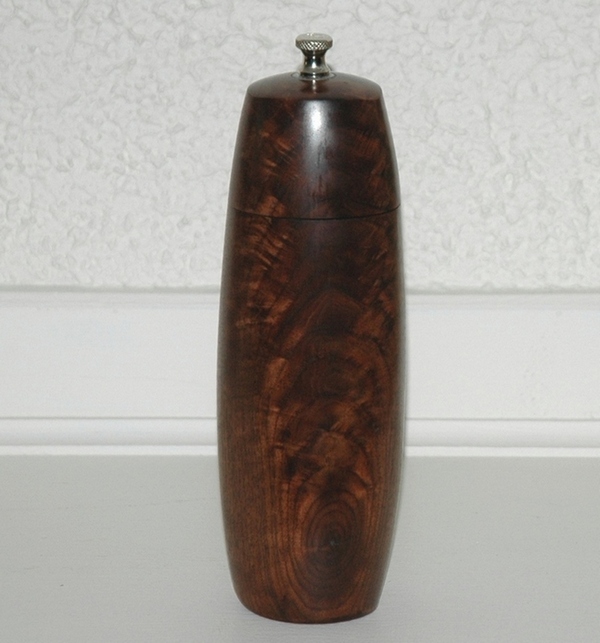
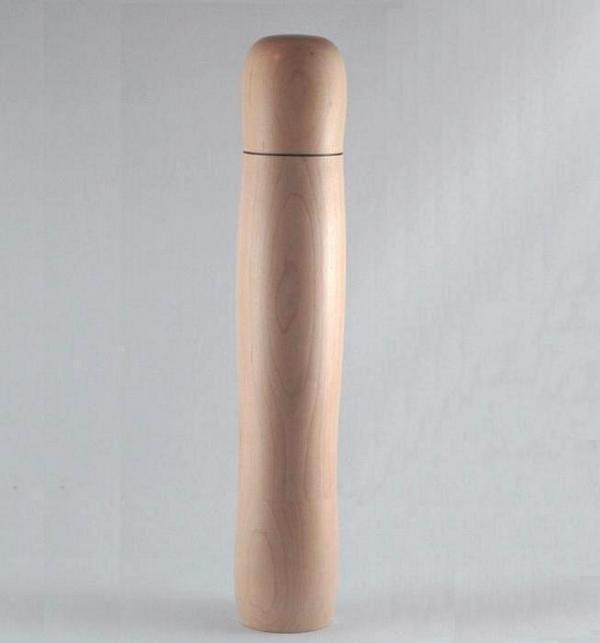
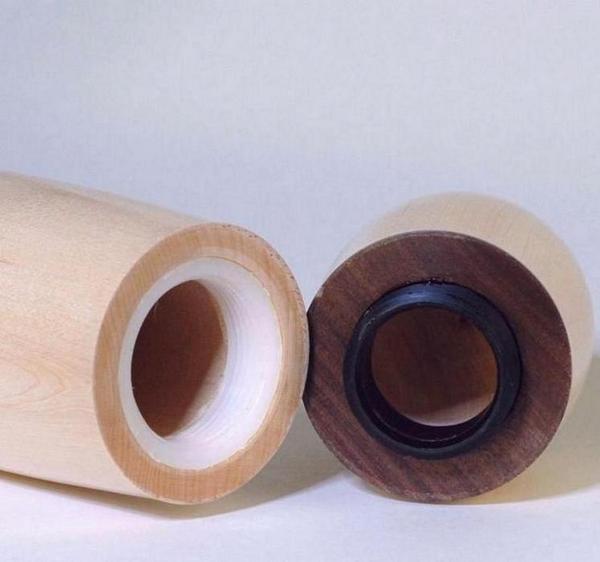
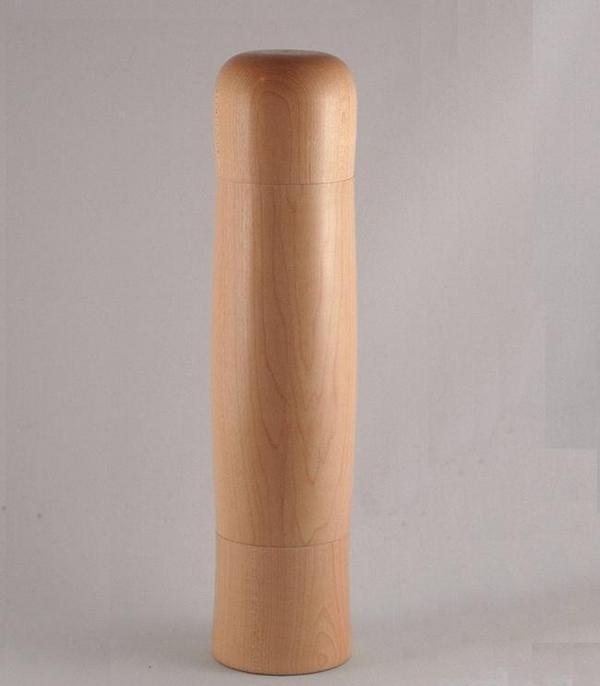
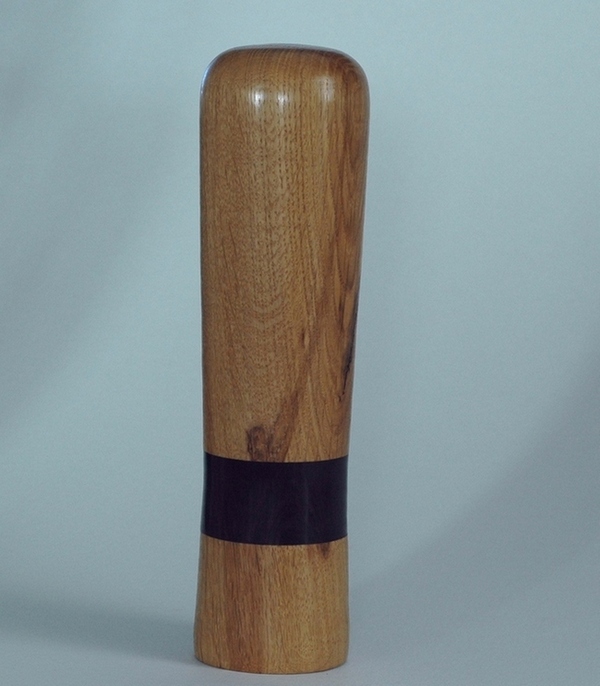
2009 was also a year of peppermills, and I am still turning them in various shapes and forms. There are two types of peppermill and salt mill mechanisms that I use. Of course, for a salt mill you want to avoid metal parts as the salt will corrode those very quickly. The normal peppermill mechanism has a long square shaft that extends through the mill and has a knurled nut on top. This type of mill is quick and easy to make and is not my favorite mechanism. The two mills on top are traditional 8" peppermills. The one on the left is constructed of spalted maple and is finished with water borne urethane which is tough and durable. The one on the right is of walnut burl, and is actually a 3 sided piece. The peppercorn chamber is in the center, but the outside was turned on three separate centers to give it a triangular shape with curved sides. I actually created a jig that would hold three of these so I could spin all three at once, clean up one side, then turn all three 120 degrees and clean up the next side, and so on. It sounds easy, but getting the jig right and getting even sides was more difficult than I expected. Then, there is all the hand sanding required and the restrictions in shape that one can create. I rather doubt I will be making many more of these, but it was fun to try. I prefer the ceramic mechanisms which can be used for salt as well, and which provide a lot more design opportunity in building a mill. The four mills on the bottom two rows are ceramic mills. The first one is shown closed and the second view shows it with the top removed. The mill is 12" tall and is made of maple with a walnut veneer separating the lid from the body. The lid uses a threaded insert made from PVC plumbing parts, which I figured would last a lot longer than creating threads in the wood itself. All of my mills have turned interiors that match the shape of the outside, as you can see in the hollowed out lid. To me, it does not appear to be much of a challenge to just drill the thing, like most do. I use a relatively small drill (1" auger bit) to drill my mills, and then use a Termite to form the interior. The real challenge with the ceramic mill is in its construction. The instructions that come with the mechanisms result in a weak and poorly operating mill, and, if constructed as directed, negate the use of any of the softer woods. What I have done is create my own method which incorporates a hardwood collar on the inside of the mill that is not seen, but which gives the plastic outer shell of the ceramic mechanism a lot more strength, and which, when epoxied in place, can be used with soft woods like redwood or Russian olive. I have made these mills of redwood burl, which would have been impossible without the collar. The bottom two peppermills are both ceramic mills. The bottom left is made of hard maple, and the bottom right one is of Manitoba burr oak with an ebony center part. The interesting feature of this mill is that the lid is also the peppercorn supply. The entire upper portion is hollowed out so that the lid beccomes the peppercorn supply container. This is also more effective because it prevents people from damaging the mill because they don't know how it works. For example, the mills that most people are familiar with work by holding the body and turning the lid. With a ceramic mill, it is operated by holding the bottom and turning the body. I've had people try to turn the lid on a ceramic mill and force the lid off. The design of the oak mill prevents that from happening. It was just a little fun twist to do, and would not have been possible without the revised instructions.
| |
|---|---|
 |
 |
 |
 |
 |
 |
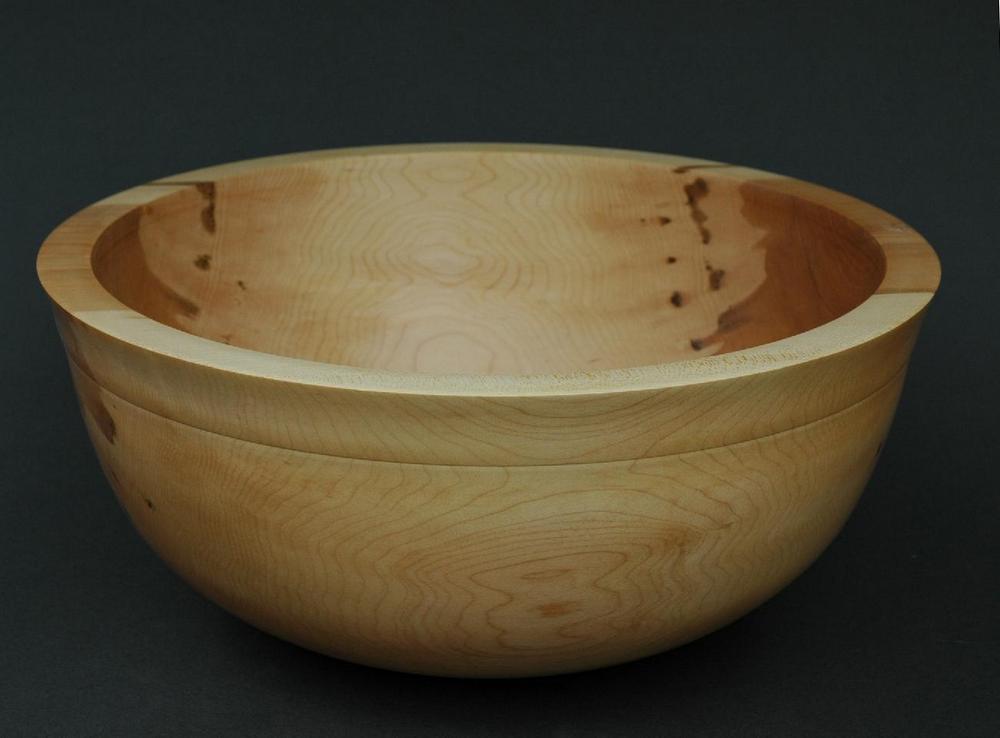 |
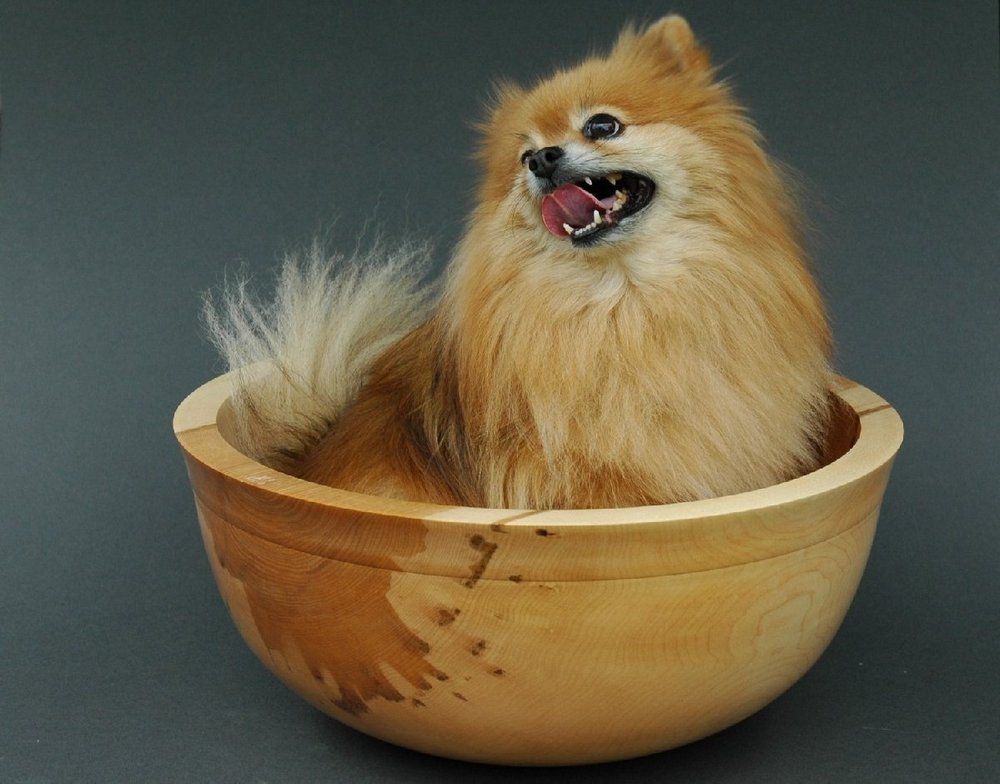
In my work from 2006 I posted a large bowl that I made for the Velvet Glove Restaurant here in Winnipeg. At the time I made that bowl, I bought two half logs from the same tree just in case I screwed up the bowl. So, the bowl featured here was rough turned at the same time as the other one in 2005, and for the last four years has been sitting in the garage on a shelf, coated with sealer and waiting to be finished. It is 18½" in diameter and about 9" deep. Big!This bowl went as a donation to the North Dakota Museum of Art for their annual auction, but before it went we plopped the little Pomeranian into it, and hey - She liked it! Happy as a coot sitting in the bowl and didn't try to get out. I think, had we left her there, she would have curled up and gone to sleep! (And yes - I did wash the bowl out before sending it off - sheesh!) Anyway, it now belongs to someone in Minnesota. It is finished with tung oil on the exterior and a boiled linseed oil on the inside so it is usable, as intended, as a salad bowl.
 | |||||
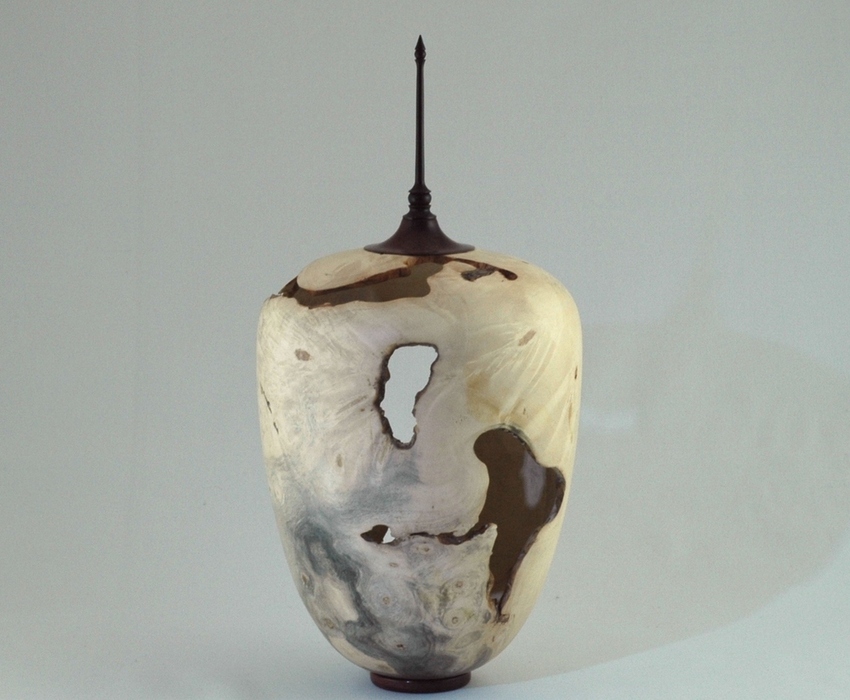 |
This piece was actually posted in the 2008 work, but I liked this photograph better, so I thought I would post it again here, because I liked the other photo too. This one just shows the piece a little better. It is of buckeye, with a purpleheart lid and foot and ebony finial.This is one of the most challenging pieces I have ever turned, due to the dirt and stones embedded in the material and the softness of the wood. I deliberately left texturing toolmarks on the inside which are visible through the voids in the piece. It is very, very delicate and weighs only ounces, although it is about 13" tall overall. | ||
 |
 |
|
|
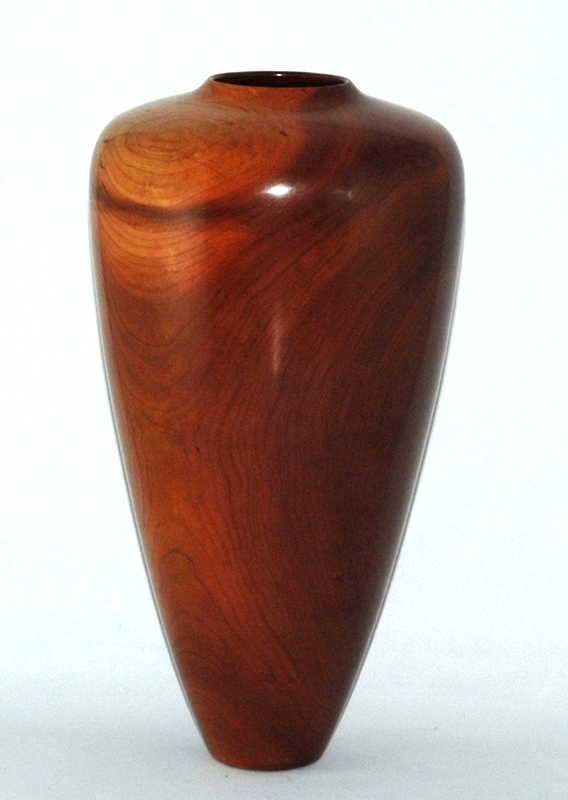
Although this cherry vase was included in my 2007 work, I thought I would repost it, side by side with the way it looked four years ago to the way it looks now. Cherry is one of the most beautiful woods I know, and is one of the most pleasant to work with. Especially nice is the patina that cherry develops over time, and the rich darkening that occurs with the wood as it is exposed to the atmostphere in your home. This is plain to see in these photos, and I thought I would include it
| ||
 |
This big leaf maple burl vase is about 18" tall and 10" in diameter and was turned to a uniform thickness of 3/8". It is finished with tung oil and buffed and waxed with the Beall buffing systemI donated this vase to a fundraiser for the Winnipeg Symphony Orchestra, and it was a real pleasure to attend the opening concert of the season and see my vase on a pedestal on display, and then enjoy the wonderful concert by the orchestra. The WSO is a fabulous organization - one of the many fine cultural organizations we enjoy here in Winnipeg, and I welcomed the opporutnity to help support the organization. | ||
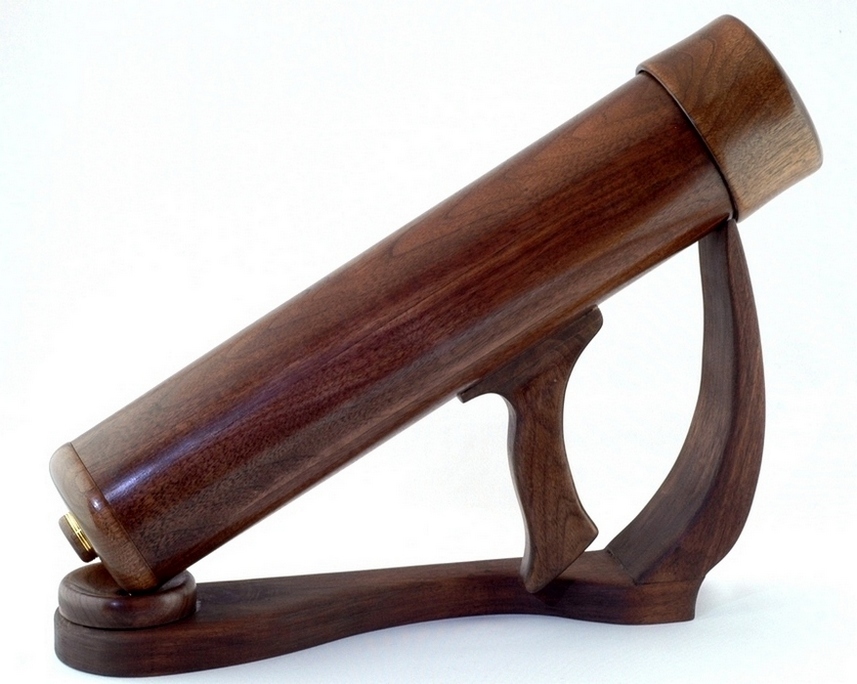 |
Several years ago, I was at a work conference in Washington DC, and on a Sunday afternoon Karen and I visited a local art show. It was a fabulous display of some of the finest art I have ever seen, including some really nice woodturned items. One of the booths had several kaleidoscopes in it, and I decided then and there that I wanted to try making some. The first one I made was from a kit just to gain familiarity with how they are made.This one is completely hand constructed from walnut planks that I had. The barrel is stave constructed and turned, the mirrors are cut from a large mirrored slab and the oil filled cell is made of plumbing PVC pipe and glass I siliconed together. Making the cell and getting the right consistency in the oil was very difficult, and I had hours of experimentation with various mixtures. I eventually ended up with thinned mineral oil. Another huge issue was determining how to put together the front of the piece so it would rotate freely, and I finally figured out a wooden split ring system that actually works very well. Then there was the grip and stand to deal with, so I just used my imagination to come up with a stand that seems to fit the overall design of the piece. At least, a lot of people seem to like it. I am now considering working on a kaleidoscope with illuminated and interchangeable cells that rotate electrically. I haven't figured it out yet, but that is the challenge - right?
| ||
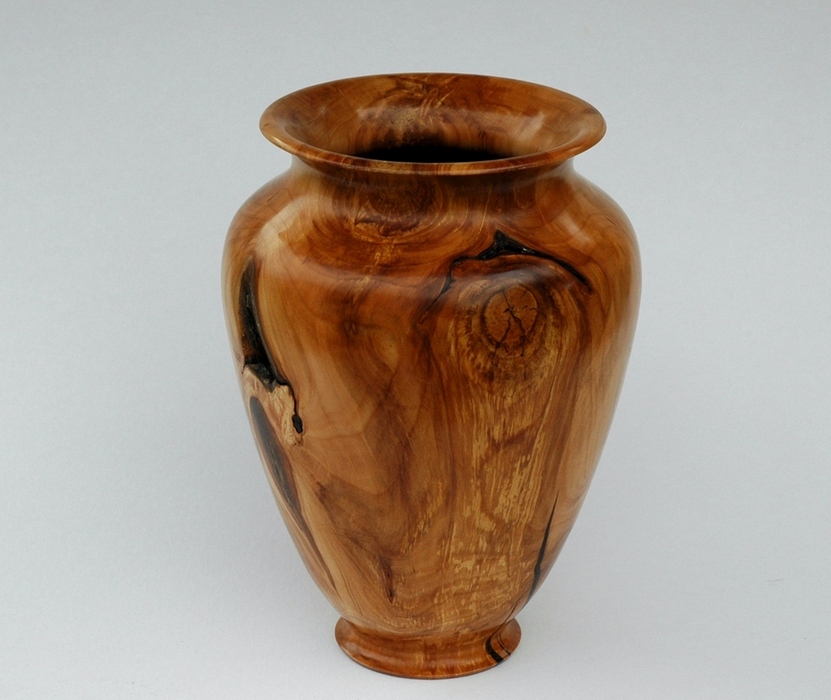 |
I always tell my woodturning friends, "If you hear a chainsaw in the neighborhoor, run, don't walk, to see what kind of tree is being cut down."That was the case with this. I heard the chainsaw and followed the sound to a backyard four houses down the street. They were in the process of cutting up a large amer chokecherry tree, and were delighted that I would take some of it off their hands. I loaded up the wheelbarrow and trundled it home, where one of the pieces ended up as this vase, about 12" tall and 7" in diameter. It is finished with Danish oil and buffed.
| ||
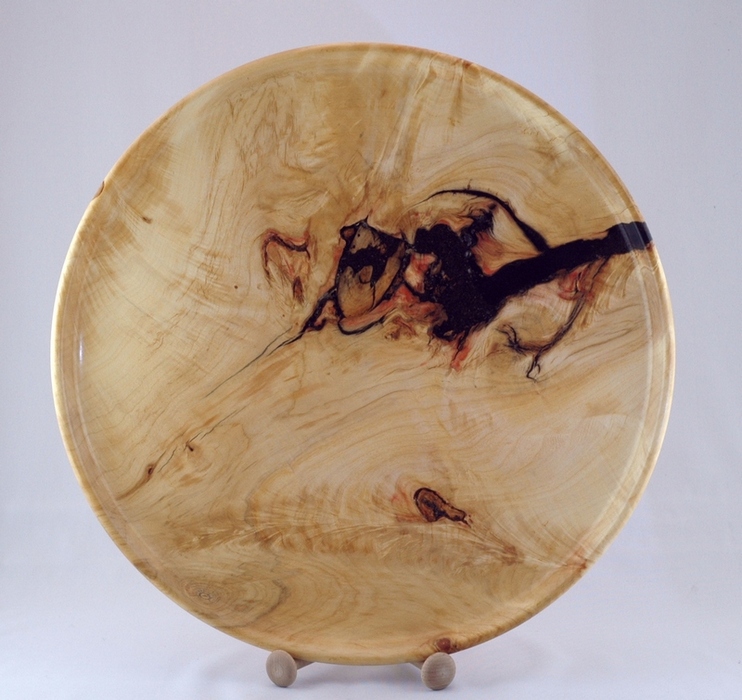 |
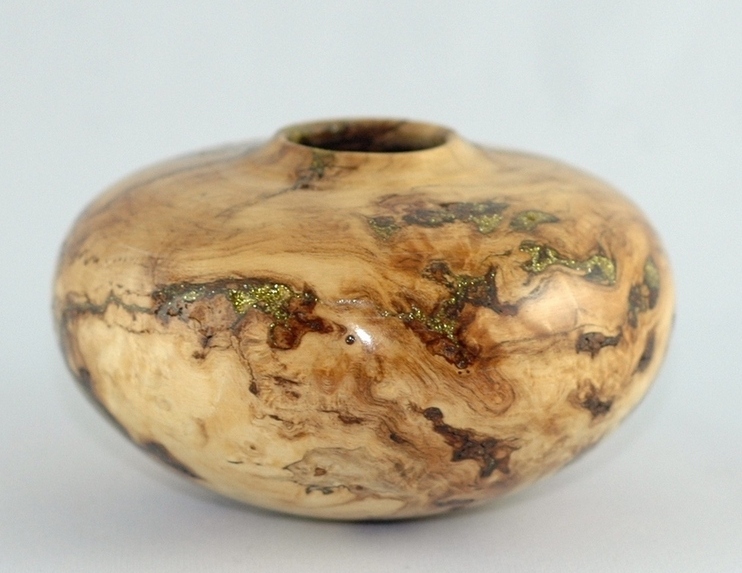
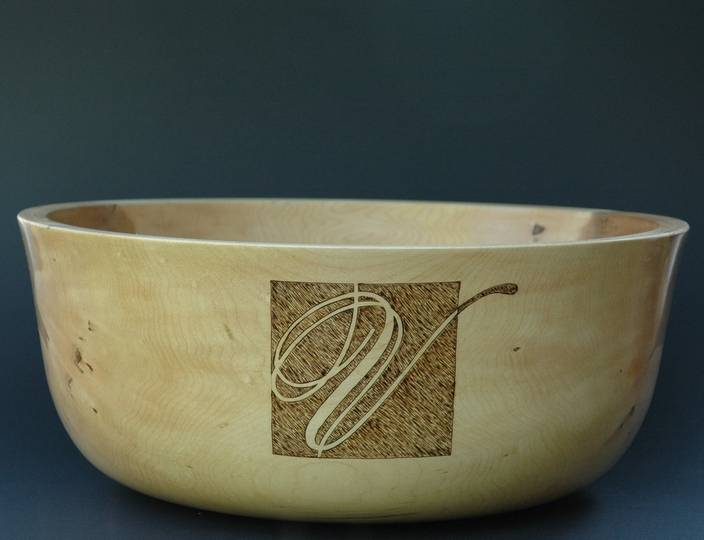
The piece on the left is a platter that I made a couple of years ago, but for some reason I did not put it on the webpage. It's a large platter, about 18", and everyone sees something different in it. I've had many offers for it, but it is a fixture in our house until Karen says it isn't. Like most of my Manitoba maple pieces, I used water borne urethane as a finish in order to retain the light tone and colors in the wood.The piece on the left was also made years ago, at the very beginning of my woodturning exploits. It is a small maple burl hollow form. I picked up this bark ridden and hole-y wood in Wisconsin. I used child's glitter that I picked up at Wal-Mart and mixed it with clear epoxy to fill all the holes. Then Karen took it to work. I forgot it existed until Karen retired in December and was surprised to see how good it still looked. It just needed a little buff to bring out the finish.
 | |||||
 |
Visting in Calgary a couple of years ago, I decided to go the Black Forest Hardwoods to see what they had. They had a showroom full of madronne and myrtle burl they had picked up at an estate sale some years before. Apparently, the old gentleman that died had purchased a barn full of wood 80 or so years ago and had just let it sit there, and when his estate was settled Black Forest bid on the wood. It was very dry and very beautiful wood, amd this urn is just one of the pieces that I picked up.This is a large urn, holding more than three liters. The dimensions are 12½" in diameter and the body is about 6½" in height. The lid is madronne and the finial is African blackwood.
| ||