I just finished the 2006 update and it is well into 2007 - like September - like, as my granddaughter would say. However, I am turning over a new leaf, and not a moment too soon, I think my lovely wife would say. However, the leaf I am talking about is that I will try to keep my website a little more up to date than I have in the past.
I am working on that on my own computer, though, and if I want to get the 2006 stuff on the Web I'd better do it now. So the rest of this page is currently under construction.I hope you enjoy this update. Again, thank you for visiting, and please let me know you were here. I love hearing from people who visit the site.
 Wellllllll......... so much for good intentions. Guess what! It's March, 2008, and I sit here with a damaged hand wondering what to do with my time. Then I open an email and someone says, "Herm - what happened to 2007?"
Ooooops! I guess I forgot, or time gets away, or I didn't have the inspiration or inclination to go to all the work. Whatever, it didn't get done, so maybe today I'll get a start on it, even though my hand hurts and I have to type using less than all my fingers.
What did I do, you ask? Well, something stupid (and not the song, either). I tried to catch something slipping off the bed of the lathe and inadventently touched the drill to the edge of the hole in the still rotating piece on the lathe. The drill bit had been resting on the tool rest with my right hand loosely holding it. Anyway, the drill bit grabbed the wood. The vice grips spun round and the blunt end of the drill bit ripped between my thumb and index finger. Ouch! Deep rip in the hand, blood everywhere. Grab a handful of paper towel and use masking tape to put pressure on the towel while decide if I want to go in to the doctors.
Anyway, I changed out of my shop clothes, got into some clean clothes and headed for the emergency room with shavings in my hair. Four hours and a whack of stitches later, I'm on Tylenol and lounging on the couch. Here's the hand after healing for a couple of days and between bandage changes. That is a very deep rip that extends almost as far down the back side as it does the front side that you can see. 20 stitches, inside and out.
My advice - avoid doing this if you can. This photo was taken after the wound had already started to heal, several days after the incident.
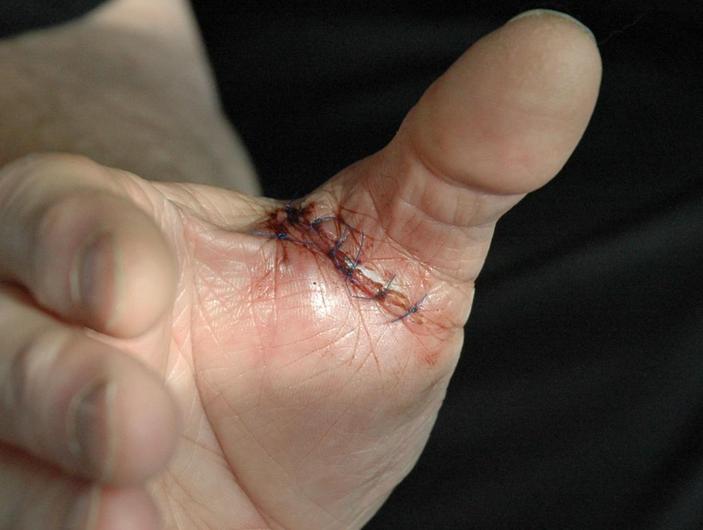 I am pretty lucky though, in that I did not do permanent damage to nerves or tendons. My thumb is a bit numb at present but I have been assured that will go away. In all the time I have been turning, this is the first serious damage I've done to myself, and I posted this picture just to remind you that a lathe is a serious woodworking machine that can hurt you, and that physics is stilll not something that one should challenge.

 |
 |
On a lighter note, Karen and I decided we wanted to learn to carve pumpkins properly, with faces and all, so we took a one-day course at Lee Valley Tools.
It was a great course, and we loved learning how to approach the craft of carving one of these pumpkins. We put them out on Halloween evening with a small light bulb inside them and watched the effect on the kids. We'd hear footsteps and chatter approaching our front door, but no one would ring the bell. We'd peek out the window and see them all gathered around the pumpkins and wondering where we got them. Several of them asked if we would teach them how to do that next year.
If you are going to try this, make sure your pumpkin hasn't been frozen. Mine, the left one, had obviously been frozen since the flesh was brittle and would flake away. A clean cut was almost impossible.
Karen's pumpkin is on the right. It doesn't take much to see that she is really the artist in this family as hers is far superior to mine.
|
 |
Many years ago, I made a long distance call to a professor in Petrozavodsk, Russia. He was a skilled and talented choral conductor and had expressed a wish to emigrate to Canada. It was early in the morning when I reached him, and when I asked him if he would be willing to fly to Canada to audition to be the conductor of the Winnipeg Philharmonic Choir, he agreed immediately.
To make a long story short, he ended up in Canada with his wife and three children and they are now citizens of this country. Yuri still conducts the Winnipeg Philhamonic Choir and several other choirs in Winnipeg.
Although I can no longer sing in the choir, I am currently on the board as chair of the program committee, and Yuri and I continue to be friends. He is a wonderful cook and when we get an invitation to party at his house we always look forward to the wonderful Russian cuisine we know will line the buffet tables.
So, when we got the invitation to attend his 50th birthday party I wondered what to give him for a gift. I ended up turning this 13" ash salad bowl and engraved his name on the bowl along with a little musical motif. I was pleased to see his reaction to the personal touch.
The bowl is finished with tung oil on the outside and buffed, and with linseed oil on the inside.
|
|
My, my, how things change!
I was once debonair and handsome and somehow I've turned into this grizzled old bear with a manner to match. Ah well, I still enjoy life.
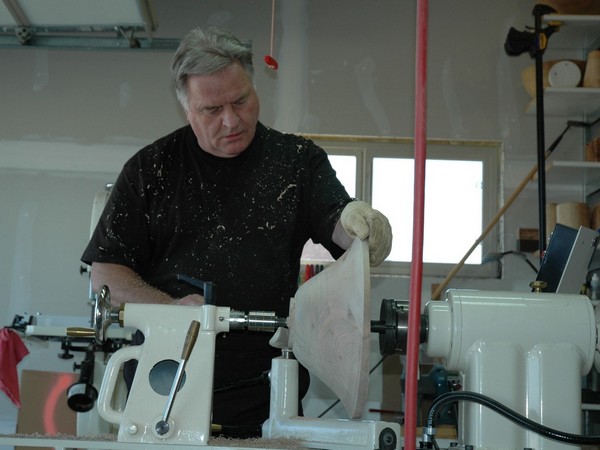
What I really enjoy is doing demonstrations and teaching classes, like the ones I do for the Lee Valley Tools store here in Winnipeg. The top left photo is me standing at their lathe in the very nice seminar room they have. It is a small Jet lathe, and the students have six General Maxi-Lathes for their use. I love teaching woodturning, but it is very tiring and a little scary with a room full of new turners and pieces of wood flying about.
Well - not really, although there has been the odd piece of wood hit the floor or blow up after a tool catch.
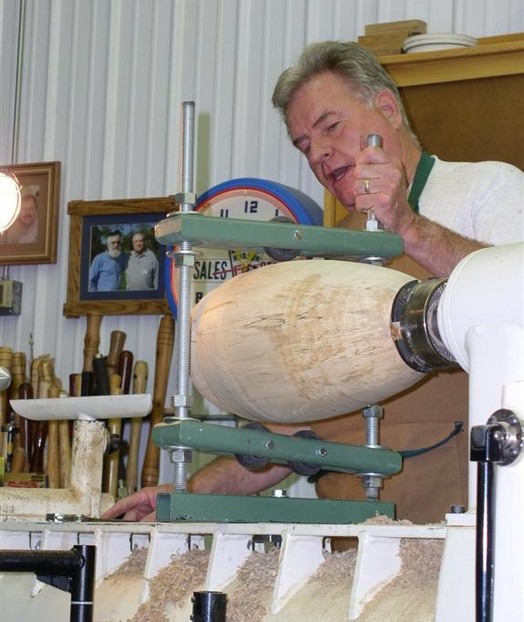
I received an invitation from the Coulee Region Woodturners to come down and demo the Termite for them. So I went down there and we met in Doug and Dennis' beautiful shop just outside of Winona, Minnesota. That's where the top right photo was taken. This is a terrific group of people and I thoroughly enjoyed my day with them. They seemed to enjoy the class and I understand they were trying to negotiate a bulk purchase of Termites after I left.
The person responsible for getting me down to the Coulee Region Woodturners Club was Pam Reilly, a good friend and a wonderful person. I stayed at her house and enjoyed a few fine glasses of wine and nice steak with Pam and her husband George.
In the bottom left photo I am preparing some of the stock I will use in my demo for the club on Pam's lathe. She has a wonderful space in which to work, and a very nice Oneway lathe. I'm making a few chips fly here on a maple bowl blank.
George does a bit of turning, too, and he gave me one of his wine goblets with the wood turned stem. I'm posting the bottom right photo of a relaxing afternoon in our back yard to show that his goblet has become one of my favorites.
|
 |
 |
 |
 |
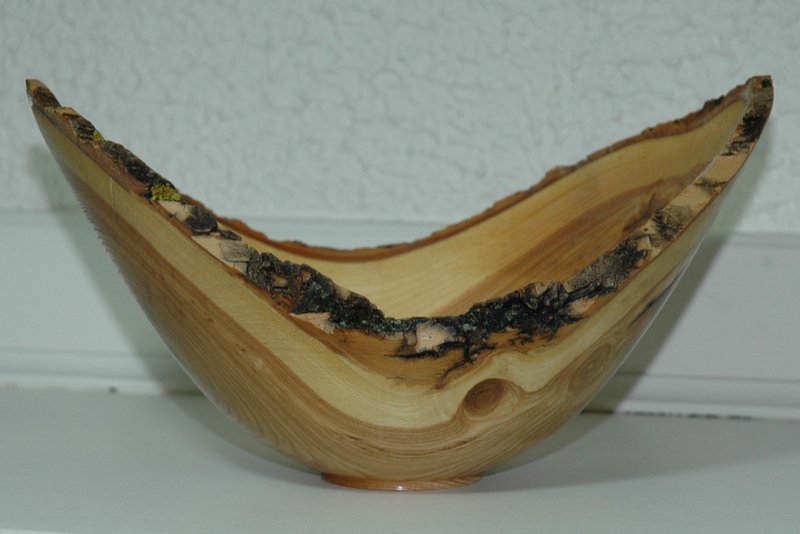 |
These two pieces are both from the same tree trunk. It was an ash tree that I acquired from my good buddy, Jack Hamer.
Believe it or not, these are two different bowls. I tried to make shape and size identical on these two, which is harder than it might seem, and I think they turned out well. I like the contrast that shows in the lovely grain of the wood even though these two were right beside each other in the tree.
Turning a bowl with a natural edge can be tricky with some woods, especially if their bark tends to be loosely attached. Quite often I need to use some CA glue to hold the bark in place. Tearing out of the wood fibers is also a challenge with the softer wood just below the bark, the sapwood. With every revolution of the piece a woodturner needs to cut across the end grain of the wood twice, and the end grain is subject to tearing out. Some woods are more susceptible to tear out than others.
Another challenge is sanding the piece. If I sand it while it is spinning on the lathe, the leading edge of each wing will hit the sandpaper first, and the edge loses its crisp-ness. The leading edge becomes rounded although the trailing edge stays nice and crisp. Very quickly the bowl's balance and look of even-ness will disappear. The best way to avoid this is to make the final cuts with the gouge as clean as possible and then sand the piece, with the grain, by hand.
If I remember correctly, these bowls were finished with urethane and hand rubbed to a soft sheen.
|
 |
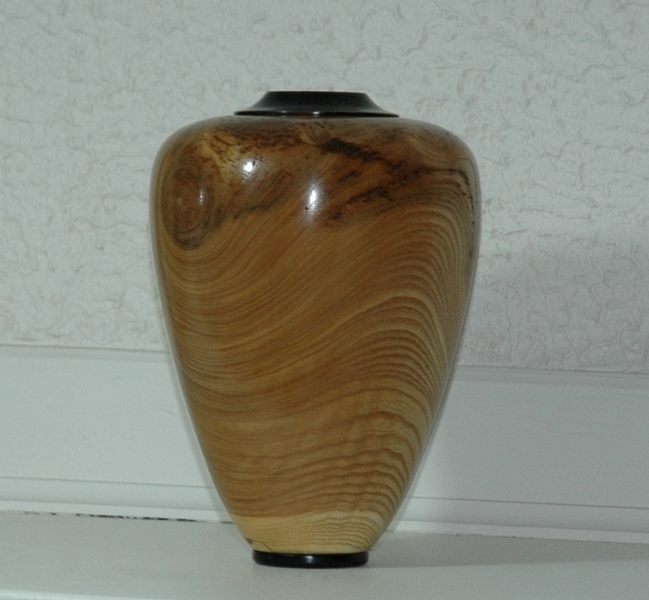 |
This piece is 12" tall and is made of ash found in Manitoba. The black collar and foot are of ebony .
The piece is finished with Waterlox tung oil and then buffed using the Beall buffing system.
|
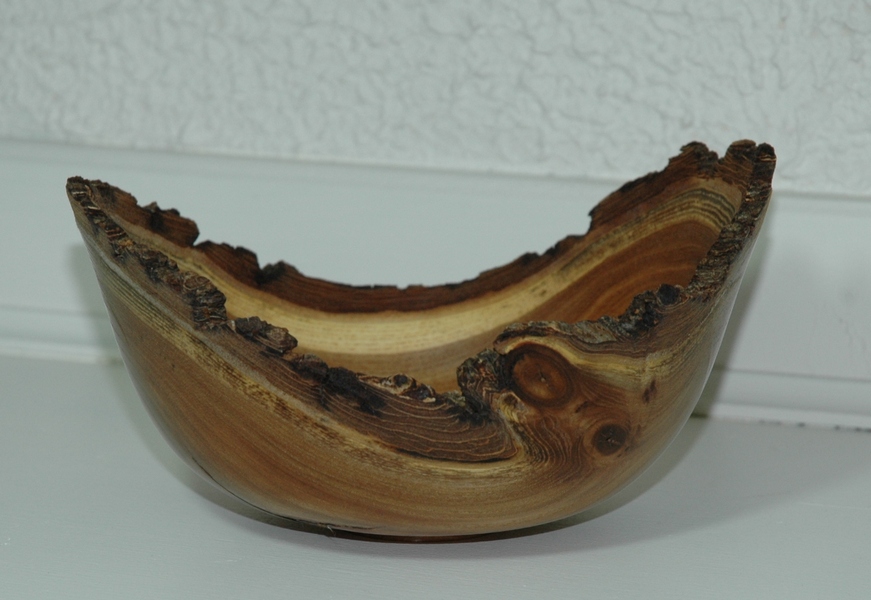 |
Another natural edge bowl of ash (I think - can't recall). This one is about 10" in diameter with more vertical sides than the two previous ones I've shown.
I am partial to this bowl because of the interesting grain changes that occur around the knot in the side. Finished with tung oil and buffed.
|
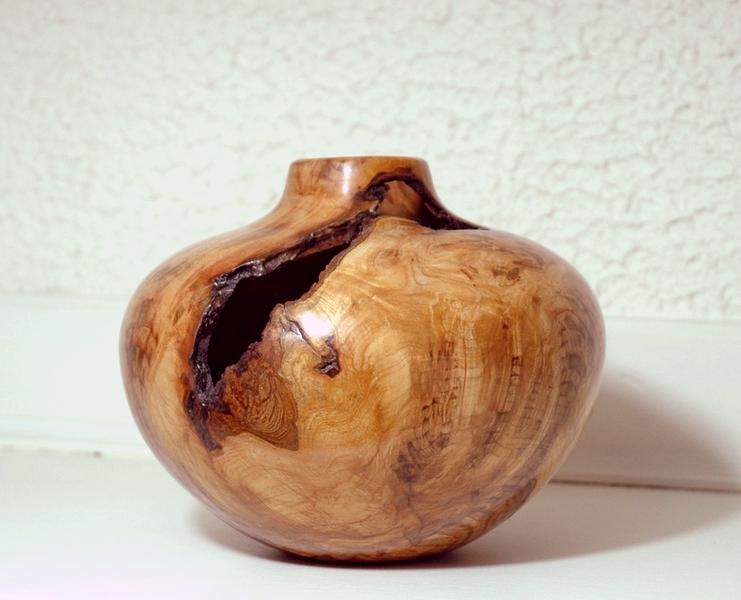 |
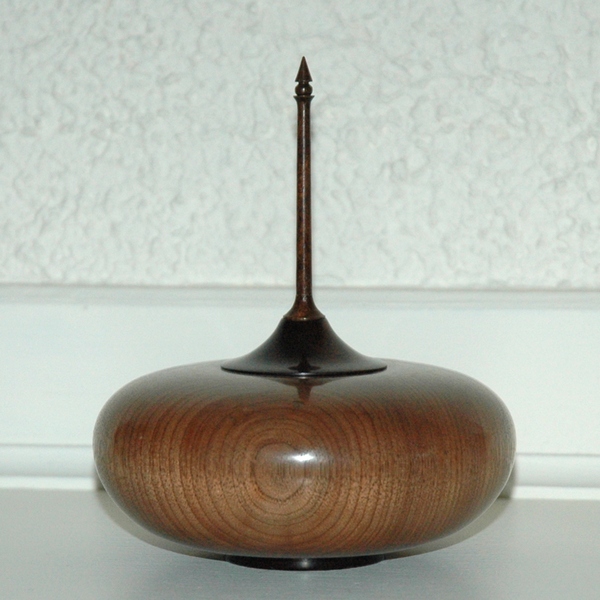
The top photo shows an elm vase with a few voids and some bark inclusions in it. A void can be caused by injury to the tree such as wind damage, insects, birds, etc. A bark inclusion is where bark has filled a gap somewhere on the exterior of the tree.
This piece is finished with tung oil and buffed. It is about 9" in diameter.
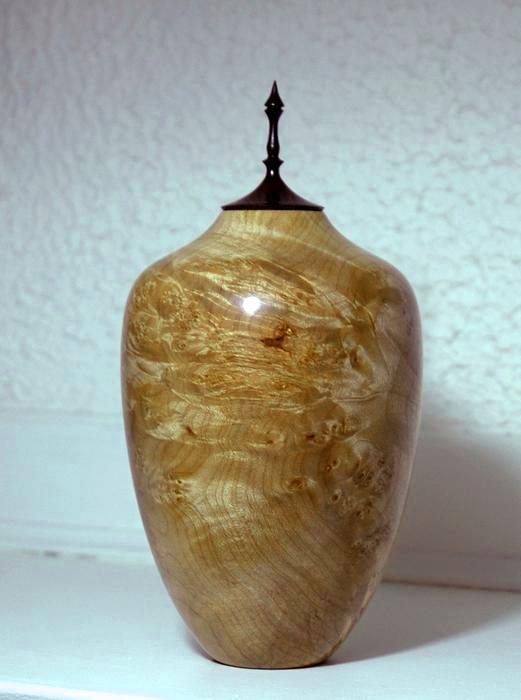
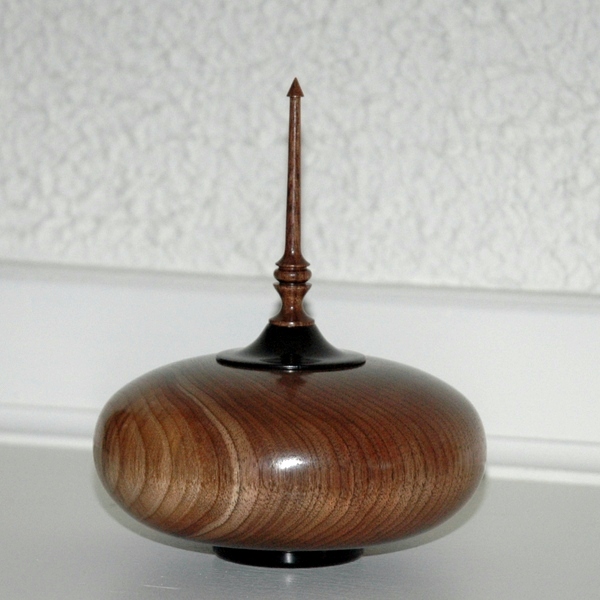
The bottom photo is a 10" tall form of big leaf maple. The lid and finial are of ebony.
|
 |
 |
 |
 |
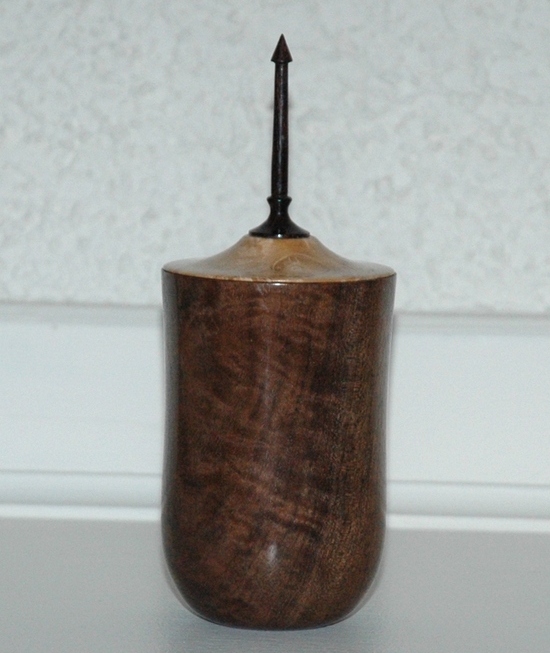 |
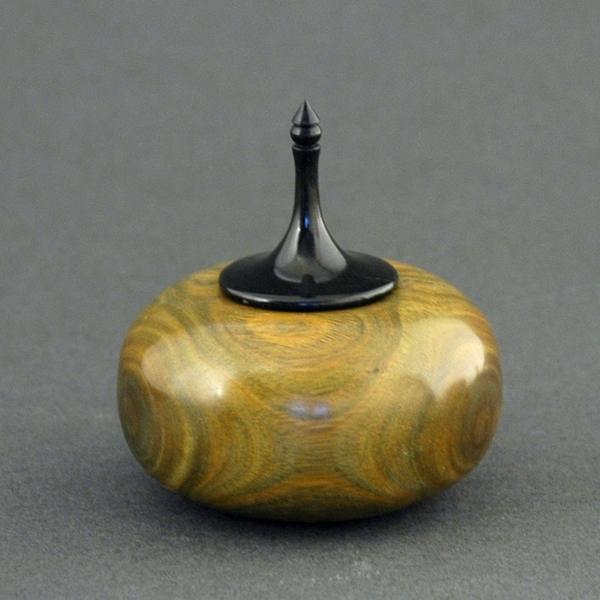
I like turning these little keepsake boxes. They are very challenging due to the shape and having to reach far, through a small opening, to the outside diameter underneath a fairly flat top. I use a bent shaft tool with a small high speed steel cutter to do these, but the hardest part is making sure the walls are of a consistent thickness. I turn these very thin, except for the ones designed to be used as a pet urn or a keepsake urn.
The two at top are made of a walnut tree found in the north end of Winnipeg with lids, finials and bases of ebony.
Everyone says, "But walnut trees don't grow in Winnipeg!". But this is proof that they do, although I may have found the only one. This was a fairly large tree, probably 12" or more in diameter at the base. Of course, it can't hold a candle to the 5 foot diameter monsters we used to see in Iowa. These are both about 5" in diameter and 6" tall overall. Finished with tung oil and buffed.
The one on the bottom left is of lignum vitae, or "Palo Santo" as it is known in Paraguay where this piece came from. It was brought back from Paraguay many years ago by my friend, Mirek Stranc, who was volunteering his services as a plastic surgeon to perform critical surgeries. He gave me a little piece of root to try to see what I thought of it.
Now, keep in mind that lignum vitae is so dense it does not float, and it has been used for decades for bushings on propeller shafts of big ships. But it cuts like butter, as many dense woods do. It turns green and it smells heavenly when cut - a spicy, pepperish smell. It also does not require any finish. Just buffing to bring out the resin and shine in the wood. So, this little piece, 3" in diameter, only has oil and wax on the lid.
The tall box on the bottom right is of claro walnut burl, a completely different variety from the two walnut boxes above. I love the burl figure in this wood and wish I could find a lot more of it. The box is about 3" in diameter and about 6" tall overall. Finished with danish oil and buffed.
|
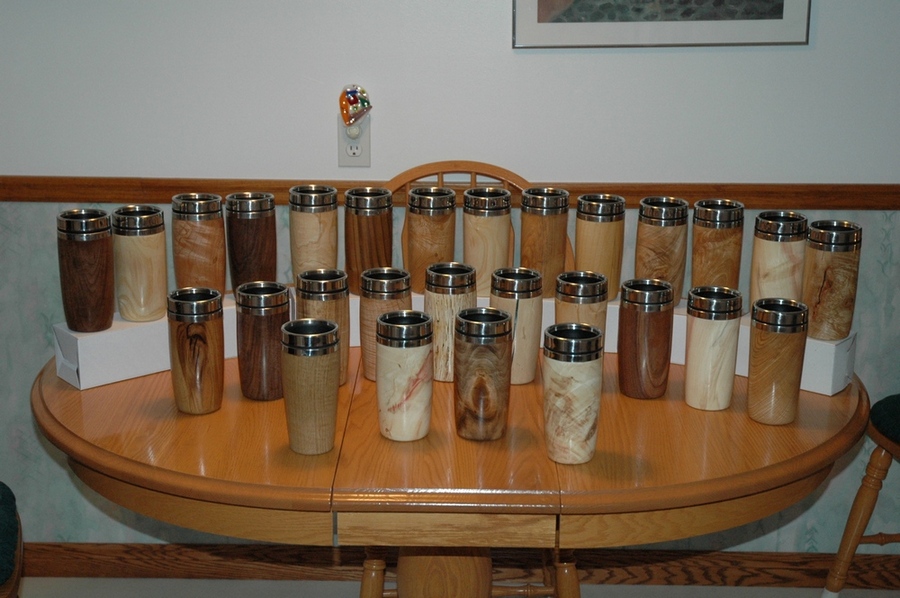 |
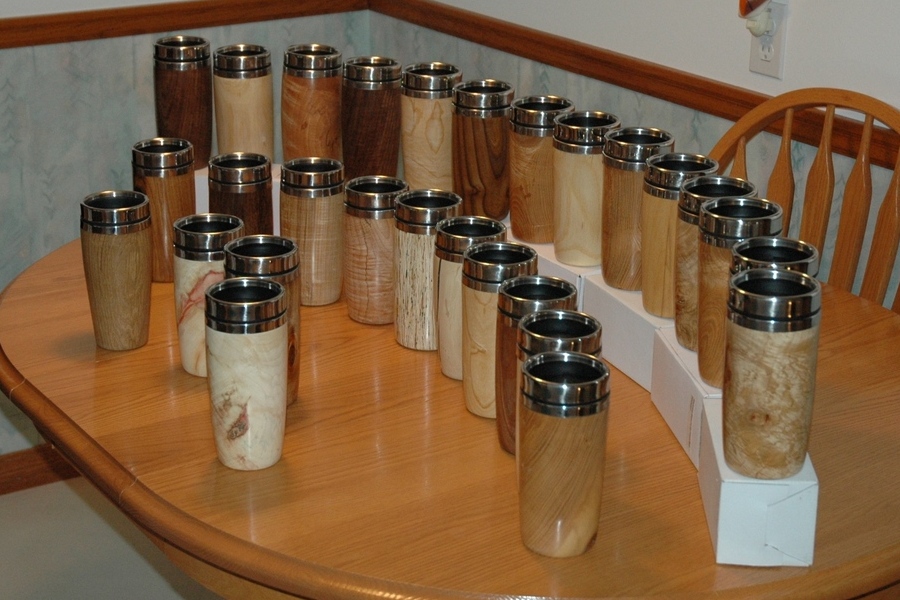
Everyone I know likes their coffee, and these mugs grab a lot of attention at the local Tim Horton's. They are an unusual item, and not very many people have them, except my friends and relatives after this Christmas. It's a lot of fun to turn something that has a very practical purpose, but thirty of them at once is a bit too many. I was pretty tired of turning these by the end of it, but I was certainly getting faster at it. After 10 of them I could turn the entire inside of the mug without measuring to be sure the insert would fit.
There's 28 of them here, made of big leaf maple burl, box elder, Russian olive, chokecherry, sugar maple, walnut and oak. And one made of OSFB (oriented strand fiber board - a construction material.)
 |
|
 |
 |
|
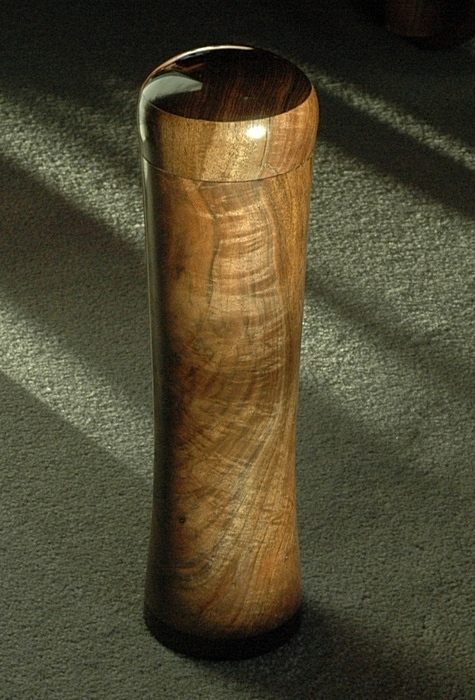
Another project of mine in 2007 was to turn some peppermills for several members of my family and for my doctor. (Hey, it never hurts to stay on the good side of your doctor). My peppermills differ from regular peppermills in that the interior is also turned, and not just drilled out. That means they hold a lot more peppercorns than the normal mill and you are not always having to fill them.
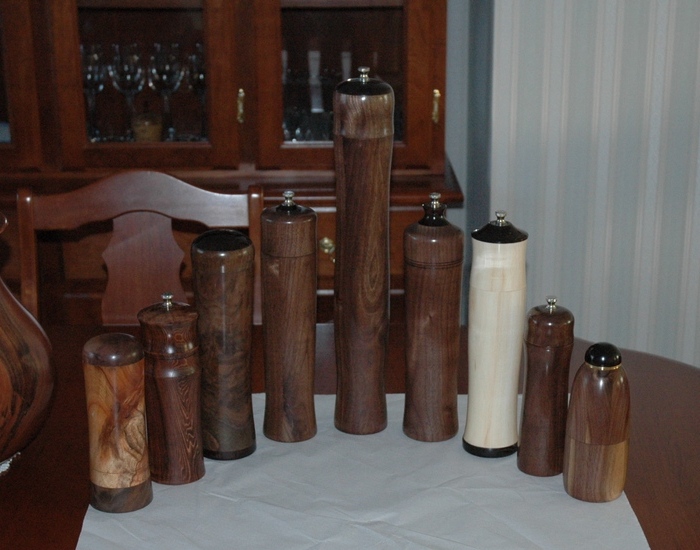
Unfortunately, I don't have any good photos of the projects, so I will post the "quickies" that I took sitting on the dining room table and the floor. I think you will get the idea.
The left photo above is several of the mills sitting on the table. They are , from left to right, chokecherry, fir, claro walnut burl, 3 walnut mills, box elder and 2 more walnut mills.
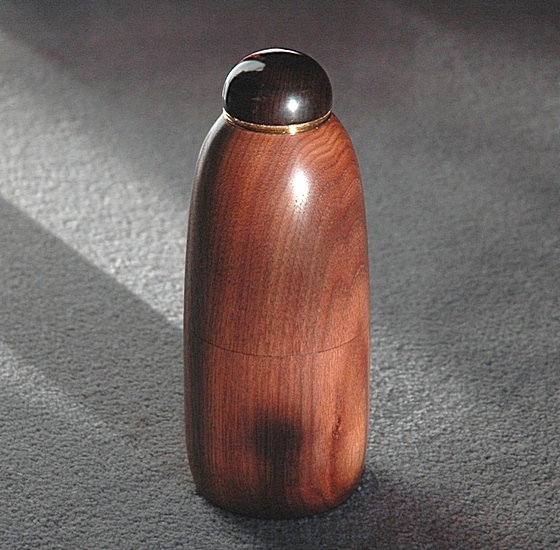
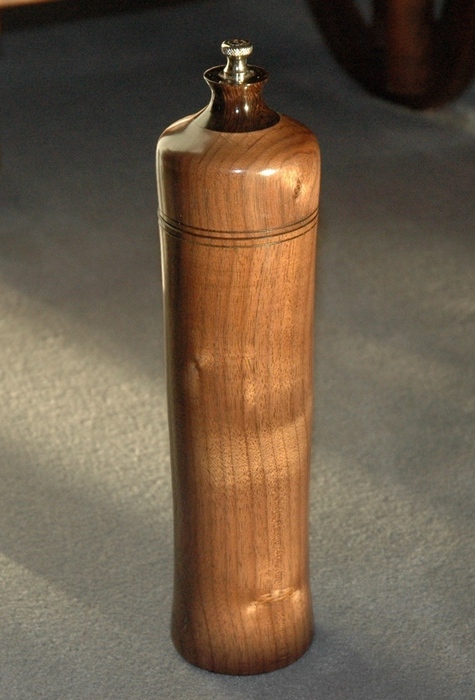
Two of these were for Karen, including the one on the right above. The mechanism in this is made of ceramic, and it cuts peppercorns very smoothly and with very little effort. It is the one we use for the red and green peppercorn mixture. The top knob, ebony, unscrews for filling. The entire mechanism is housed in the base and it does not have a center stem like most pepper mills.
|
|
 |
 |
 |
 |
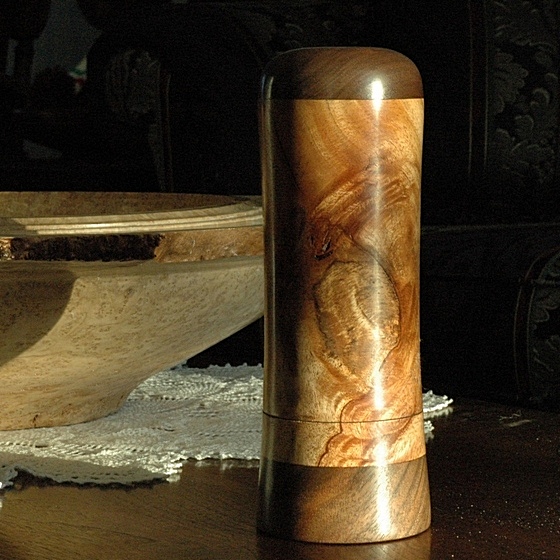
Here are individual pictures of six of the peppermills . The mill at top left was made for my wife, Karen. It is claro walnut burl, showing the characteristic coloration of light and dark that is typical of claro walnut. This is also a ceramic mechanism, but it has a shaft in it that is hidden inside. 12 inches tall.
The one at top right is box elder, capped and footed with ebony, and my brother Bryon uses that one every day in his kitchen. It is a normal Peugot mechanism with the shaft. The nut screws off the top and the top is removed for filling. 12 inches tall.
The next two are both of walnut. The one on the left belongs to my niece, Peggy and is 12" tall, and the 8" one on the right was given to her mother, Dorothy.
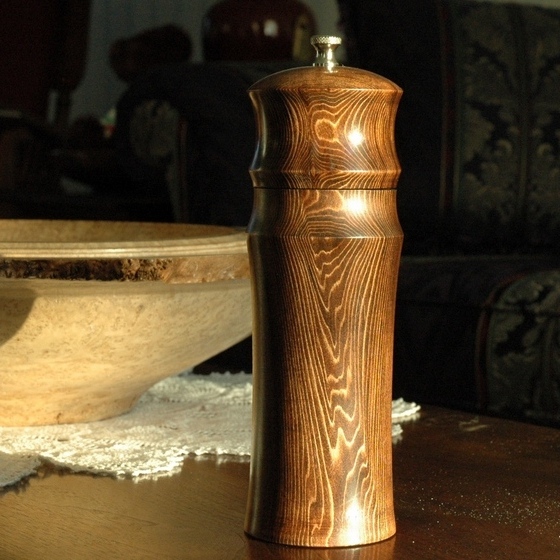
Below, the left one is from a piece of chokecherry that has some outstanding figure in the wood. The accent wood on this one is walnut, and the top unscrews for filling. I used plumbing PVC fixtures, cut and turned, to create the threads needed for a screw top lid. This one went to my GP, Dr. Farmer. The fir mill on the right belongs to my daughter Erynn. The fir is part of an old beam from one of the ancient buildings in this city. I wish I knew which one, but the person I got the wood from did not know.
 |
 |
|
|
 |
 |
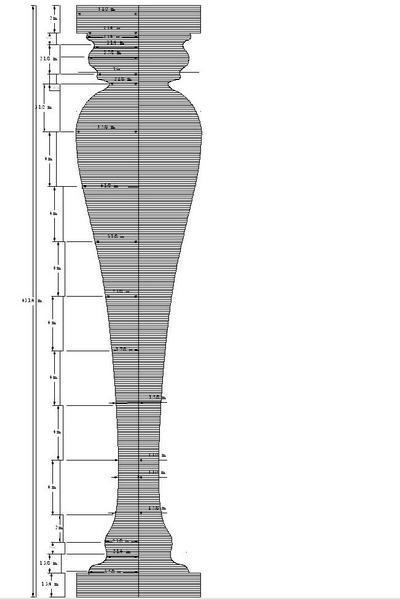
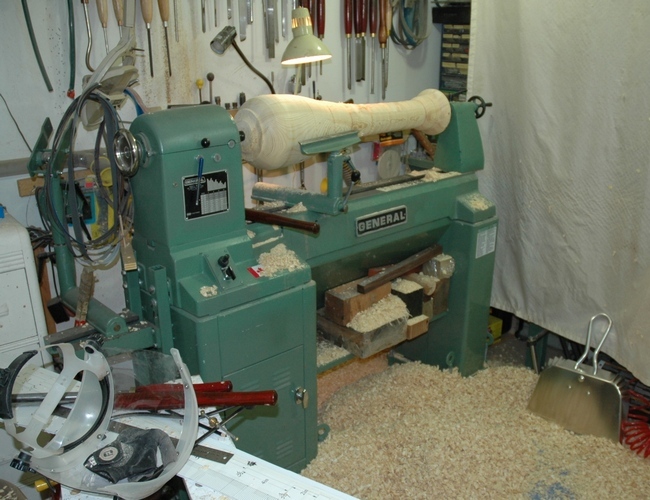
A friend called. "Herm, can you make a couple of pillars to hold up a fireplace mantle?".
"Why, sure I can. How big?"
"11 inch squares top and bottom, 9 inch largest diameter, about 48 or 50 inches long. Has to last a long, long time."
Yikes - that's really big and I would have to do it in two pieces and join them lengthwise.
So, I priced the cost of hard maple and it was verrrrrrrry expensive. Since they were going to be painted anyway, I thought we could just glue up pine for a tenth of the cost. So I did.
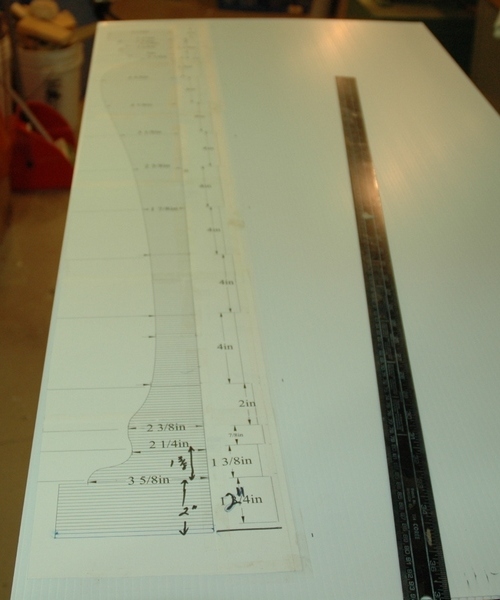
The left photo above shows the computer graphic I designed for the pillars, and the right photo shows the graphic enlarged to actual size and ready to use as a template. I just used a plastic panel for the template.
 |
 |
|
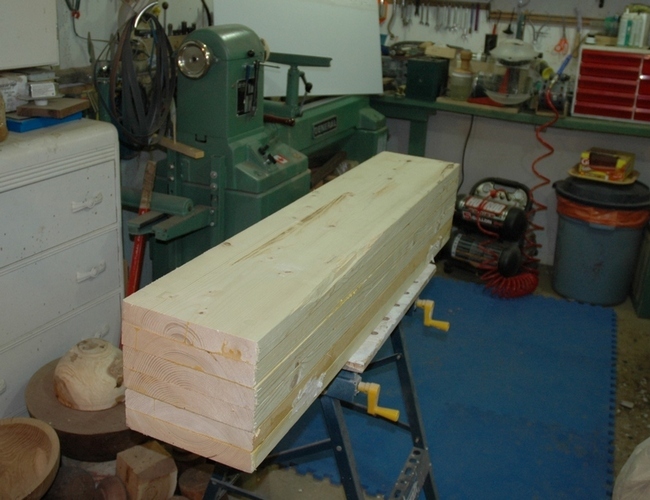
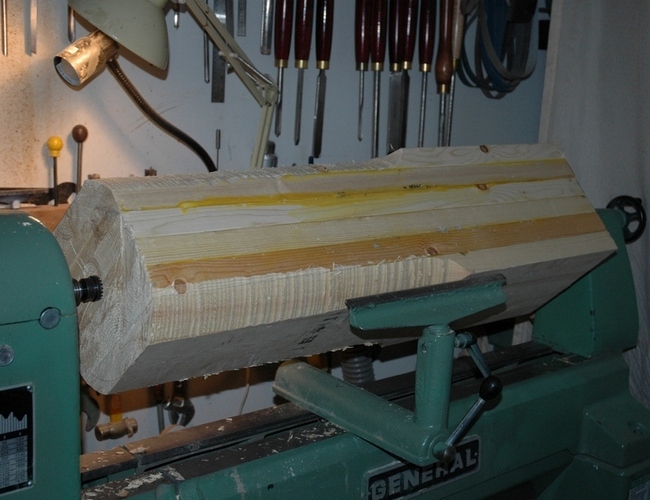
The left photo above shows the glued up blank, about 11 inches square and 48 inches long. This was a very large piece of wood to tackle, spinning at 200 rpm (to begin with) and inches from my nose. Pine is far from easy to turn since it is splintery, as shown in the right photo where I had just started rounding the piece. P>
 |
 |
In the left photo above you can see the form of the pillar beginning to take shape. It may be hard to see, but there are numerous diameter reference grooves along the piece to mark all the low and high spots and a few places in between. This helped to ensure the two pillars were correctly dimensioned and identical. While turning, I continually held various sections of the full size template outline along the profile of the pillars to make sure the profile was developing properly.
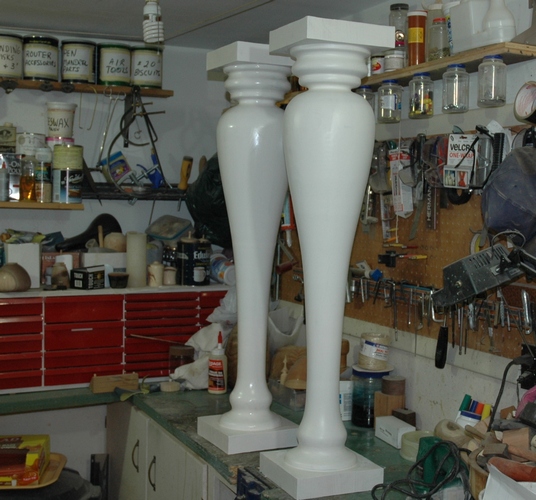
The right photo shows the pillars sitting on the bench, one still glossy with wet undercoat. I took a photo to make sure they were identical while I could still throw them back on the lathe, if needed, for alterations.
 |
 |
|
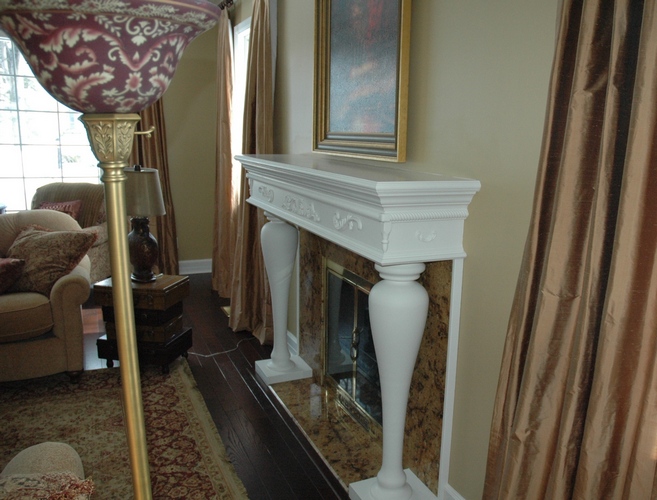
Finally finished and sitting in my storage room waiting to be picked up. I thought they looked pretty good, and was unprepared for the effusive praise I got from my friend.
The pillars were going into a Winnipeg mansion, probably 150 years old. This is a beautiful, huge, old house and I was delighted that my work will be visible there for a hundred years or more. I like what they did with the pillars.
| |
|
 |
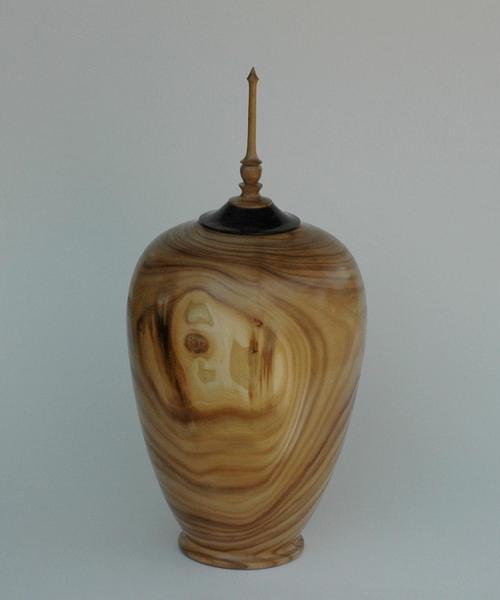 |
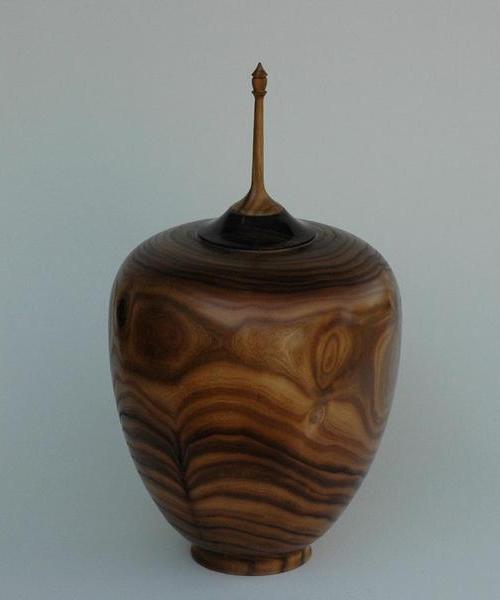
In 2007 I made numerous lidded, closed hollow forms that could be used as funerary urns. I have supplied friends with urns for pets, and some family members have asked for urns to set aside for themselves. Making an urn is like any other hollow form, except I leave the walls a bit thicker and make the lid fit a little looser so it can be glued in place with silicone glue and leave some room for wood movement. The interiors are lined with several thick coats of urethane, but I don't worry about tool marks or small grooves in the interior of the piece.
Both of the above pieces are turned of Russian Olive, finished with tung oil and buffed. The lids and feet are African blackwood and the finials are of Russian Olive. Each one has a capacity of slightly over 3 liters.
 |
 |
|
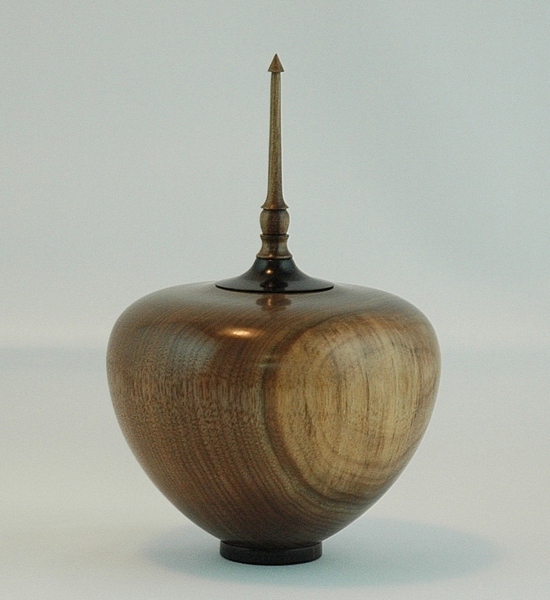
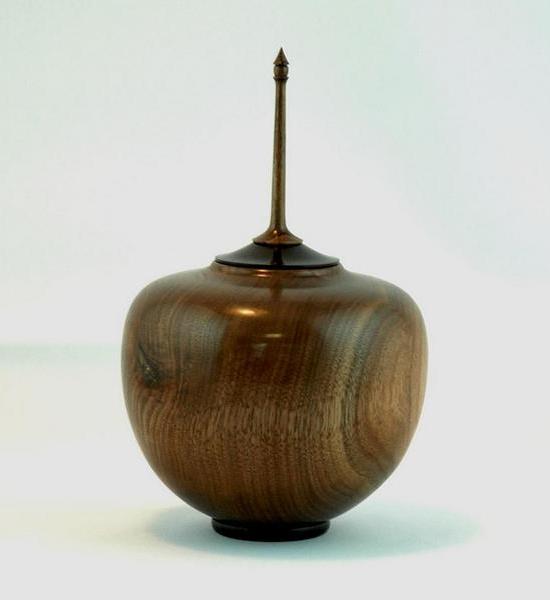
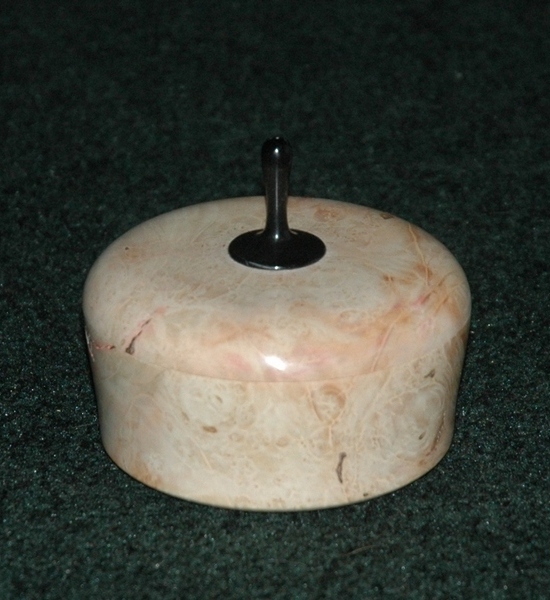
These two urns are smaller, and are commonly known as keepsake urns. The loved one's ashes may be interred or scattered, but the family may want to keep a small portion of the ashes as a remembrance. Or the deceased may be an infant or small child, and their ashes require a small container. These are both around 1 liter in volume and would be suitable. They might also serve as an urn for a beloved pet.
As before, they are coated with urethane on the interior, the walls are left about 3/8" thick with a buffed tung oil finish. The lids and feet are African blackwood and the finials are walnut.
 |
 |
|
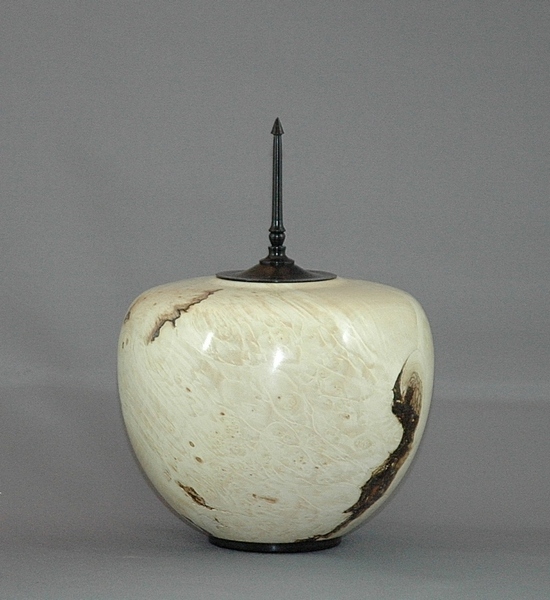
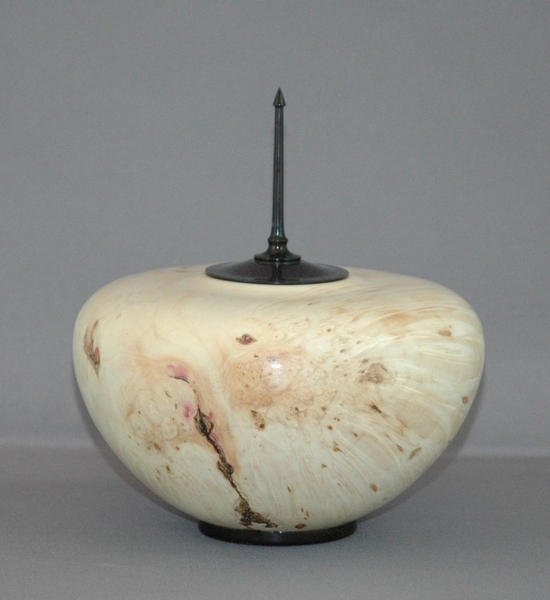
These two are also keepsake urns, each holding about 1 liter. They are of native Manitoba Maple, otherwise known as Box Elder. I love this wood, especially its naturally white color and the texture of the burl. It is one of the few woods in Manitoba that will actually produce burl wood, if one is lucky enough to find it before the tree decays from the center of the tree outward. It is so disappointing to find a nice burl and find that only about 2 or 3 inches of it is firm wood. The rest is completely hollow.
I maintain the whiteness of the wood by using a water based urethane finish and buffing it by hand with a 2000 grit wet sandpaper.The finish is labor intensive, but I think it is well worth it to keep the whiteness. With the lovely contrast of ebony on the lids, finials and feet, I think these pieces are a lovely resting place for a loved one.
 |
 |
|
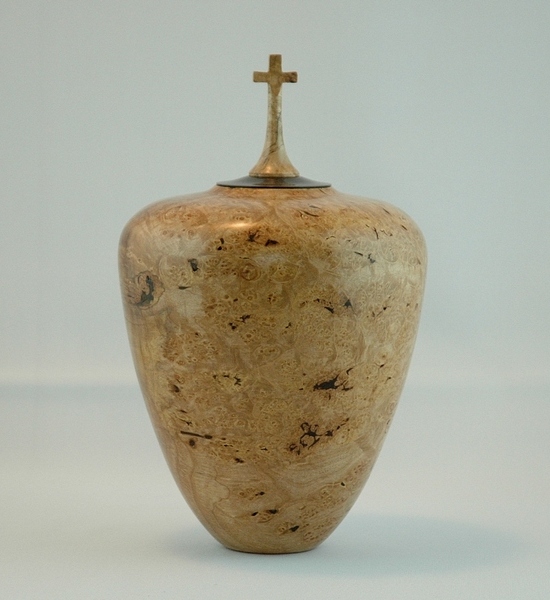
The urn on the left is a full size urn of Big Leaf Maple burl. I thought I would try a different kind of finial, and turned the little cross for the top of it. I'm not sure I like it, but that is easy to change. This holds around 3 liters and is finished with tung oil and buffed.
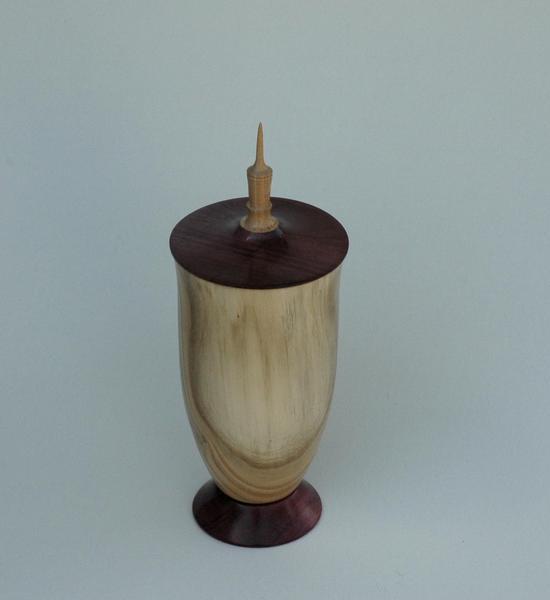
Urns don't have to be a certain shape, and this little ash and purpleheart urn on the right was a little experiment. Note the repetition of the form in the finial. I'm not sure I like it, but there it is.
|
 |
 |
Just a couple of little boxe. The one on the left is a little different form for me, rather short and squat. This was a lovely piece of Box Elder burl. The box is about 3" in diameter and 3½" tall.
The box on the right was an experiment with a small piece of aromatic cedar. What a lovely smelling wood to turn! It turns the shop into an aroma therapy center, and I was amazed at the beautiful finish one could achieve with this wood. About 4" tall and only 2" in diameter.
|
 |
 |
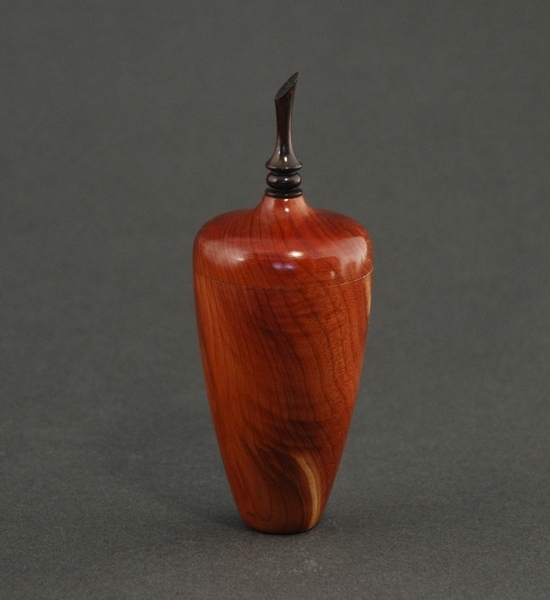
I decided to turn a birdhouse out of a piece of ash branch I had lying about the shop. So I turned a round cylinder, turned a removable bottom (for cleaning) with a finial and a top cone for roof. I decided to paint the roof and finial and leave the rest natural. I just guessed at the size.
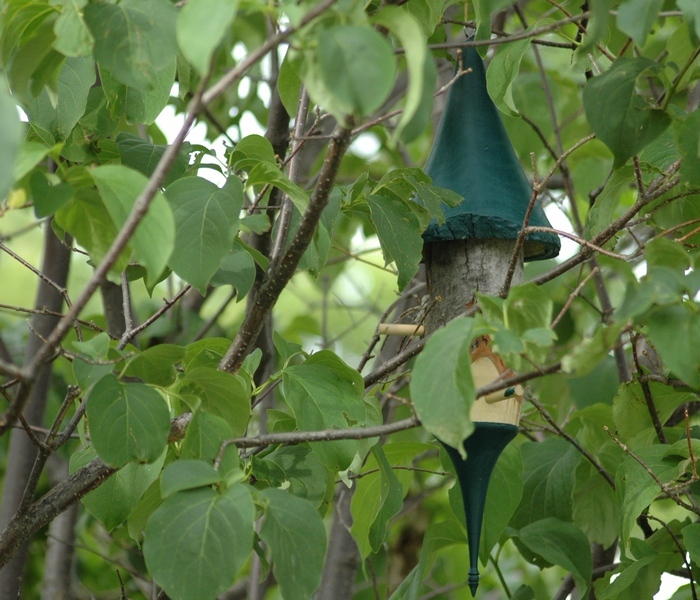
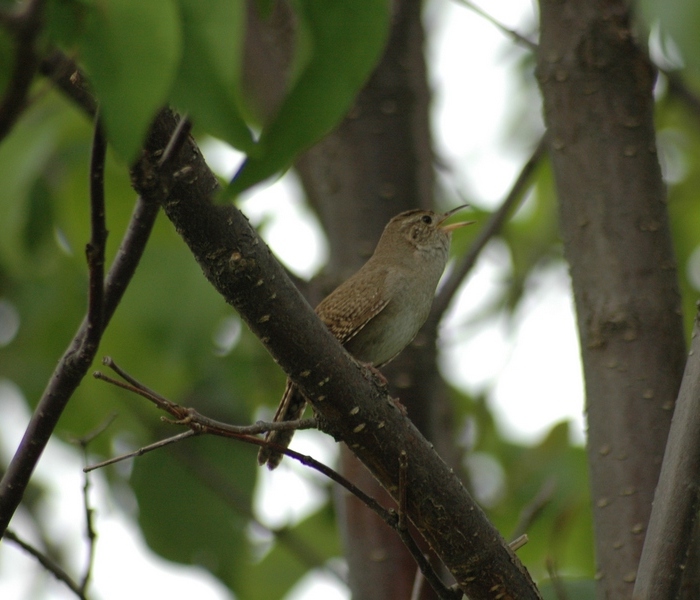
I hung the thing in a tree and a couple of days later went out to retrieve it to take it to a club meeting. What I found was a curious little wren who thought this might be just the place for a nest. I was surprised. I did not expect that, and especially a wren because we had not seen a wren here before. However, his call was unmistakable and I had to admire his tenacity in his attempts to attract a mate. I did not know that they were such territorial little birds and that they could terroize all the sparrows and other birds.
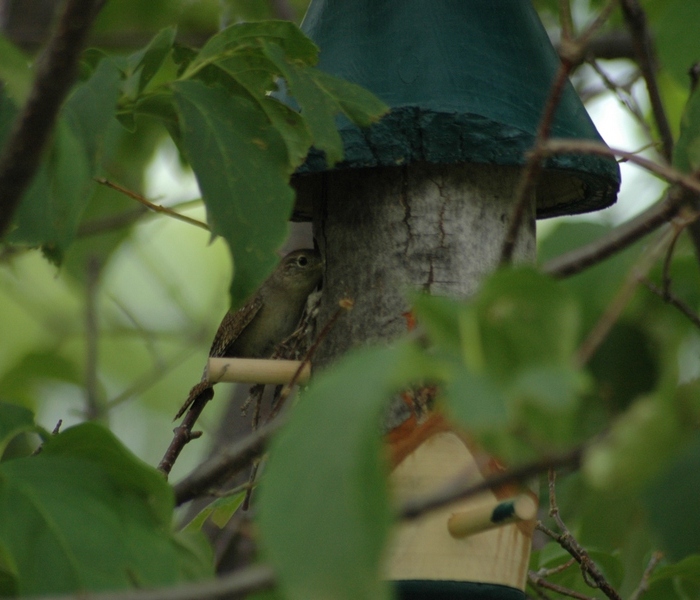
Anyway, I caught him going into the house to inspect it, and got several photos of him coming out after delivering a small piece of wood or string to the nest.
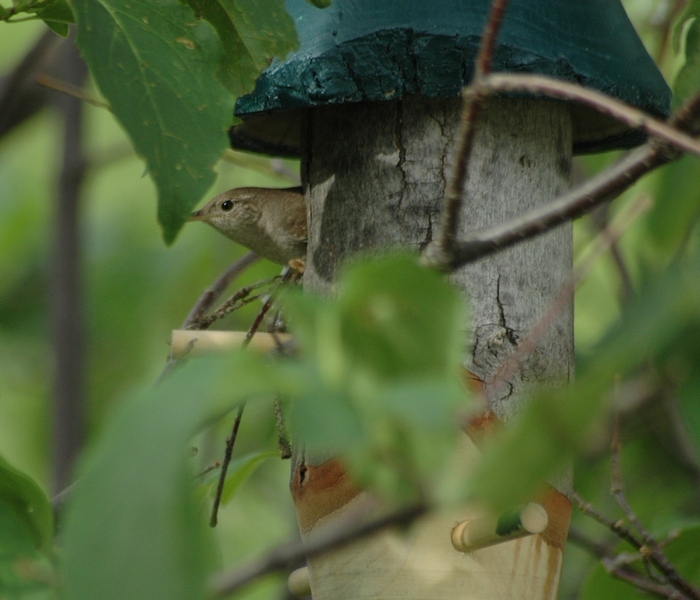
As the last picture shows, he appears to be quite happy with his discovery. I know he certainly warmed my heart.
 |
 |
|