2002 Turnings

If you visited my 2001 page, you will see several pieces that were started but not finished in 2001. Much of my turning has taken on a larger scale, and that means bigger pieces of wood which translates into longer drying time. Some of the large pieces will dry for well over a year, and will be turned in stages. Therefore, even though the pieces may have been finished in a later year, the finished piece will show on the previous years' pages.

This is a splendid hobby and it never seems to stop developing. There are few suppliers of tools to turn very large pieces so I have begun making many of my own tools. I have come to enjoy the tool making almost as much as the turning. Most of these tools will end up in the "tools and tips" section on this site, but a few of them can be seen with the piece they were made to turn.

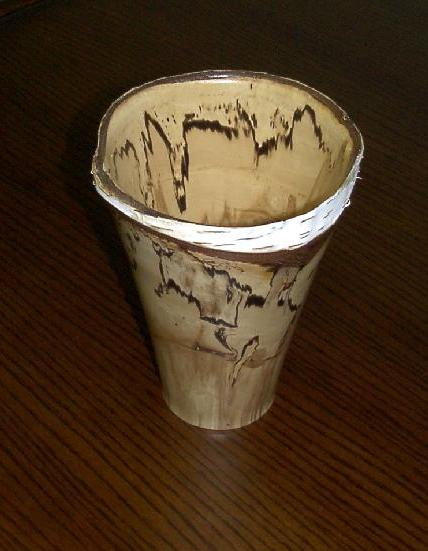
I have also begun turning more pieces from start to finish right out of the green wood. The green wood is far more pleasant to turn and is almost dust free, and I like the thin and translucent walls one can get from green wood. I hope to start with "piercing" and carving some pieces in 2002, and if you watch this page you will be able to either chastise me or commend me at the end of the year for either failing or succeeding (who knows - you may be able to chastise me for making a mess of an otherwise acceptable vase).

A New Years Feast

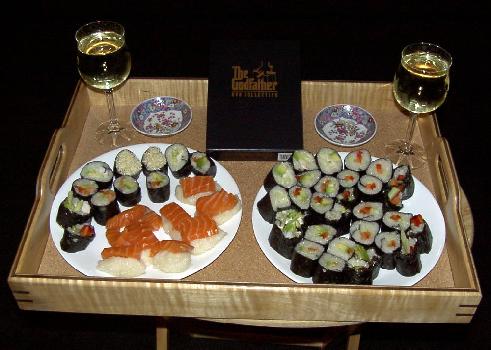
This was how the year started. December 31, 2001, starting at about 8:00 p.m. Just Karen and I, a whole lot of homemade sushi, some soy sauce, ginger and wasabi. Topped off with some terrific Canadian white wine (Grey Monk) and 7 hours of "Godfather" DVD's.

The clock tolls midnight.

Stop the movie.

Smooch.

Start the movie.

Ahhh - great way to go. :))

Birch Vase
Floating in Space

This is one of my first green pieces. It started out as a freshly cut birch log from my friend Brad. Two hours later emerged as the finished piece you see. I was soaked with moisture from the piece.

It was turned to 1/8" thickness and as it turned slowly I dried it with a heat gun so I could sand it down, inside and out. Then I reversed it on the lathe in a jam chuck to turn the foot, and dried and finished that. After two days it got 3 coats of urethane (water base), was dry sanded with 400-grit sandpaper and buffed to a matte finish with 0000 steel wool. It has not warped in the slightest.

Large Manitoba Maple Bowl

The Manitoba Maple was threatening to come down on top of the house. The house was on the beach at Dauphin Lake, right beside my sister's home. She lives right on the beach with about 100 feet between the house and the water. It's a beautiful spot, with spectacular sunsets across the water. I remarked how nice it would be to get some of the wood when they took the tree down. I then forgot about it, because I live 200 miles away.

Charlie and Mary rescued some of the wood for me and I was able to turn this monster bowl, 16" by 8" that will be used to serve salad for our rather large family gatherings (I had 10 brothers and sisters).

I think I'll leave it in the capable hands of my nephew Larry, who just happens to be trained as a very fine chef.

Woodworking Show

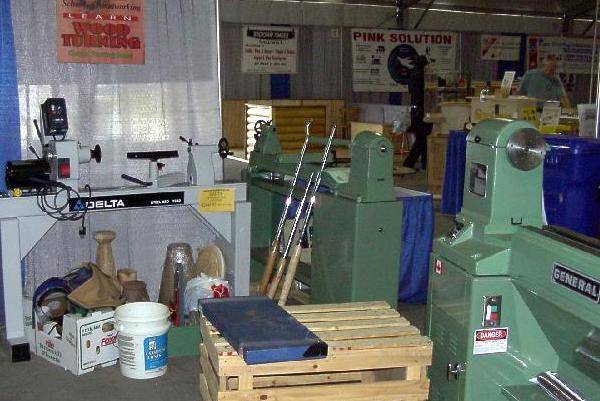
For the last couple of years I've been fortunate enough to demo the lathes for Canadian Woodworker, a store here in Winnipeg, at the annual woodworking show. This is a 3 day affair.

I love the show, meeting hundreds of people and getting to talk turning with them. Besides, there are three lathes there to play with. Of course, the big one, the General 26020VD is the one I use most. People like to see those big pieces being turned.

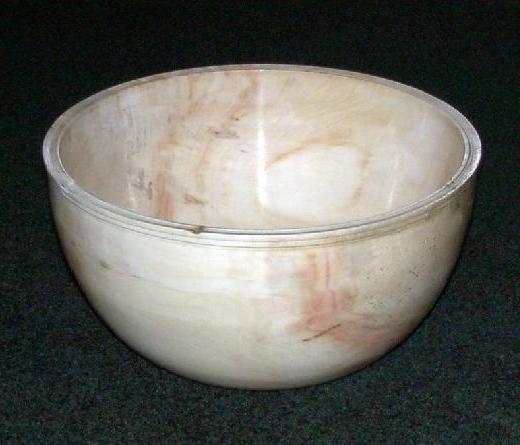
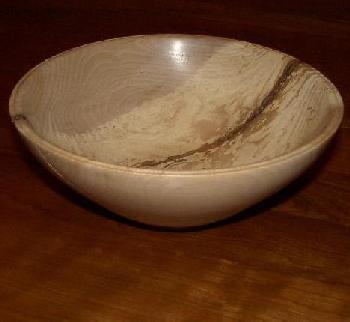
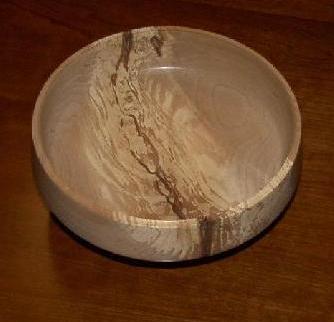
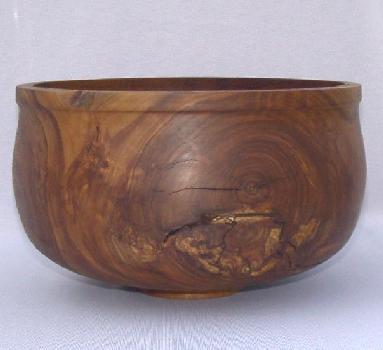
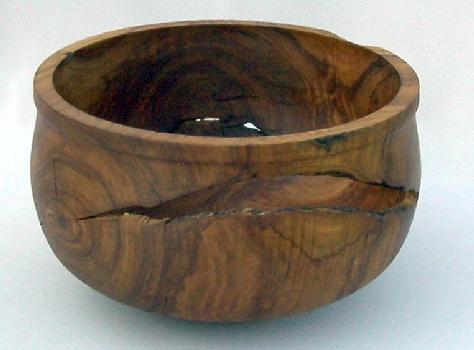
These two bowls are from a beech tree that I spotted when visiting with friends in Castleman, Ontario. Mike's neighbor had just taken down the tree and we went over with a chain saw and got a couple of pieces. However, like an idiot I didn't immediately seal the end grain, and by the time they got back to Manitoba the pieces were split through and through. The lesson - don't bring a piece of wood from a damp climate to a dry one in the back of a pickup truck without protecting it.

Anyway, most of it went to my neighbor for his wood stove, and one piece lay around three years. It was split down the center. I was going to give it to Joe as well (both of my neighbors are "Joe") but thought I'd see what I could do with it. These are the result, and I'm so glad I could salvage something from the tree.

They are slightly spalted, both about 10" across and 3" deep. They are finished with urethane, wet sanded and then rubbed to semi-gloss finish. Karen has claimed the one on the left for her desk at work. (I'll bet she has candy in it!)

Beech bowl One
Beecj Bowl Two

I got a nice e-mail from Ken Mick at www.creativehands.com, inquiring if I was interested in some wet wood he had reclaimed from the bottom of a lake. I said I was, and promptly ordered several pieces, two of which you can see below. One raw piece is shown on the top left. The bottom spaces are reserved for the finished piece.

This wood is extremely heavy and extremely wet. I rough turn these blanks and hollow them to about 1½" thick. Then I wrap them in clear plastic bags and leave them there until they are dry. In about 6 months I will turn the pieces a bit thinner and re-round them, and then back into their bags they go. From time to time I take the bags off for an hour or so, as well as cut small holes in the bags to let some of the moisture escape. They seem to be doing well, and the moisture content is steadily decreasing.

The mere size of these makes them a challenge to turn. The maple blank was 24" tall and 14½" square and dripping wet. After nipping off the corners to make the blank an octagon, I start out with the piece between centers to turn it to a rough outside shape and turn a tenon on it. Then it gets stuck in the Stronghold chuck and the steady rest to rough hollow the piece.

At the bottom left is the finished piece that you see on the lathe above. It was wrapped in plastic for a long time, drying. However, the process also causes some mould to form, and the mould causes the spalting. This particular piece spalted beautifully.

At the bottom right is another piece from reclaimed wood. This one is of oak, ebonized and then finished with water base urethane. The piece is 15" tall and 7½" in diameter. This one is one of my personal favorites. I call it "Elegia".

Sunken Maple Blank
Sunken Maple Round
Big Mama
Elegia

Here is a little birch vase that came from my neighbor’s weeping birch tree. Joe was so sad when the tree had to come down, and was kind enough to give me the wood for helping him with it. The logs lay on the ground for a couple of years to spalt, and this is the result. I deliberately turned the end grain and this shape to get the maximum effect from the spalt.

When Helen Waldby e-mailed me from Australia and said she would like to visit with me when she came through Winnipeg on her worldwide trip, I was pleased to send this piece back to Australia with her. It can't get any more local than next door. Joe died last year and I know it would please him that this little piece of his prize tree will end up "down-under".

The vase is about 11" tall and a bit more than 4" across - I think. I sent it away and didn't measure it.

Spalted Birch Vase
Spalted Birch Vase

My Daytime Home
Statue of Job

Well, this is where I spend my days. The photo on the left is one corner of the office, showing one of the walnut planters I turned in 1997. The office is large and sunny and bright.

The fellow on the table keeps me company. As we were driving home from work I spotted this guy in the window of an art gallery and I remarked to Karen, "Look - there's Job". A few months later I opened my birthday present and there he was. Actually, the sculpture is entitled "The Man Who Argued with God", and was created by a student at the University of Manitoba. I was struck by the intensity of the piece, especially the oversized fists, clenched in defiance and anger.

Manitoba Maple Platter

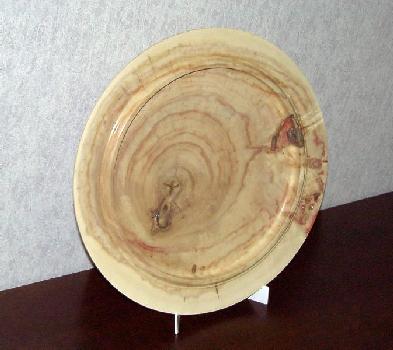
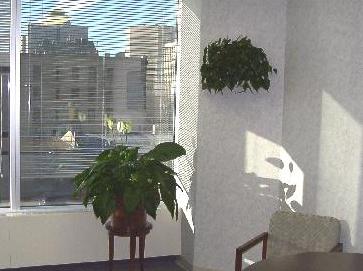
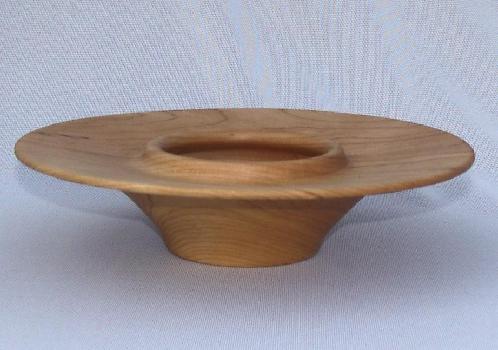
This platter sits on the credenza in my office. It was a bit of an experiment, as it was turned directly across the end grain of a slab from a maple tree. Cutting across end grain without tearing it out requires great care, a lot of patience, and razor sharp tools.

The piece is one that I use to show how competent the disc chisel is in performing that kind of cut. No tear-out, a smooth as silk finish and an interesting effect from the end grain cuts.

The platter is about 16" in diameter. It is finished with gloss urethane varnish, then wet sanded with 600 grit paper and buffed to a satin finish with steel wool and beeswax.

Apple Vase
Apple Vase

Apple is such an unpredictable wood. Whenever someone asks me about turning apple, I tell them that it is very difficult to keep from cracking, and that it warps and twists just because it's ornery

Naturally, this piece has to prove me wrong. This was rough turned wet to about 1/4" thick. Usually I wrap the green piece and let it dry slowly. I was working on something else too, and absent-mindedly put this aside, intending to wrap it later. A month later I remembered it. I figured it was ruined. Nope - not a crack, not a hint of warping. Still none, and it's been finished for a couple of months now.

It's about 13" tall and 6" in diameter, and finished with "Tried and True" oil from Lee Valley Tools.

Urns

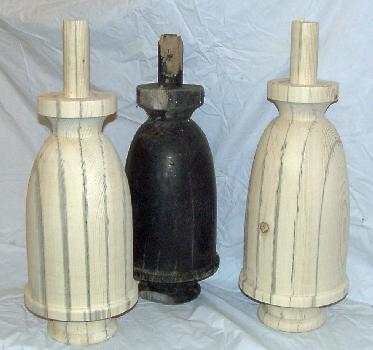
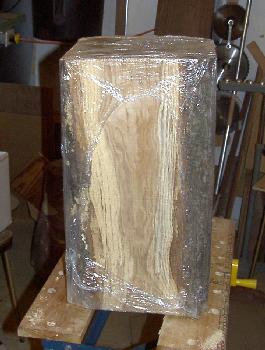
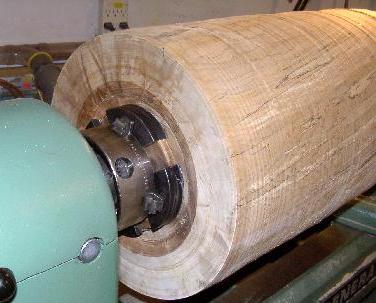
I was pleasantly surprised to receive a phone call from a Winnipeg resident, asking if I could turn some large urns to sit atop some pillars on the outside of his house. He lives on Wellington Crescent, a quiet, tree-lined street with some of the most expensive real estate in Manitoba. The original urns were probably between 50 and 70 years old.

I glued up the 25" by 9" blanks from 2x10 hunks of treated fir, using polyurethane glue. Then I cut the corners off to make the blank an octagon and finally turned the pieces to duplicate the original. I was pleased with the result, and so was the homeowner when he came to pick up the pieces. Of course, I had painted them black like the originals.

The photo on the bottom shows the urns in place at his house.

Urns in Place

Maple Burl with Natural Edge
Apple Bowl

The little maple vase on the left is from a small piece of burl. It's only about 8" in diameter but is very thin. I left the bark on the edge and finished it with lacquer.

The bowl on the right is of apple, from a tree taken down by a storm. I was out in my car during my lunch hour from work and I spotted a young woman that worked for the city cutting apart the tree. I asked for some of the wood and she obliged by cutting a few pieces. I was in my business suit, but that did not stop me from loading the chunks into my trunk.

Apple is very hard to dry without splitting and warping. On this piece it didn't matter much, because there is a huge split on the other side from when the tree went down. The log was a foot in diameter, and this bowl is 11" by 6½". It is finished with "Tried and True" varnish oil.

Apple Bowl - Backside

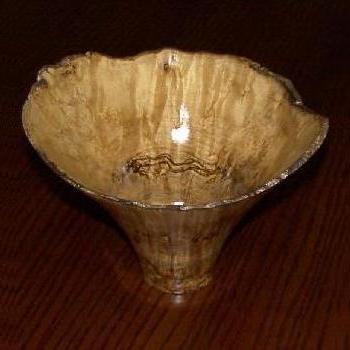
The top photo is the backside of the apple bowl in the photo above. I included it to show the split caused by the wind when the tree went down. It's sad when a tree dies like this, and that seems to be reflected by the down turned "mouth" of the split.

The 9½" by 2¼" bowl in the bottom photo is made of cherry. It was turned from a remnant of a very large log, and was turned out of wet wood. I dried it with a heat while it turned slowly on the lathe so I could sand it and finish it with Danish oil.

The sides follow the shape of the bottom and top is only 1/8" thick outside of the rim. The rim is undercut almost an inch.

Cherry Bowl

Handle in Lathe

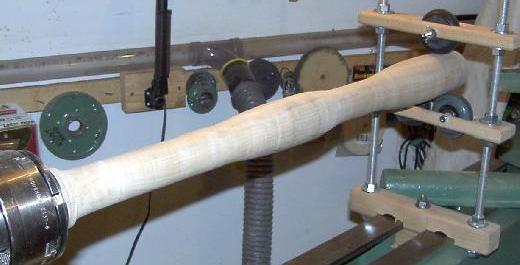
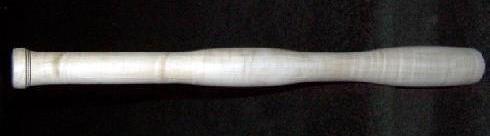
Turning handles is necessary when you make your own chisels. It's something I love to do. It's probably a little strange that I enjoy making tools almost as much as turning.

Here's the setup I use. Round the piece first. Then chuck it into the Stronghold and the steady rest while using the Jacobs chuck in the tailstock to drill the hole for the shaft.

The next step is to turn the tenon for the ferule and to glue the ferrule in place (yes I know, this handle does not have a ferrule - I FORGOT it and had to add it later).

Finally, remove the steady rest, bring up the tailstock with a cone center in it and turn the handle. The result is shown in the bottom photo

Handle

Walnut Handle

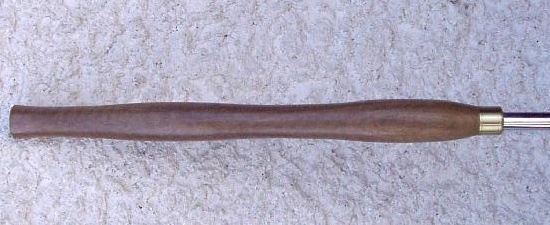
The top photo is of a handle that is properly finished. The handle is of walnut with a fitted brass ferule. It is attached to a self-designed and homemade shear cutter that I use on the inside of tall vases to clean up the ridges left by the Termite ring cutter.

If you are going to make handles, here is a tip for you.

Sign the handle, for a couple of reasons. One reason is to mark your work as your own. After all, it is important to sign your pieces. The other reason is to mark the position of the cutter when it is out of sight inside the piece you are working on. In this case, the signature is on the top of the handle and I can tell the orientation of the sharp edge of the cutter by the position of the signature. This is very important in preventing a catch that could ruin the piece and possibly injure you.

Signature on Handle

Homemade Shear Cutter Tip

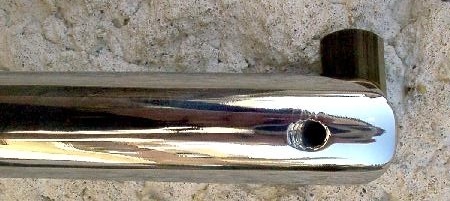
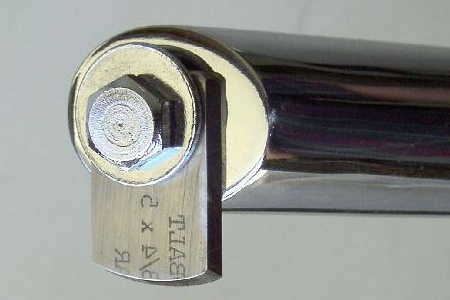
This is a photo of the shear cutter that I made to attach to the walnut handle shown above.

In turning deep vases it is a challenge to get the walls a constant thickness and to avoid ridges and a wavy surface. There are modern devices, like laser pointers attached to special deep hollowing gadgets, that one can buy, but I prefer using my wits and my senses to accomplish the end result.

Don't misunderstand - I am not being critical of those who use the modern hollowing inventions, especially if they are turning for production. It's just not for me. One of the most important things I try to impress on participants in my seminars is that there is no "right" was or "wrong" way. The only rules are the rules of physics and if you try to challenge the rules of physics you will be corrected in a hurry. There is only "your" way, and "your" art and whatever you produce and how you do it is as legitimate as anyone else's.

At any rate, this shear cutter, placed at the end of a 3/4" shaft at a 45-degree angle, cuts extremely fast and has to be used with care. I can replace the tip with tips of different sizes and contours. The tips are made from bars of high-speed steel.

Homemade Shear Cutter Tip

FINALLY!! I have finally reached a goal I targeted at least five years ago, and that was to develop my skills to the point where I could finish a very large deep vase. I saw photos of James R Johnson from Texas turning a deep vase in a woodturning magazine and I knew that I wanted to turn the large vases. I could just see the piece sitting on a pedestal in a gallery. Well, below are the two that I finished on the same weekend. The walnut one on the top was rough turned in 2001, and there are pictures of the process on that section of this website. The wood came from Howard Klepper in California. I love this piece. It is about 21" tall and has a maximum diameter of about 10". The interior contour follows the exterior with a wall thickness of a little more than ¼ inch.

The vase is finished with three coats of Danish oil and then finished off with 3 coats of urethane. The finish coat is then wet sanded with 1000 grit paper and finally waxed with a pad of ultra fine steel wool. It's a long process, but it is worth it.

The bottom vase is of redwood. It is 18" tall and about 12" in diameter. It too has a wall thickness of slightly more than ¼ inch. The vase is finished with Danish oil and top coated with several sprayed on coats of lacquer.

The wood came, with a great deal of frustration, from California. I would love to get more of the wood, but I would have to find a supplier I can trust. I had to threaten to sue the supplier to finally have him send the wood I had paid for. I was also surprised at the difficulty in turning the wood, especially when it was still green (not dry). The wood is fibrous, and the wet fibers wanted to "grab" the chisel. It actually cut better when it was dry.

However, I love the end result and I hope you do too.

Large Walnut Vase
Large Walnut Vase
Large Redwood Vase
Large Redwood Vase

Manitoba Oak Vase
Tall Cherry Vase

Manitoba oak is different from oak grown in other places. It grows very slowly, and the growth rings are so close together it is more like a closed grain wood. It is also extremely tough and hard when it is dry.

A friend brought me a log that had been on the ground for decades. It was about 18" in diameter and very badly split. Even though I turned the vase down to a bit over 11" in diameter, some of the splits remained. I decided to fill them, and set about filing brass shavings off of old plumbing fixtures. I mixed the brass shavings with epoxy and filled the cracks before the finishing cuts were made. The end result is not really visible in the photo, but the brass glistens from the cracks as you walk about the piece.

The vase is 18" tall and 11" across and is finished with Danish oil. In the photo it has not yet been waxed and buffed, and it will have a shinier finish when completed.

On the right is a cherry vase completed in September. Mike Walter, a good friend, called me and asked if I was interested in a piece of cherry log. He had inherited four of them, and was offering me a chunk of it. Of course, I accepted. When he dropped it off I was amazed. It was 24" in diameter and a bit over 2 feet long - huge - and all I could do to maneuver it around to cut it up.

I've started a number of pieces from the log - one very large piece and a number of smaller ones. This is one of the smaller pieces. The shape of the wood you have to work with often dictates the shape of the piece, and that is so of this one. The vase is 14½" tall and is 5½" across at the top. It is a mere 3/16" thick and is very light.

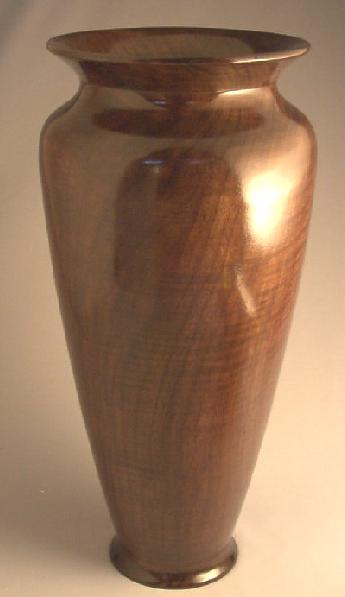
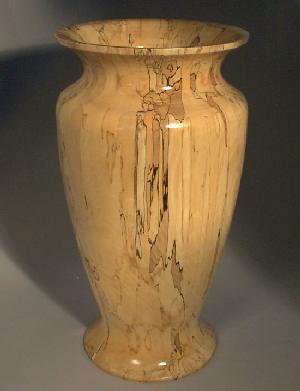
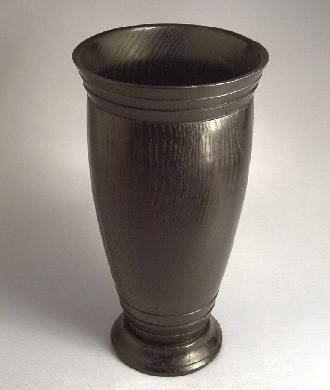
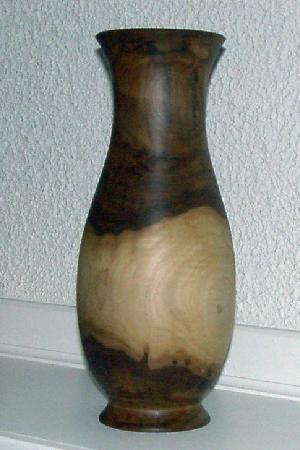
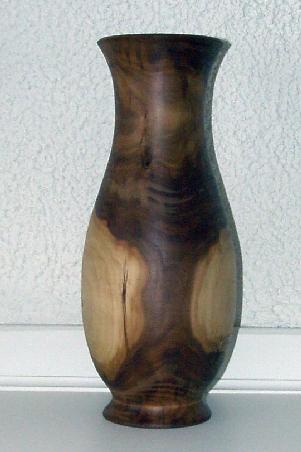
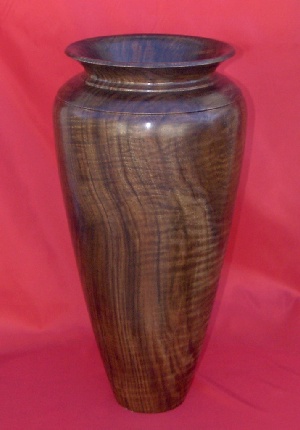
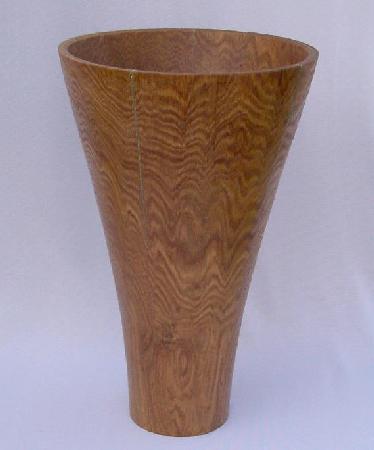
No, the vase on the right is not the same walnut vase as in the panel above. It is a twin, about the same size, 21" by 10". This one is finished with lacquer, although I may yet reduce the shine.

The maple vase with the walnut top in the bottom photo is only 5" tall and about 2½" in diameter. It is about 1/8" thick, and weighs just a couple of ounces.

Together, I call them "David and Goliath".

Tall Walnut Vase
Small Maple and Walnut Vase