2001 Turnings

2001 begins a new woodturning chapter in my life. Late last year I took delivery of my new lathe, a General 20260VD, which finally gives me the ability to turn very large pieces. What I want to do with the page for this year is to show some pieces in development, from the raw blank to the finished product. As I begin this, in the middle of March 2001, I have a few sections below showing work begun, but not yet finished. As the year progresses I will finally get to the finished pieces. As usual, if you have any questions or suggestions about the work just click the e-mail button in the left panel and send me a message. This page is here for your enjoyment and your comments are appreciated.

Spalted Birch Vase
Maple Vase

On the left is a spalted birch vase measuring 11" by about 5½" This is a beautifully grained wood, and I'm proud of this one. It is finished, like most of my pieces, with hand rubbed urethane.

On the right is a maple vase. The wood came from Dave Robertson on E-Bay. E-Bay is good way to find wood, but it is getting too expensive to continue. The shipping charges can end up far more than the cost of the item, and that makes the cost prohibitive. Anyway, I thought Dave would like to see what one of his pieces of wood looked like after I finished with it. This piece is 12" deep and about 4" in diameter. It is very thin, about 3/16" and the interior is hollowed out to within 3/4" of the bottom.

Elm Vase & Manitoba Marsh Reeds

This photo shows a little bit of native Manitoba. While on a visit to my family, we stopped along the shore of Lake Dauphin where I was born. The ditches were filled with water and all kinds of swamp weeds. Karen spotted the reeds you see in the birch vase in the photo to the left, and asked me to back up and cut down a bunch. She debated dying some of them to add some color but decided it would be very hard to improve on their natural state.

They are beautiful, and help to amplify the natural beauty of the wood in the turning as effectively as any flower.

The piece of wood on the left below is something my sister Mary and her husband, Charlie, gave me a while back. They bought it with a bunch of junk at an auction sale and said, "Let's give to Herman. He'll think of something to do with it."

Now that's faith. At this point I have a vague idea of what I'm going to try, but a lot of it depends on whether this piece will hold together. It's 32" long and 20" wide, and mounting this thing on the lathe is going to be tricky. The center part of it won't hold screws since it is all worm eaten and quite soft. I'll probably epoxy a plywood backing on it to do the rough turning on a faceplate and then treat it with Polyall 2000 to harden the wood.

We're not totally sure what kind of wood it is, but my best guess is that it is the root portion of a diamond willow tree. I'm anxious to see the colors that will come out of this piece. Woodturners will immediately recognize the challenge I have here since I will be cutting across end grain from start to finish. Feel free to e-mail and tell me I'm crazy, but the spots below are reserved for the progression of the work and the finished product. I may only have a broken piece of wood to show you.

Diamond Willow Root
Diamond Willow Root
Diamond Willow Bowl in Progress
Finished Diamond Willow Bowl

This amazing burl came from a tree on the grounds of the Manitoba Legislature in Winnipeg. Karen works for government and from her window she saw them taking down a large Russian Olive tree. She rushed out and asked if her husband could have some of the wood. That was in 1995. After chain sawing off part of the burl to make a wall hanging (on my 1997 page) the remaining piece in the top left photo stayed in the garage until March of 2001. It is hard as concrete. The burl is about 28" in diameter and weighed about 120 pounds. Until I got the General lathe, I couldn't turn it.

I got it mounted all by myself, but not without a struggle. Trying to hold a 100+ pounds in one arm and turn the spindle by hand to start the thread on the faceplate gave me quite a workout. That was nothing though; compared to the workout I got turning this piece. The best cut I could take was about 1/8", and there were no shavings - just chunks coming from the chisel. The wood was just too hard to take a more aggressive cut. The picture top right is the beginning of the top of the bowl.

The picture, middle row left, shows the backside of the burl, which I finished first, leaving a tenon for the Stronghold chuck. In this photo, the bowl has been turned around and the interior is ready to begin turning. Unfortunately, the guys felling the tree weren't woodturners, and it is a shame that they ran the chainsaw across the natural rim of the bowl. I considered turning off the bark, but decided that the chainsaw cut, left rough, is just as natural as the rest of it.

In the finished photos, posted June 13, 2001, you can see in the bottom right photo that I changed my mind. I simply used a coping saw to rough shape the edge that was chain sawed and then used a torch to char the edge so it looked like the bark on the rest of it. You have to look hard to see the difference and it saved the rough edge on the rest of the bowl.

Russian Olive Burl
Starting on the top of the bowl
The back of the bowl
Almost finished
Ta-Da!!! Finished
Ta-Da!!! Finished

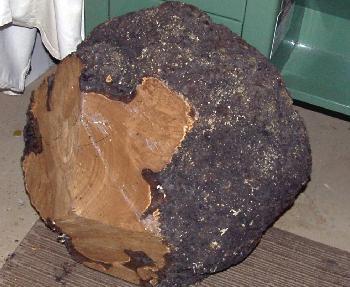
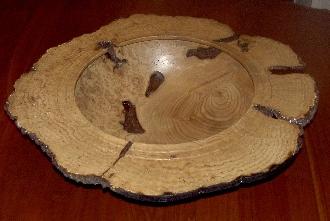
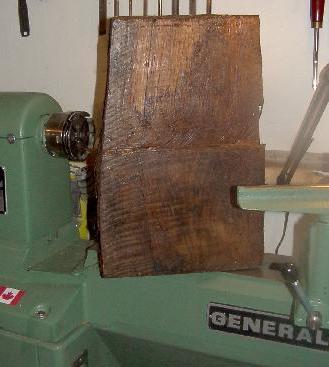
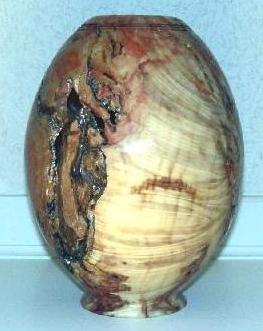
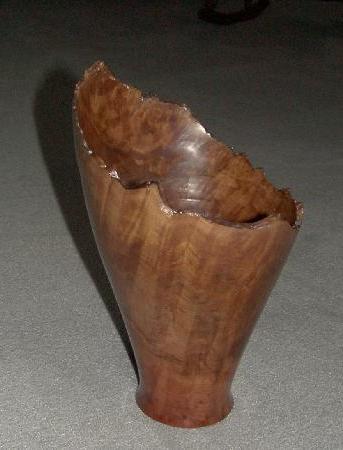
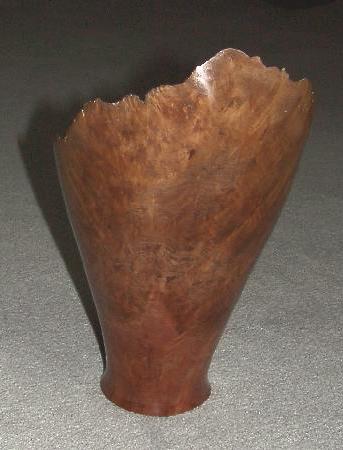
I had three pieces of this walnut sent to me from California by Howard Klepper. The woodturning newsgroup readers will be familiar with Howard, as he often posts useful and helpful information.

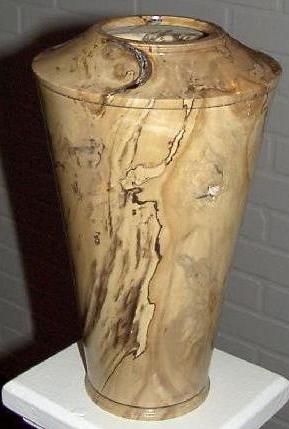
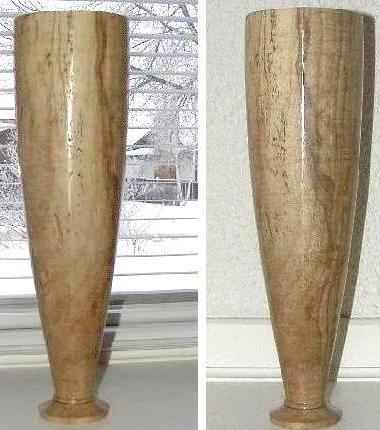
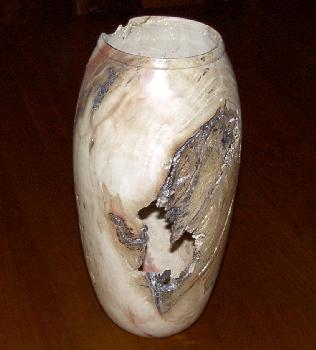
They are 24" to 28" in height and the largest diameter will be between 13" and 14". I plan for three floor-standing vases that will take the General lathe to a new level, although the Russian Olive burl above was certainly a test. I've now started on the first one, and you can see the progress.

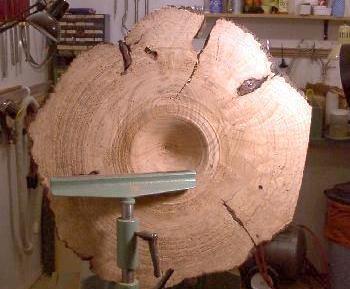
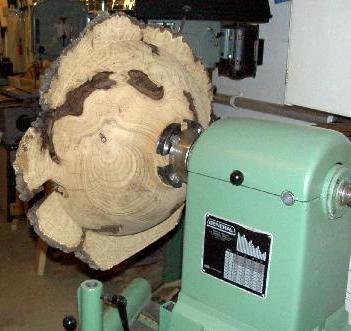
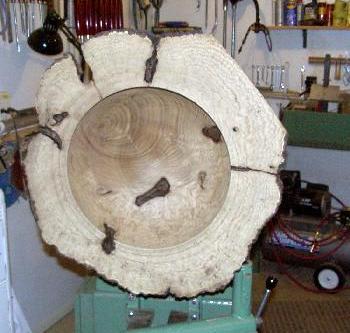
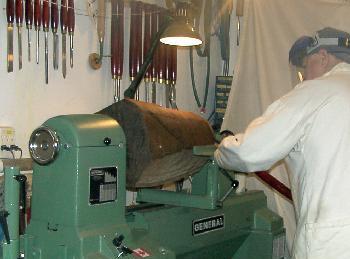
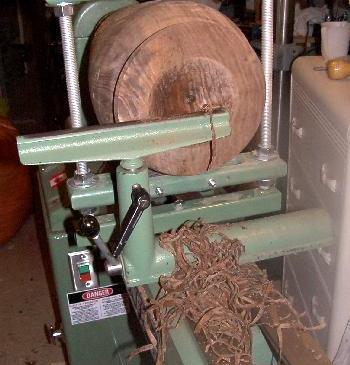
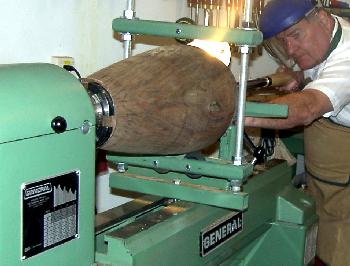
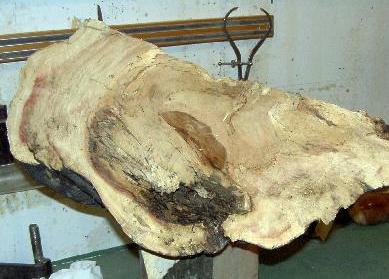
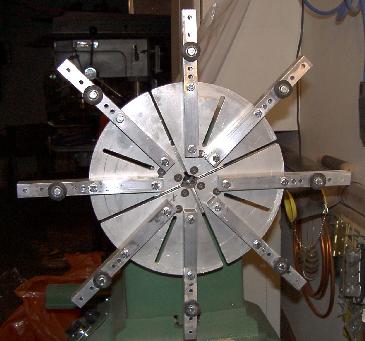
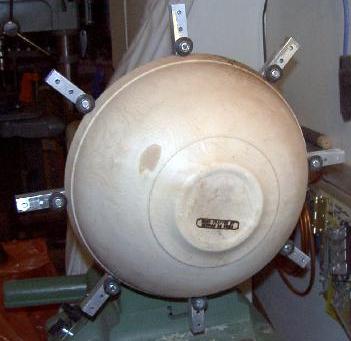
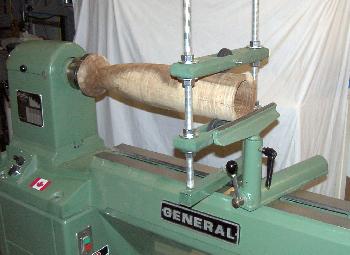
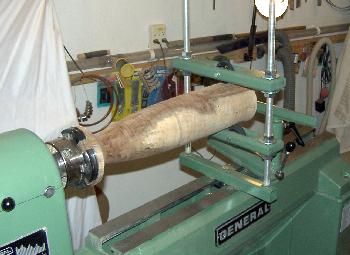
The piece starts out between centers, turning quite slowly and speeded up as the balance changes. I like to go between centers on something like this so I can adjust the centers as I need for balance and to get the maximum size from the blank. After the rough outside shape is turned I mount the piece in the Stronghold and support it with the steady rest I made for this lathe. The piece is as solid as a rock at this point. From the photo, bottom left, you can see that having the lathe a little higher works best for me. While most of the internal turning is done by feel and sound, I still like to look into the piece to get my bearings when starting the chisel and taking it out. There's a really good reason for this. I rarely catch the tool when I'm actually turning, but I've had some heart-stoppers when I've taken the chisel out of the piece carelessly and had it inadvertently touch the spinning interior. These catches are the worst ones, and can be very dangerous with a big lathe, a big chisel and a big piece of wood with a lot of momentum. Just ask my friend, Harry Ott, who was here one day when that happened.

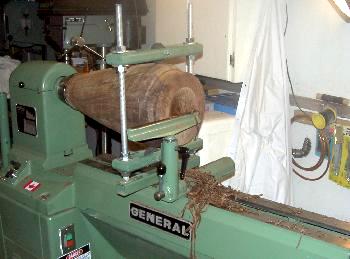
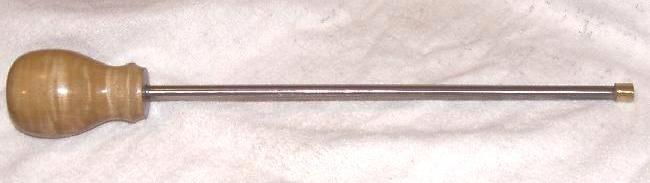
This piece is quite a challenge. At the bottom, I show the chisel I made to hollow out the vase. The tool is of stainless steel, and accepts the ring cutters from the "Termite". Since the largest cutter currently is only 7/16", I am having a blacksmith friend tool a couple of larger rings for me, 1/2" and 5/8". This tool is 56" long and has a solid 3/4" stainless bar fastened into a 1 1/16" chrome steel tube, which goes into a figured maple handle. I know I could have gone with a Stewart system or something like that, but that almost feels like cheating to me. I prefer the challenge of developing the skills required to manhandle this tool and approach the spinning wood directly. As they say, "to each his own". However, by the time I'm 22" into the vase, it's sort of "hang on for dear life" time. I still need something heavier, and the next tool you see on this site will be bigger and heftier yet. This one is good to 18" but it's dicey after that.

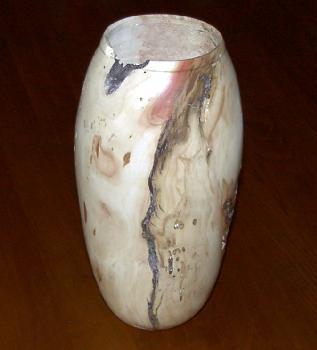
This piece is now wrapped for drying. It is 21" tall and hollowed out to a 20" depth. The finished piece will be posted, probably late this year.

PS. The piece is now finished - in June 2002. Look in my 2002 work and you will find it toward the bottom.

Walnut Log
Walnut Log
Starting the Outside bewteen centers
Mounted in the Steady Rest
Starting to Hollow
Looking down the Pipe - Serious Business
Chisel

Below, left, is a maple vase, another one from Dave Robertson's wood. It's 11½" high and 5" at its widest and is finished with urethane.

Below, right, is a small vase, 9" by 6" from a madronne burl. This wood was covered with wax when I got it, including the rough bark part. I tried everything to get the wax off and got all kinds of advice from people on the woodturning newsgroup. Finally, I just boiled the blank and presto! the wax was gone. This vase has Danish Oil and Deft lacquer on it.

Maple Vase
Madronne Burl Vase

Manitoba Maple Form
Manitoba Maple Form

This piece, more than any other I've done with Manitoba Maple, shows the brilliant colors one can find in this wood. The blank for this piece was very soft and had to be treated, as is often the case with the highly colored wood. Actually, the Manitoba Maple is not a maple at all. It is box elder, but up here we call it maple. Don't ask me why, but it's OK with me.

To try to keep the color, I finished this with urethane (it has UV filters in it), and will keep it out of the bright light. This piece is 10" tall and about 7½" in diameter.

Rough Maple Blank

Who would have thought that the ugly hunk of Manitoba Maple to the left could have turned into the vase in the bottom two photos? This rotten old piece of wood was taken from a tree that I think my father planted back in the 1920's, on the old homestead. He and Mom planted a lot of maple trees, and I can't be sure if this is one of them. Since maples don't seem to grow naturally up there, I suspect it was one of theirs.

It's an odd feeling to turn something from a tree that your father and mother planted when they were young and full of hopes and dreams (and before 11 kids). I'm hoping to salvage enough material from the trees up there so I can turn something for each member of my family from trees that their father planted.

This piece is 11" high and 5½" in diameter. It is finished with gloss urethane varnish and hand rubbed and polished for hours.

Manitoba Maple Vase
Manitoba Maple Vase

Madronne Burl Vase
Madronne Burl Vase

The challenge of turning a shape like is that it is never balanced, so your lathe needs to be solid to do it. This is a fairly large piece, almost 13" at the tall part, and the wood was green when it was turned. The piece is finished with Danish Oil, and two top coats of urethane, then wet sanded and, finally, buffed by hand.

I got the wood on E-Bay, and by the time I got it home it cost a small fortune. However, I am very pleased with the beautiful colors and grain of the finished piece.

Cherry Burl Vase
Cherry Burl Vase

Another piece from Garland Miller's woodpile. I absolutely love these cherry burls, but they are HARD to turn. Maybe if I turned them green it would be different, but when they're dry they're like concrete. The longest shaving is ½".

The left photo shows how it is displayed in our house, on a cherry teacart with the crystal wine decanter and glasses. The right photo shows a close-up of this 11" tall vessel.

You might be interested in what I did with my Stronghold chuck to hold very large bowls by the rim so I can turn the base of the bowl.

Eight extensions of square aluminum tubing are bolted into the holes of the Jumbo jaws on the chuck. I then drilled a series of holes and used bolts to secure the round rubber grippers that come with the Jumbo jaws. This increases the capability of the Jumbo jaws to grip the inside rim of a 23" bowl, and it's extremely solid and rigid. Took me only a couple of hours to make it. Another advantage of this solution is that I can use wooden grippers shaped in the contour of a bowl that can't be held by the rubber grippers.

The photo on the left shows the chuck with the extensions on it, and the photo on the right shows it holding a 17" bowl with an outside grip. I'm working on an adjustable rim for safety on this device since the spinning extensions could give you a nasty "whap" if you got your hand in there. However, no worse, I suppose, than getting belted with an irregular shaped natural edge bowl. I use slow rpms with this, and care is always needed when working around a lathe.

Jumbo Jaw Extensions on Stronghold Chuck
Salad Bowl on Jumbo jaw Extensions

Why do so many people spend so much money on complicated bells and whistles and are convinced they are worth what they had to pay for them? I like things to be straightforward and simple, and when I thought about a steady rest for my lathe that's what I tried to design. Anyone can make this with a few tools and for very little money. The wheels came from a garbage can at the local Sport Chek store, and my father-in-law gave me a chunk of really old hard oak from a pallet he had. It was full of nail holes and he thought I could use it, and I could. The 3/4" threaded rod, nuts and washers and 1½" steel I bought for about $25. I paid my neighbor with a beer for welding the rod into the steel base.

The rough turned vase chucked into the lathe in the photos below is 23" long and 8" in diameter. Turning straight into the end grain on tall piece like this makes it essential to have good support. The steady rest, bolted to the bed of the lathe, can't be moved more than 1/8" at the top of the threaded rods. It is rock solid. I can exert as much or as little pressure on the wheels as I want and the wheels are infinitely adjustable.

This works extremely well, and that's what counts. The green paint is thanks to General who supplied me with a can of spray paint the same color as the lathe. The curtain in the background, by the way, is a shower curtain. I use them to contain the chips from the lathe instead of letting them cover everything in the shop. When I'm done, I draw them back.

Large Steady Rest
Large Steady Rest

My lathe usually sits against the wall of the shop, but when I want to turn outboard or use the long chisels over the end of the lathe, I need to move it into the center of the room. For you General owners, you know how big and heavy the lathe is. It's not something you move easily, right?

Wrong - it's not hard at all. This General weighs close to 800 pounds, outfitted as it is in pictures above. Since I'm quite tall and it was too low for my liking, I raised it 3" as shown in the left photo below. From that point, it was simple to figure out a way to move it around. A couple of pieces of plywood and four salvage wheels from Princess Auto salvage yard, and it was done. The wheels and the plywood are 3¼" tall, so all I have to do is use a pry bar and lift the thing ¼" and slide the wheels under. Do the same on the other end, and presto - it's portable. I used steel wheels for two reasons. They were the right size and the steel wheels have very little rolling resistance.

Anyway, if you want to move your lathe, this is an easy way to do it. I haven't gotten around to painting the plywood yet. It has to be green, too.

Lathe Base
Wheels to Move Lathe

The General lathe suffers from a lapse or two in design judgment. One of those is that the handle for the tailstock is on the backside of the lathe. The company has no explanation for that design. I only know it is hard to reach.

Another is the design of the outboard attachment. They claim the outboard side allows for a 28" swing. It does when the top of the bowl faces the lathe, but once you turn it around to hollow the bowl, it suddenly won't clear the banjo. That effectively reduces the maximum diameter to 24". Obviously, there needed to be some modifications, 'cause the bowl I wanted to turn was bigger than that.

My solution is below. It involves two 1½" square steel tube simply bolted into the holes in the headstock and bolted to the steel stand at the bottom. There are holes in the tubes to adjust the outboard attachment up or down. It was an inexpensive fix and is really solid. It works and General should take note.

Outboard Attachment
Outboard Attachment Closeup

The General lathe was not cheap, and I was utterly surprised when I found out that they did not supply a knock-out bar for knocking the spur center out of the headstock. When I demonstrated the lathe I had to use a long drill bit to knock out the center, and it was actually embarrassing to demo this big expensive lathe and have to use the drill.

"What the heck,"I thought, "I'll just make my own."

The result is shown below. I'll bet General wouldn't use curly maple for the handle and screw on a solid brass tip just to avoid marring the live center. Maybe this will embarrass them enough to provide this tool with their lathes.

Chisel

Just so you won't think I don't know how to turn something that doesn't have bark or cracks in it, I've included a couple of pictures of two salad bowls I just finished. The top one is of maple (with a little birds-eye in it), 14½" by 5½" and the bottom one is of birch, 14¼" by 6". Both are finished with walnut oil, which is safe for food use, and then waxed.

All that's left now is for my nephew Larry, who is a chef, to come and pick up the one he's chosen - the maple one.

Birds-eye Maple Salad Bowl
Birch Salad Bowl
Birch Salad Bowl